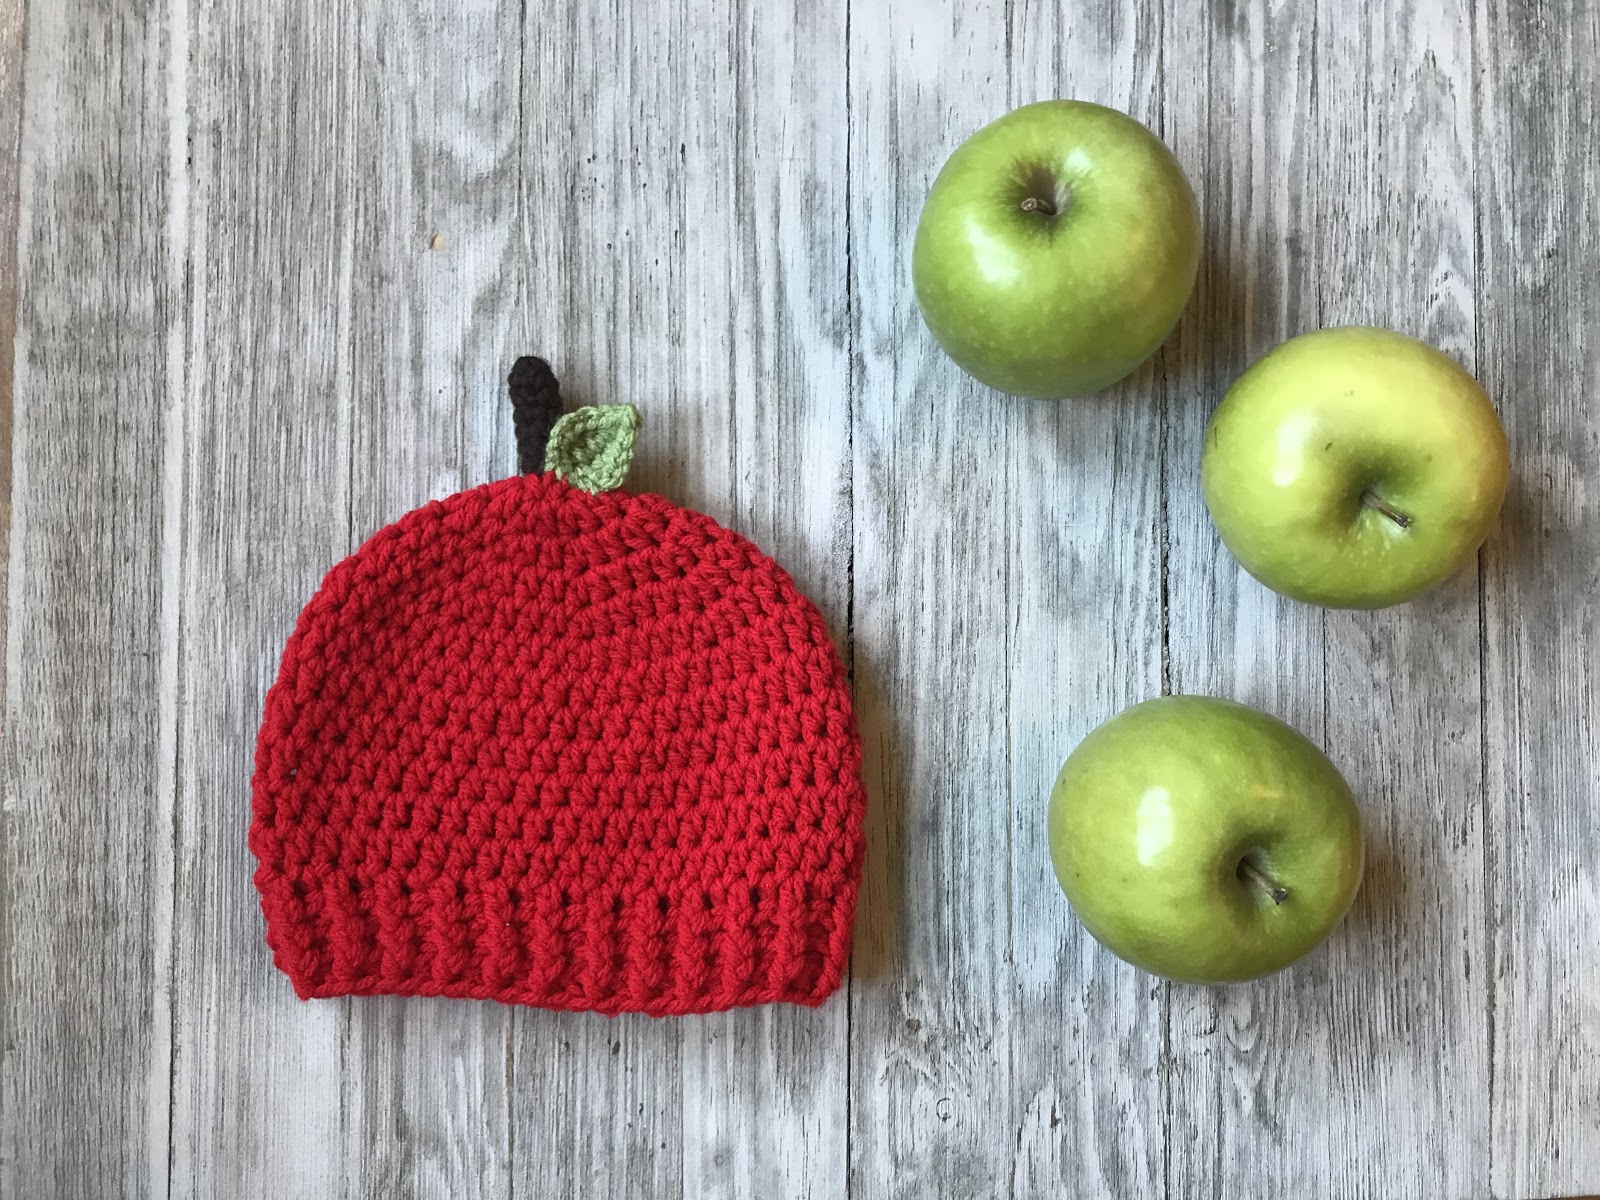
Is it Apple Picking season yet?? Fall is approaching and although the weather is still warm, I’m dreaming of apple cider, bon fires, and pumpkin patches. And this cute little Apple Beanie Crochet Pattern will be just perfect for all of those activities.
Last year I put together a Pumpkin Beanie Pattern in several sizes. This year, I thought, how cute would a little apple beanie pattern be?? You can make it in 5 different sizes, from newborn to 2 years old.
The apple beanie is worked using my Basic Hat Beanie Crochet Pattern with post stitches at the bottom. That comes in 8 sizes, but I eliminated the bigger sizes for this pattern. If you are interested in making in bigger sizes, just refer to that pattern.
I like the post stitches brim on hats because it gives them a nice stretch. It also adds some texture without complicating the pattern.
What is needed
Worsted weight yarn is used for this pattern. I used Red Heart With Love. You will need an H 5mm hook for the beanie and a G 4mm hook for the stem and leaf.
The apple beanie is worked first in red, or whatever color you choose. Then make the leaf in green, then the stem in brown. Sew both items on to the top center of the beanie.
If you’re looking for more fall patterns, check out my Pumpkin Beanie and Pumpkin Decor Crochet Patterns.

Apple Beanie Crochet Pattern
Materials Needed
- H 5mm & G 4mm Crochet Hook, or hook that meets gauge
- Medium #4 Weight Yarn in Red, Brown, and Green
- Scissors
- Tapestry Needle
- Stitch Marker
Gauge
- 4” square = 14 HDC x 9 Rows using H hook
Stitches Used/Abbreviations (US Terms)
- SC – Single Crochet
- HDC – Half Double Crochet
- DC – Double Crochet
- Sl St – Slip Stitch
- FPHDC – Front Post Half Double Crochet
- BPHDC – Back Post Half Double Crochet
- Ch – Chain
- St(s) – Stitch(es)
- Join – Sl St to first stitch
Pattern Notes
- Work beanie in a spiral using a stitch marker to mark the last stitch of each round.
- Beginning chain DOES NOT count as a stitch
- Leaf and Stem are made after working the beanie and sewn on to the center top.
NEWBORN SIZE
Measures 12″W x 5″L using H 5mm Hook
Rnd 1: Ch 1, 8 HDC in magic ring (8) do not join continue working in a spiral. Use stitch marker to mark the last stitch
Rnd 2: 2HDC in each st around (16) move stitch marker each rnd
Rnd 3: *HDC in 1 st, 2HDC in next st* repeat around (24)
Rnd 4: *HDC in 2 sts, 2HDC in next st* repeat around (32)
Rnd 5: *HDC in 3 sts, 2HDC in next st* repeat around (40)
Rnd 6 – 11: HDC around. (40) Join on last rnd
Rnd 12 & 13: Ch 1, *FPHDC in first st, BPHDC in next* repeat around, join. (40)
3 MONTHS SIZE
Measures 14″W x 6″L using H 5mm Hook
Rnd 1: Ch 1, 8 HDC in magic ring (8) do not join continue working in a spiral. Use stitch marker to mark the last stitch
Rnd 2: 2HDC in each st around (16) move stitch marker each rnd
Rnd 3: *HDC in 1 st, 2HDC in next st* repeat around (24)
Rnd 4: *HDC in 2 sts, 2HDC in next st* repeat around (32)
Rnd 5: *HDC in 3 sts, 2HDC in next st* repeat around (40)
Rnd 6: *HDC in 9 sts, 2HDC in next st* repeat around (44)
Rnd 7- 13: HDC around. (44) Join on last rnd.
Rnd 14 & 15: Ch 1, *FPHDC in first st, BPHDC in next* repeat around, join. (44)
6 MONTHS SIZE
Measures 15″W x 6.25″L using H 5mm Hook
Rnd 1: Ch 1, 8 HDC in magic ring (8) do not join continue working in a spiral. Use stitch marker to mark the last stitch
Rnd 2: 2HDC in each st around (16) move stitch marker at the end of each rnd
Rnd 3: *HDC in 1 st, 2HDC in next* repeat around (24)
Rnd 4: *HDC in 2 sts, 2HDC in next st* repeat around (32)
Rnd 5: *HDC in 3 sts, 2HDC in next st* repeat around (40)
Rnd 6: *HDC in 4 sts, 2HDC in next* repeat around (48)
Rnd 7 – 14: hdc in each st around (48) Join on last rnd.
Rnd 15 & 16: Ch 1, *FPHDC in first st, BPHDC in next* repeat around, join. (44)
12 MONTHS SIZE
Measures 16″W x 6.75″L using H 5mm Hook
Rnd 1: Ch 1, 8 HDC in magic ring (8) do not join continue working in a spiral, use stitch markers to mark last st.
Rnd 2: 2HDC in each st around (16) move stitch marker at the end of each round
Rnd 3: *HDC in 1 st, 2HDC in next* repeat around (24)
Rnd 4: *HDC in 2 sts, 2HDC in next* repeat around (32)
Rnd 5: *HDC in 3 sts, 2HDC in next st* repeat around (40)
Rnd 6: *HDC in 4 sts, 2HDC in next st* repeat around (48)
Rnd 7: *HDC in 23 sts, 2HDC in next st* repeat again (50)
Rnd 8 – 14: HDC around (50) Join on last rnd.
Rnd 15 – 17: Ch 1, *FPHDC in first st, BPHDC in next* repeat around, join. (44)
2 YEAR OLD SIZE
Measures 17″W x 7″L using H 5mm Hook
Rnd 1: Ch 1, 8 HDC in magic ring (8) do not join continue working in a spiral, use stitch markers to mark last st.
Rnd 2: 2HDC in each st around (16) move stitch marker at the end of each rnd
Rnd 3: *HDC in 1 st, 2HDC in next st* repeat around (24)
Rnd 4: *HDC in 2 sts, 2HDC in next st* repeat around (32)
Rnd 5: *HDC in 3 sts, 2HDC in next st* repeat around (40)
Rnd 6: *HDC in 4 sts, 2HDC in next st* repeat around (48)
Rnd 7: *HDC in 11 sts, 2HDC in next st, [HDC in 5 sts, 2HDC in next st] repeat [ to ] * repeat * to * again (54 sts)
Rnd 8 – 15: HDC around (54) Join on last rnd.
Rnd 16 – 18: Ch 1, *FPHDC in first st, BPHDC in next* repeat around, join. (44)
Leaf
With G 4mm Hook in Green yarn
Ch 7, DC in 4th ch from hook, HDC in next ch, SC in next ch, Sl St in last ch, ch 1, turn and work down the other side of the chain, Sl St in first ch, SC in next ch, HDC in next ch, DC in last ch, ch 3, Sl St to center of ch.
Stem
With G 4mm Hook in Brown yarn
Rnd 1: SC 5 times in magic ring, do not join, continue working in a spiral
Rnd 2 – 6: SC in each st around. (5) Join on last round, finish off.
Sew the Leaf and Stem to the top center of the beanie.
Save for later or share with others using the share buttons at the top and bottom of post. If you have any questions please comment below or you can email me at jessica@crochetitcreations.com.
I love to see photos of your work and read your comments. Follow Crochet It Creations on all of your favorite social media sites! Join my Crochet It Creations Crochet Friends Facebook group to further connect!
You may sell your items made from my patterns. Please do not use my photos as your own to sell your work. A link back to my site is much appreciated when selling your items from my patterns. I hope you enjoy!
This site is supported by advertisers and may contain affiliate links. See copyright & disclosure policy here for more information.


