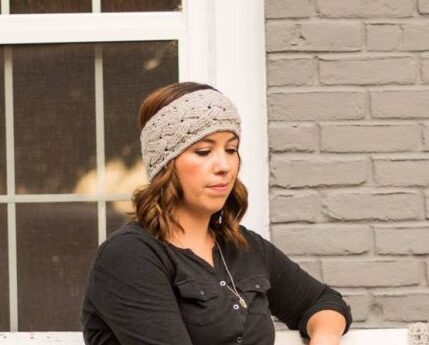
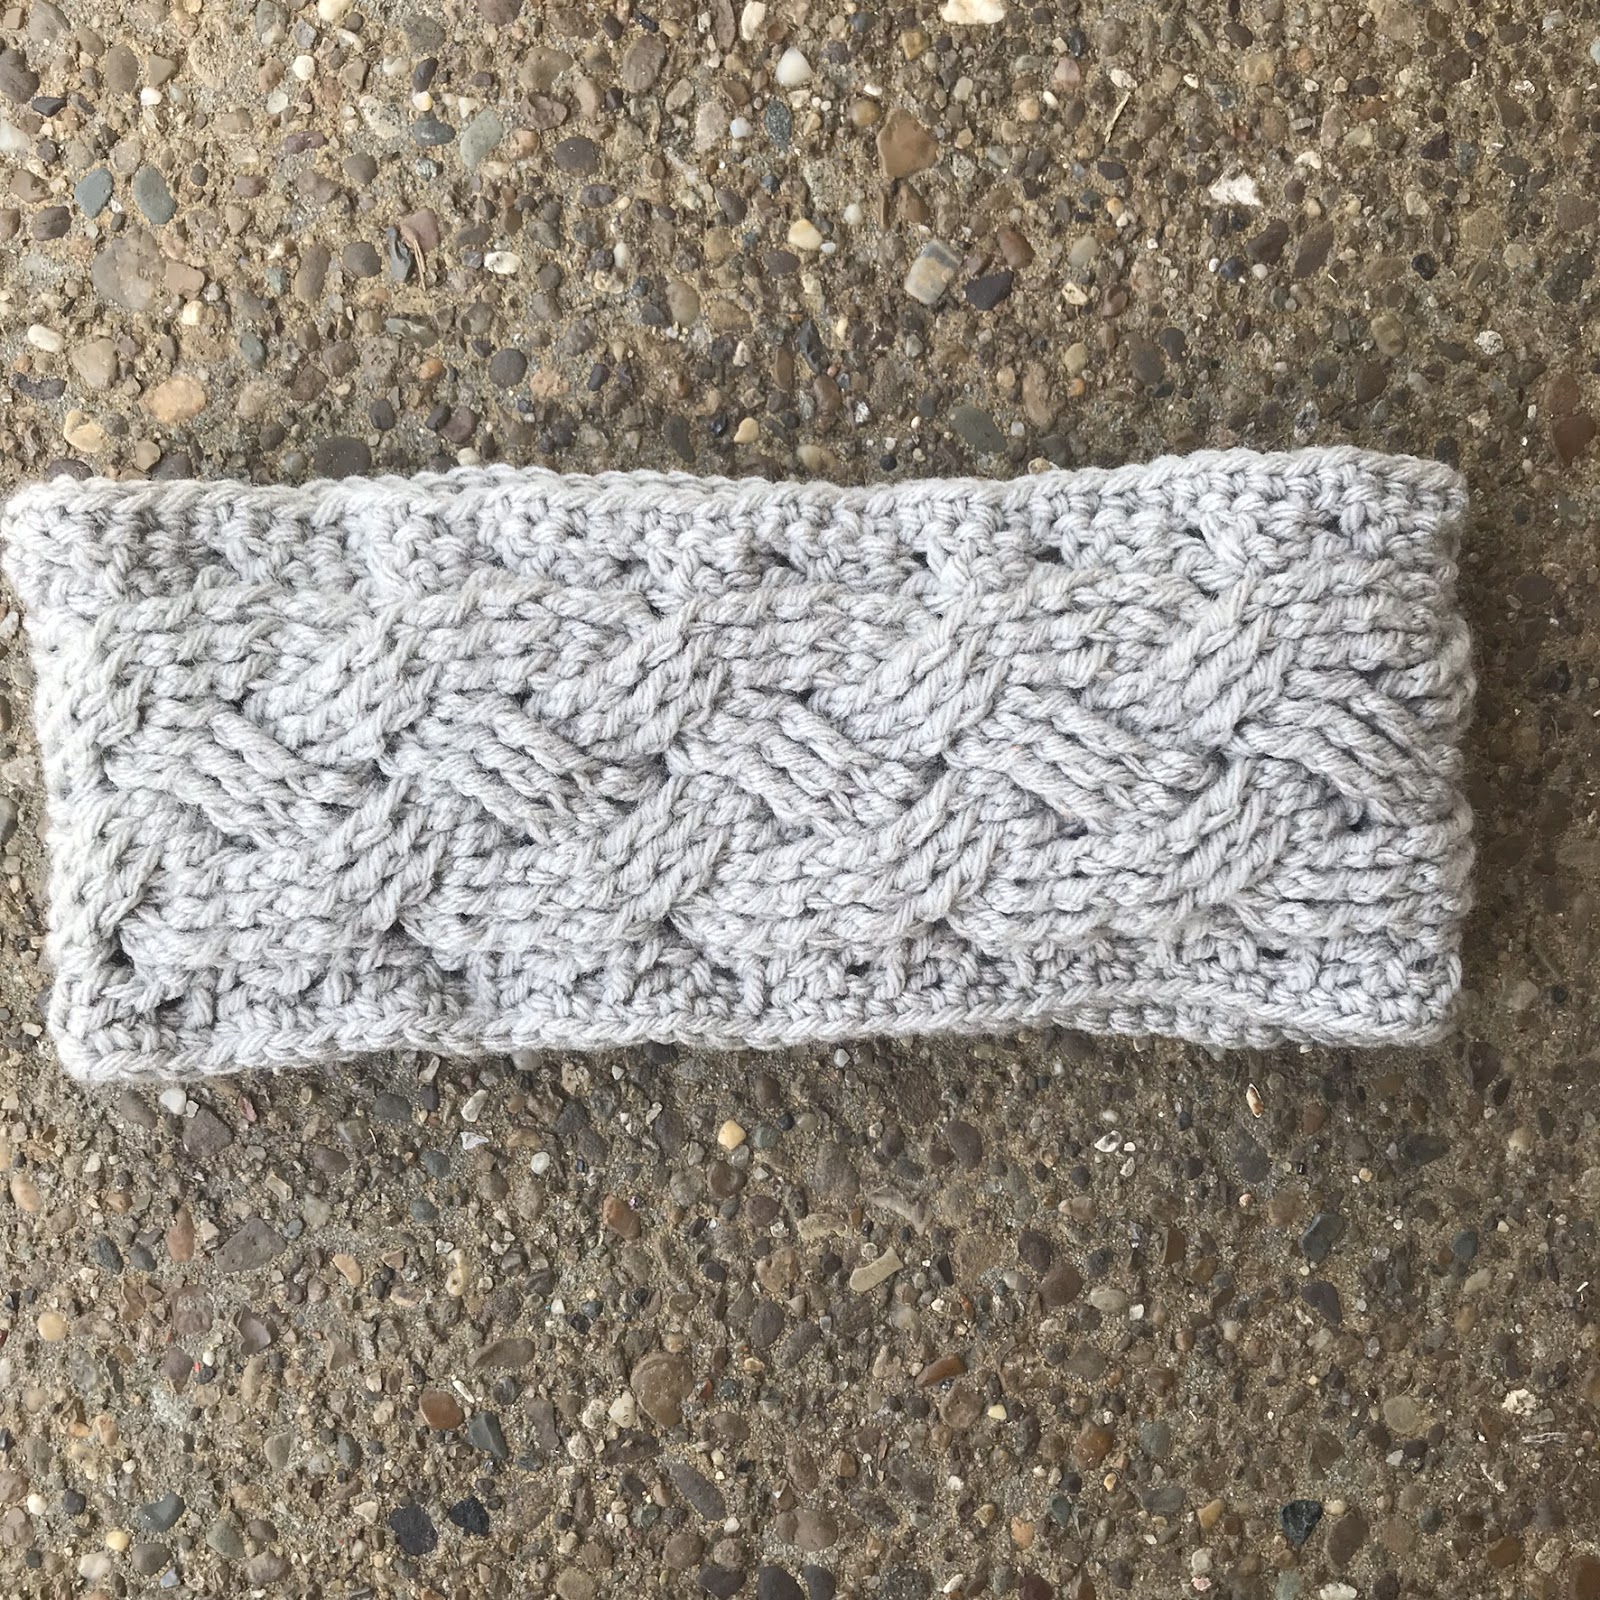
The Braided Cable Ear Warmer is so fun! Last winter I shared my Braided Cable Beanie crochet pattern. Since then, the pattern has been loved by many. I decided, like my Ana Series patterns, that there needed to be more Braided Cable patterns!
Here we have the Ear Warmer pattern. It uses post stitches to make cables that look braided. They also look a little knitted. The pattern comes in adult size, but could be adjusted for smaller sizes with a smaller hook and yarn weight.
Prefer a PDF version to print? Find it HERE on Ravelry
This pattern is for the intermediate crocheter. If you have never worked cables before, they can be a little confusing. I have included photos for guidance. My advice would be to take your time and assure you are working around the correct stitch.

Materials Needed
- I 5.5mm Crochet Hook, or size needed to obtain gauge
- Medium #4 yarn
- Scissors
- Tapestry Needle
- Measuring Tape
Gauge
- 4” square – 13 DC x 7 Rows
Stitches Used/Abbreviations (U.S. Terms)
- Ch – Chain
- Sl St – Slip Stitch
- SC – Single Crochet
- DC – Double Crochet
- FDC – Foundation Double Crochet
- TR – Treble Crochet
- BLO – Back Loop Only
- FP – Front Post
- BP – Back Post
- DC2TOG – Double Crochet 2 Stitches Together
- SC2TOG – Single Crochet 2 Stitches Together
- St(s) – Stitch(es)
- WS – Wrong Side
- RS – Right Side
- Join – Slip Stitch to the top of the first stitch
Pattern Notes
- Pattern is for Adult Size Only, finished measurements are 4” wide by 19” long.
- Beginning ch-3 counts as a DC, unless otherwise stated
- When working cables, you will be skipping stitches going in front and behind stitches worked at times. Pay close attention to which stitches you need to be working around. Photos are included for guidance.
- There will be some “holes” from cable stitches, this is normal. If you live in a cooler climate and think these holes will allow cool air in. Feel free to line it with fabric.
- Sew together at the end by Whip Stitching. See post HERE how to Whip Stitch.
Braided Cable Ear Warmer Crochet Pattern
WS Row 1: FDC 16, turn. (16) Or chain 18 and dc in 4th ch from hook and across.
RS Row 2: Ch 3 (counts as DC here and throughout), DC in next st, FPDC in 3 sts, sk 3 sts, FPTR in 3 sts, WORKING BACK and going BEHIND the posts just made – FPTR in the 3 skipped sts (working right to left), FPDC in 3 sts, DC in 2 sts, turn. (16)
WS Row 3: Ch 3, DC in next st, BPDC in 12 sts, DC in 2 sts, turn. (16)
RS Row 4: Ch 3, DC in next st. [sk 3 sts, FPTR in 3 sts, WORKING BACK and going in FRONT of sts just made – FPTR in 3 skipped sts] x 2, DC in 2 sts, turn. (16)
WS Row 5: Ch 3, DC in next st, BPDC in 12 sts, DC in 2 sts, turn. (16)
Repeat rows 2-5 until row 40 or measures approximately 19” for an adult. (You want it to be a little snug to have room for stretch.) Ending with a Row 4 row, this will keep the braided stitches lined up. On last row finish off. Sew first row and last together by WHIP STITCH.
Border
Join to side of Ear Warmer with a slip stitch. SC in the ends of rows evenly around. Join to first st and finish off. Join to the other side of the Ear Warmer with a slip stitch. SC in the ends of the rows evenly around. Join to first st and finish off. Weave in all ends.
Photo 1: Row 2 – Right Side, 3 skipped stitches
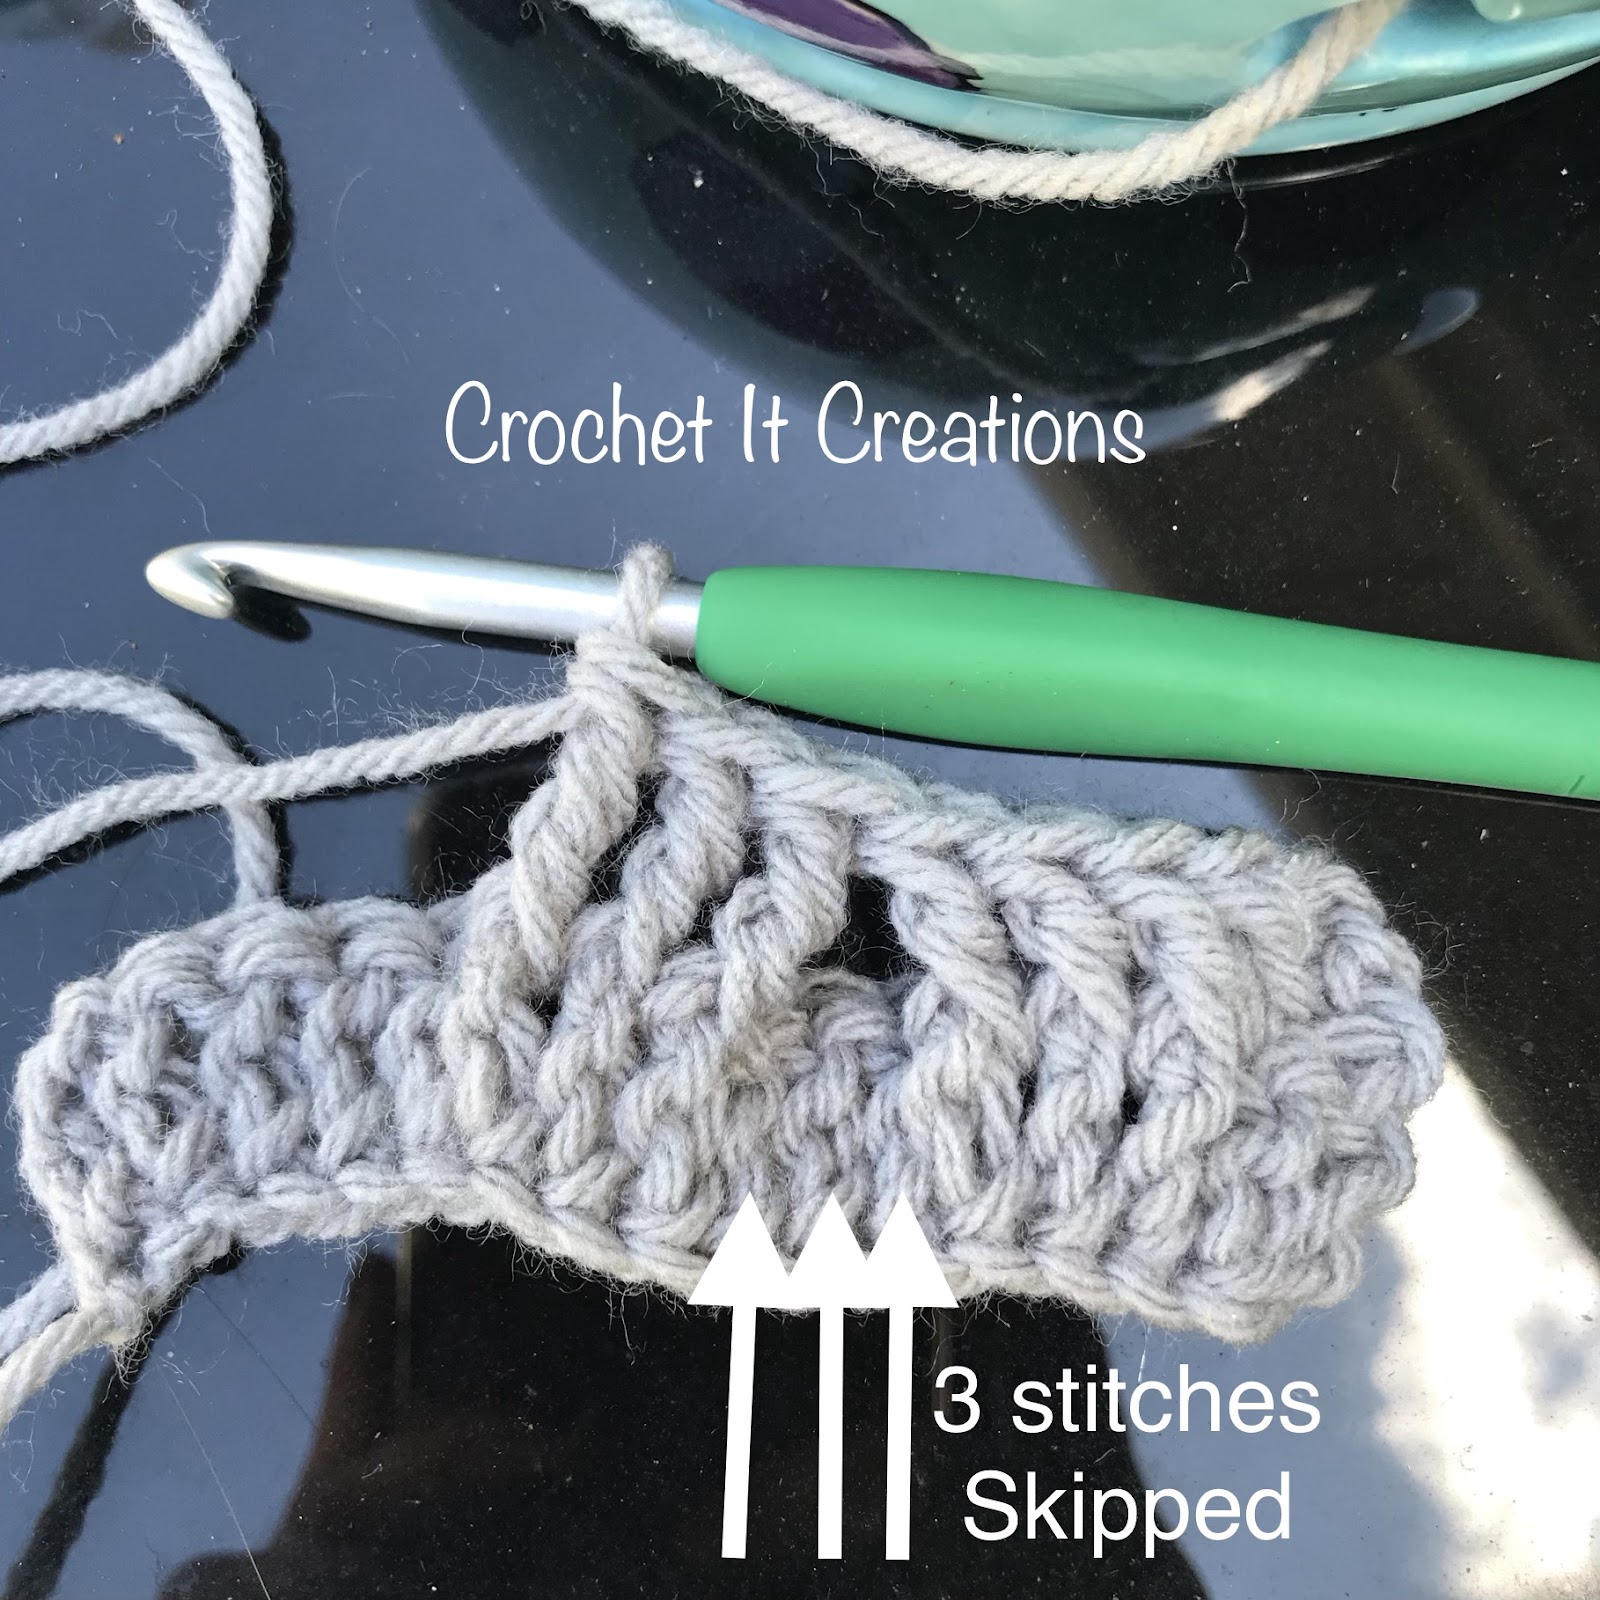
Photo 2: Row 2, FPTR in 3 skipped sts
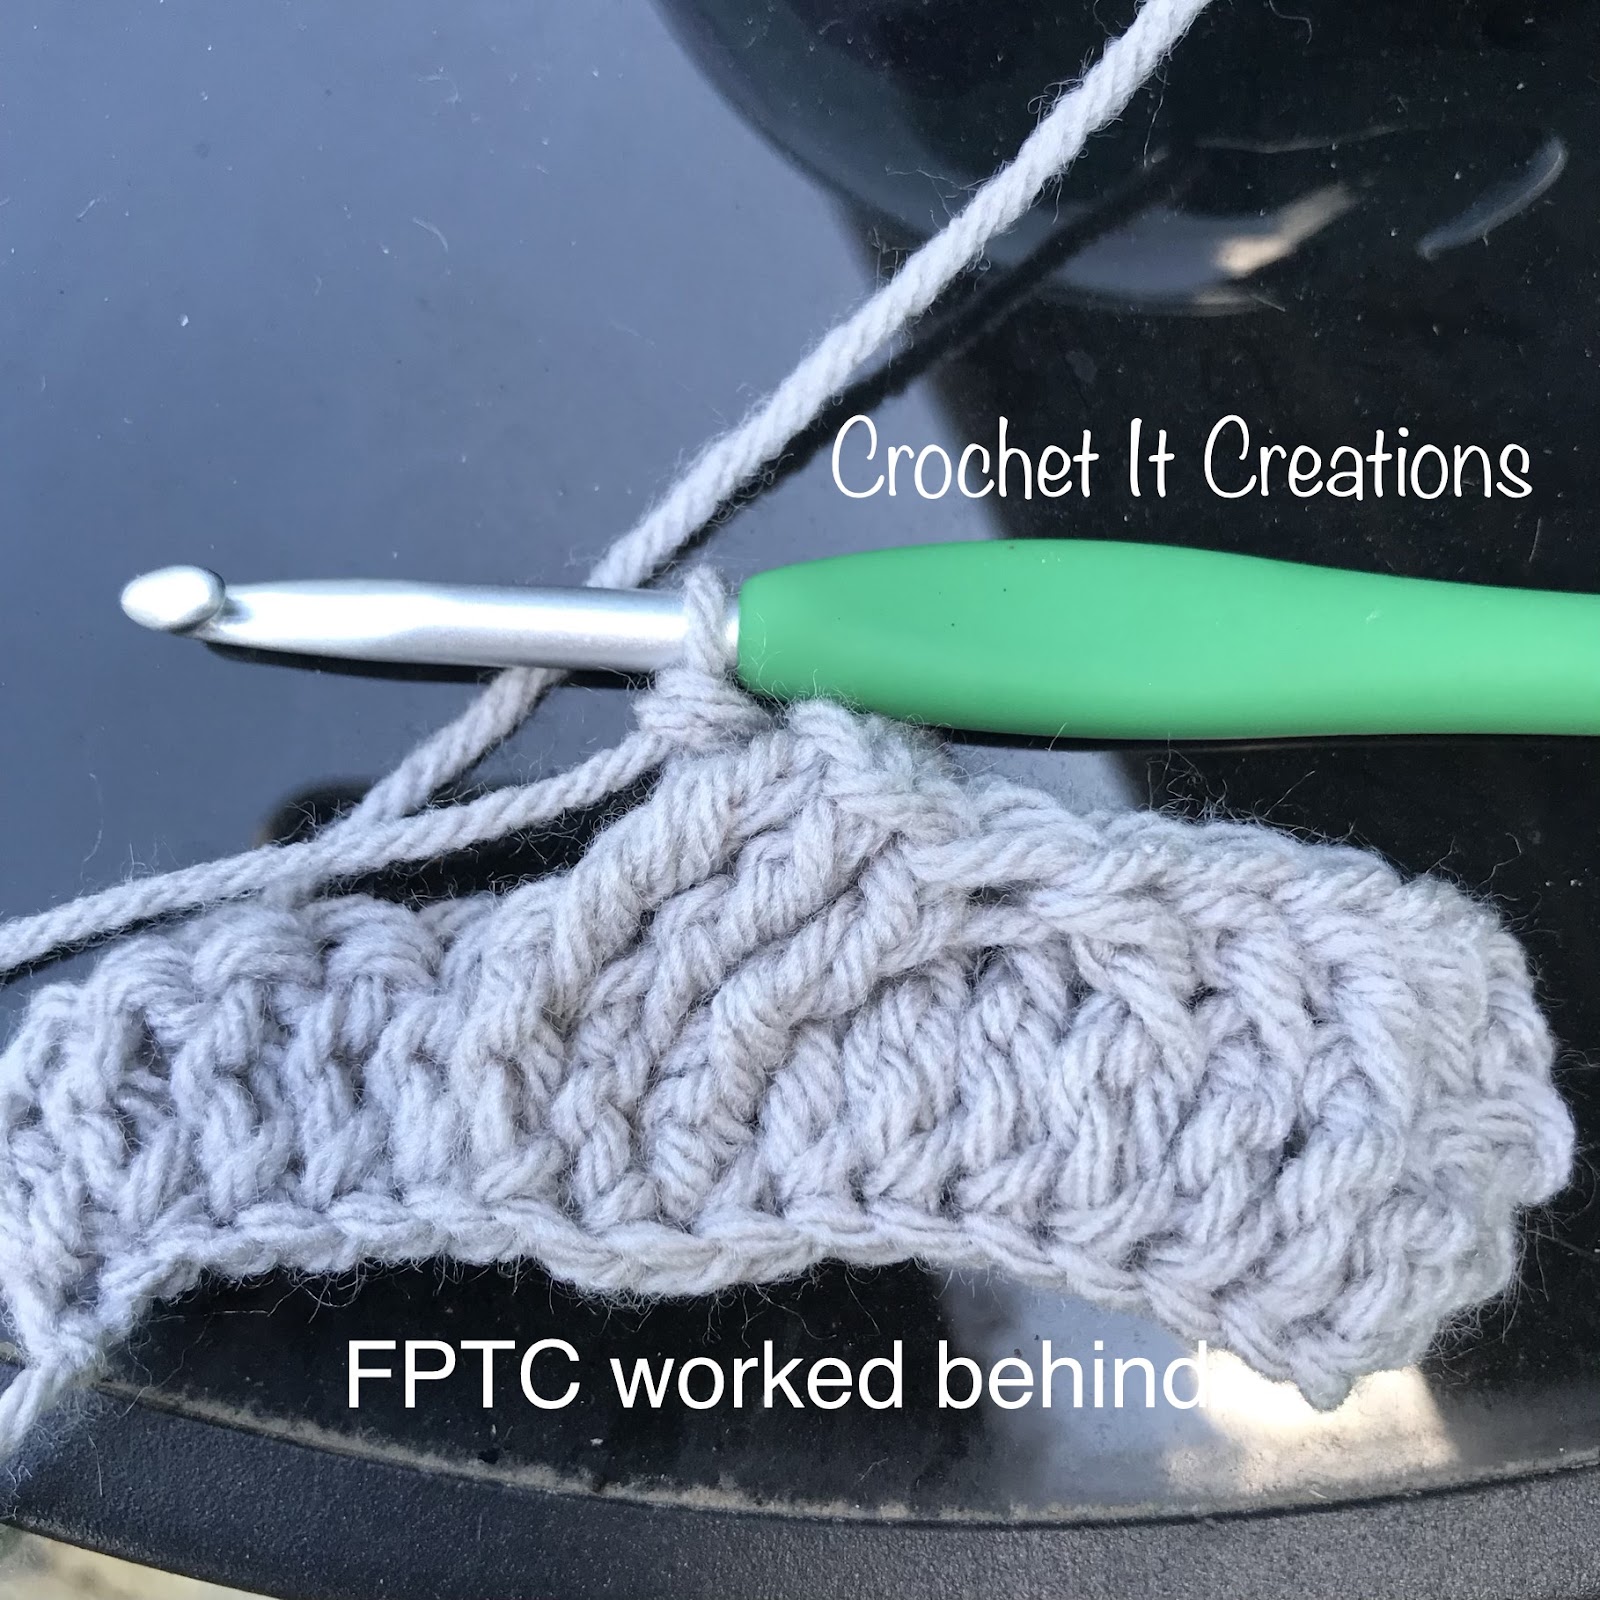
Photo 3: Row 2 completed
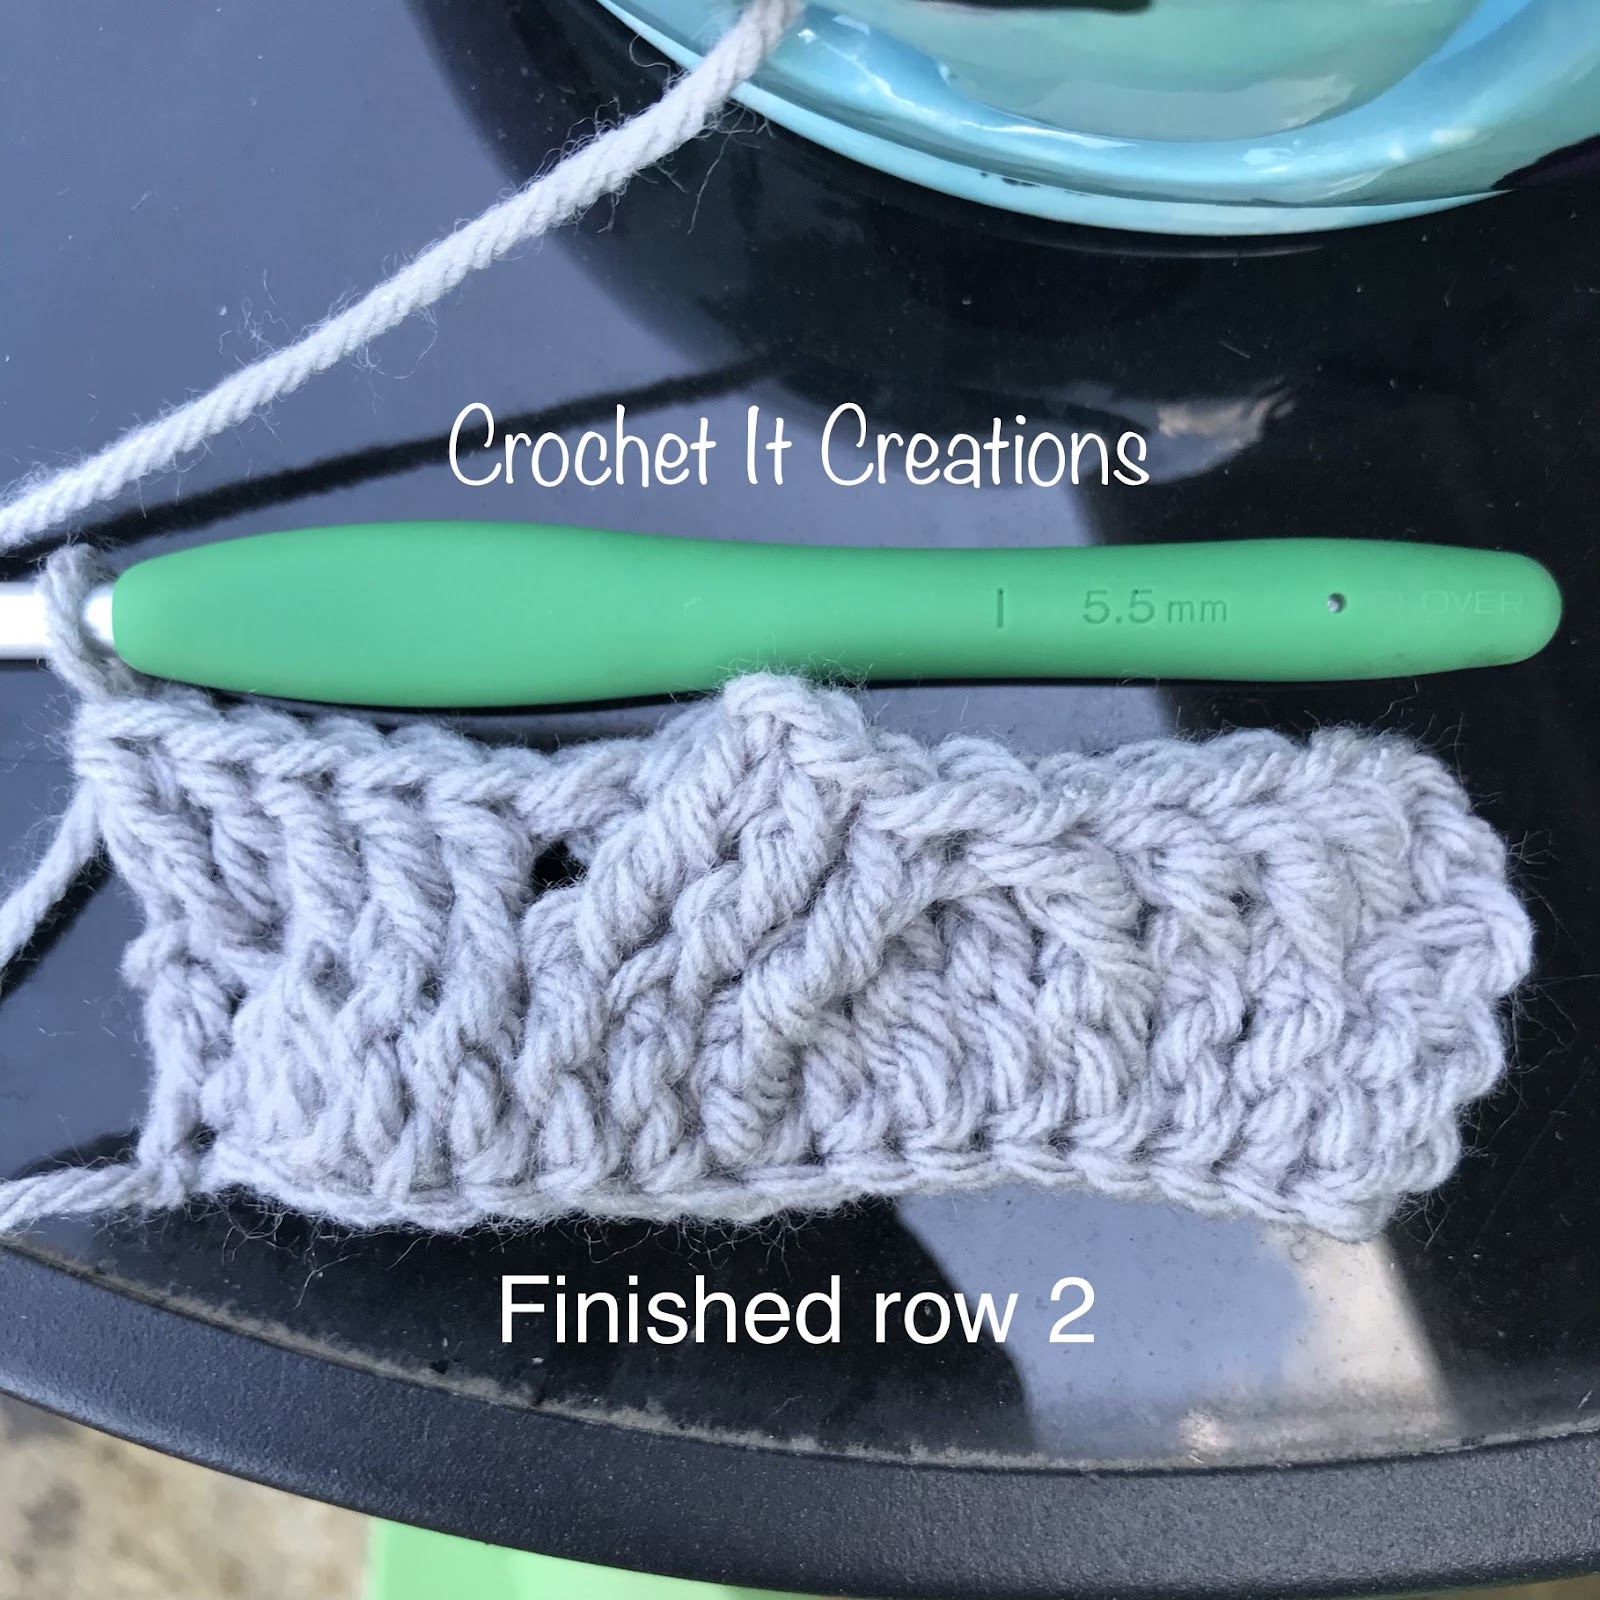
Photo 4: Row 3 – Wrong Side completed
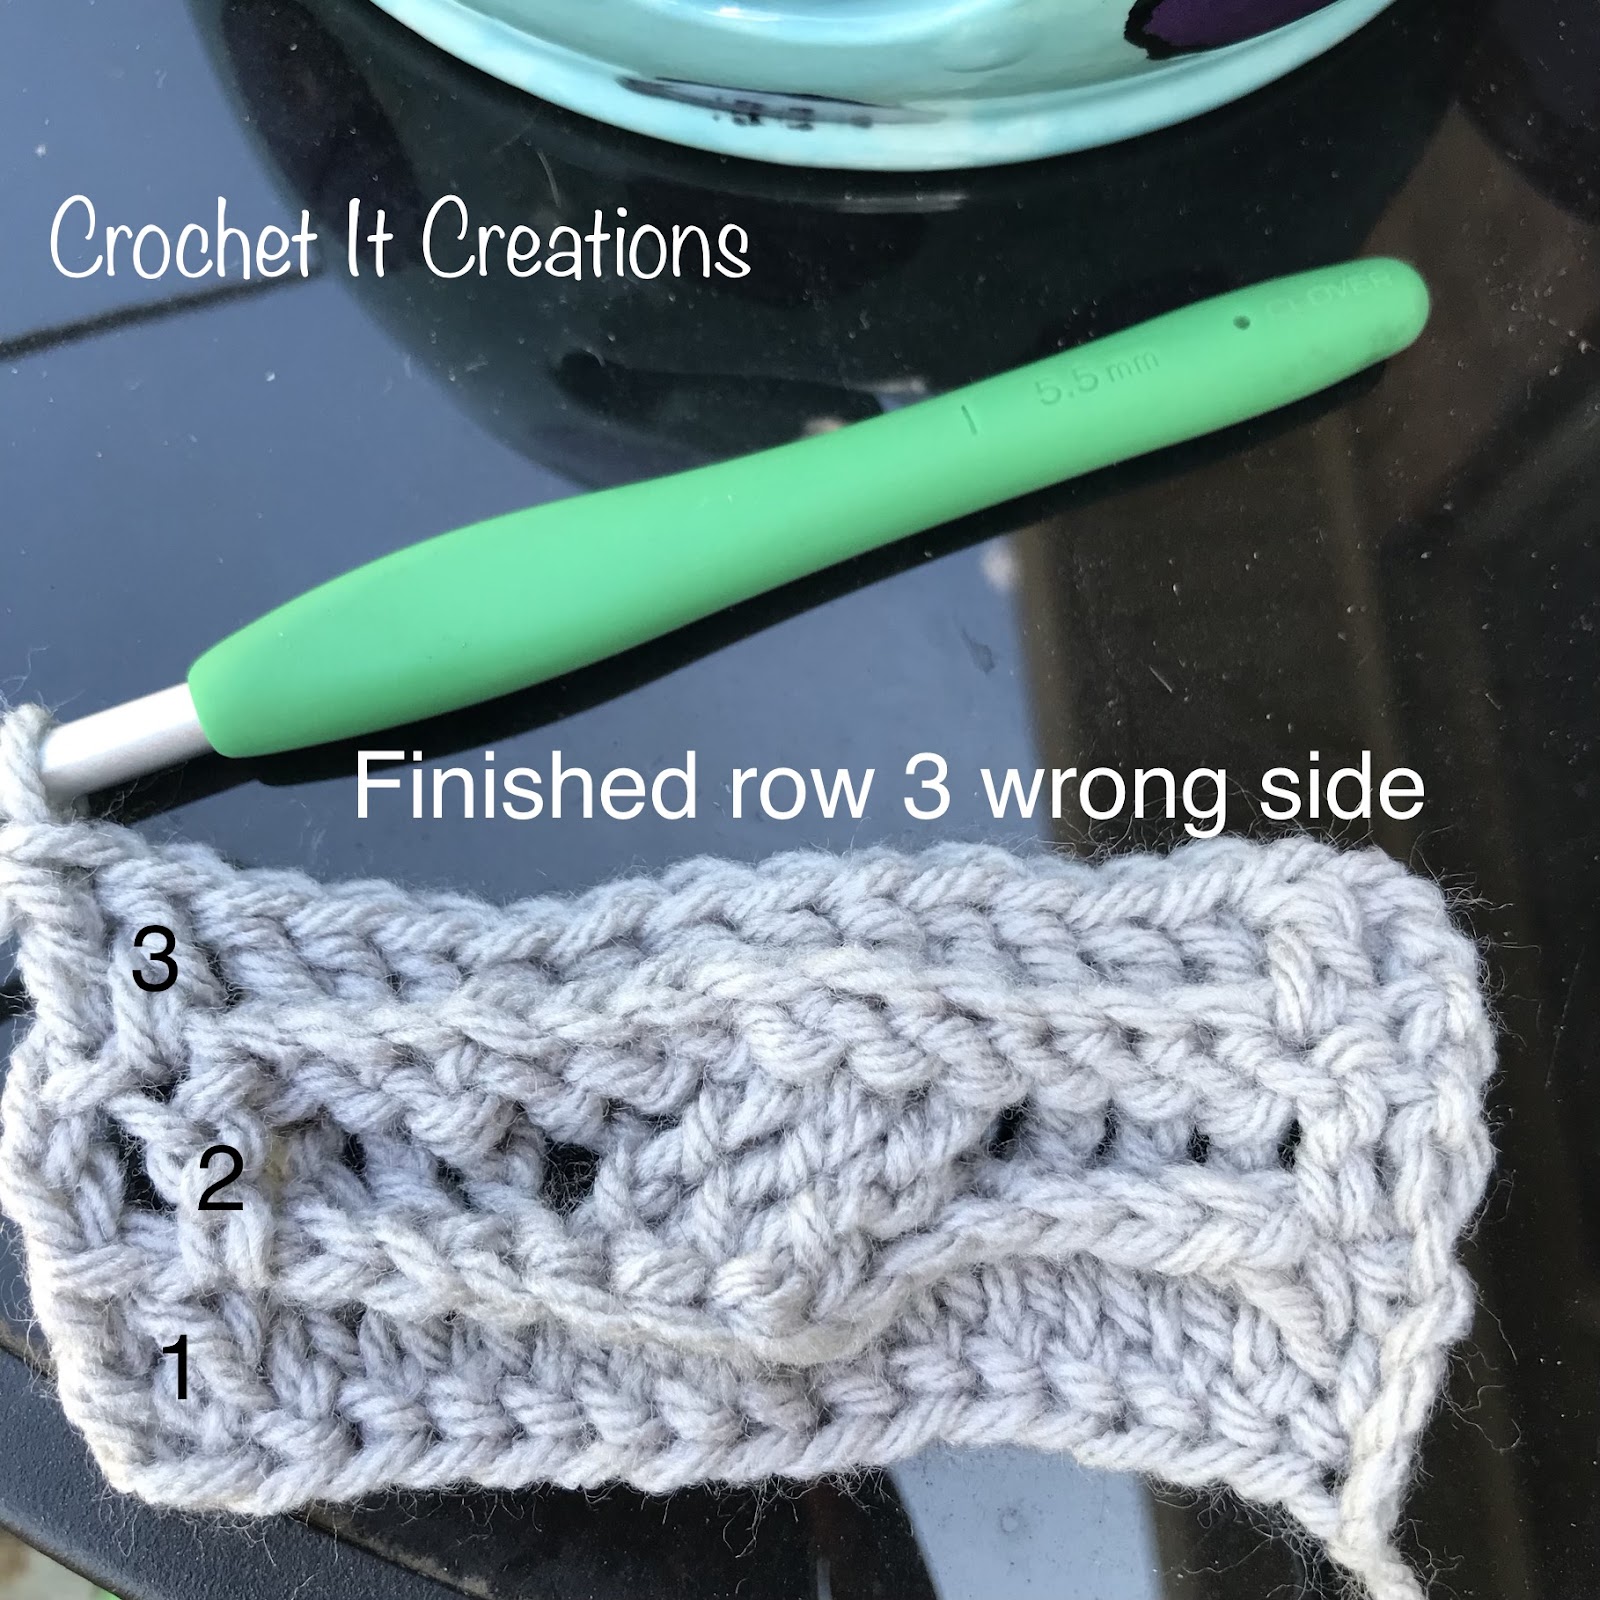
Photo 5: Row 4 – sk 3 sts, FPTR in 3 sts
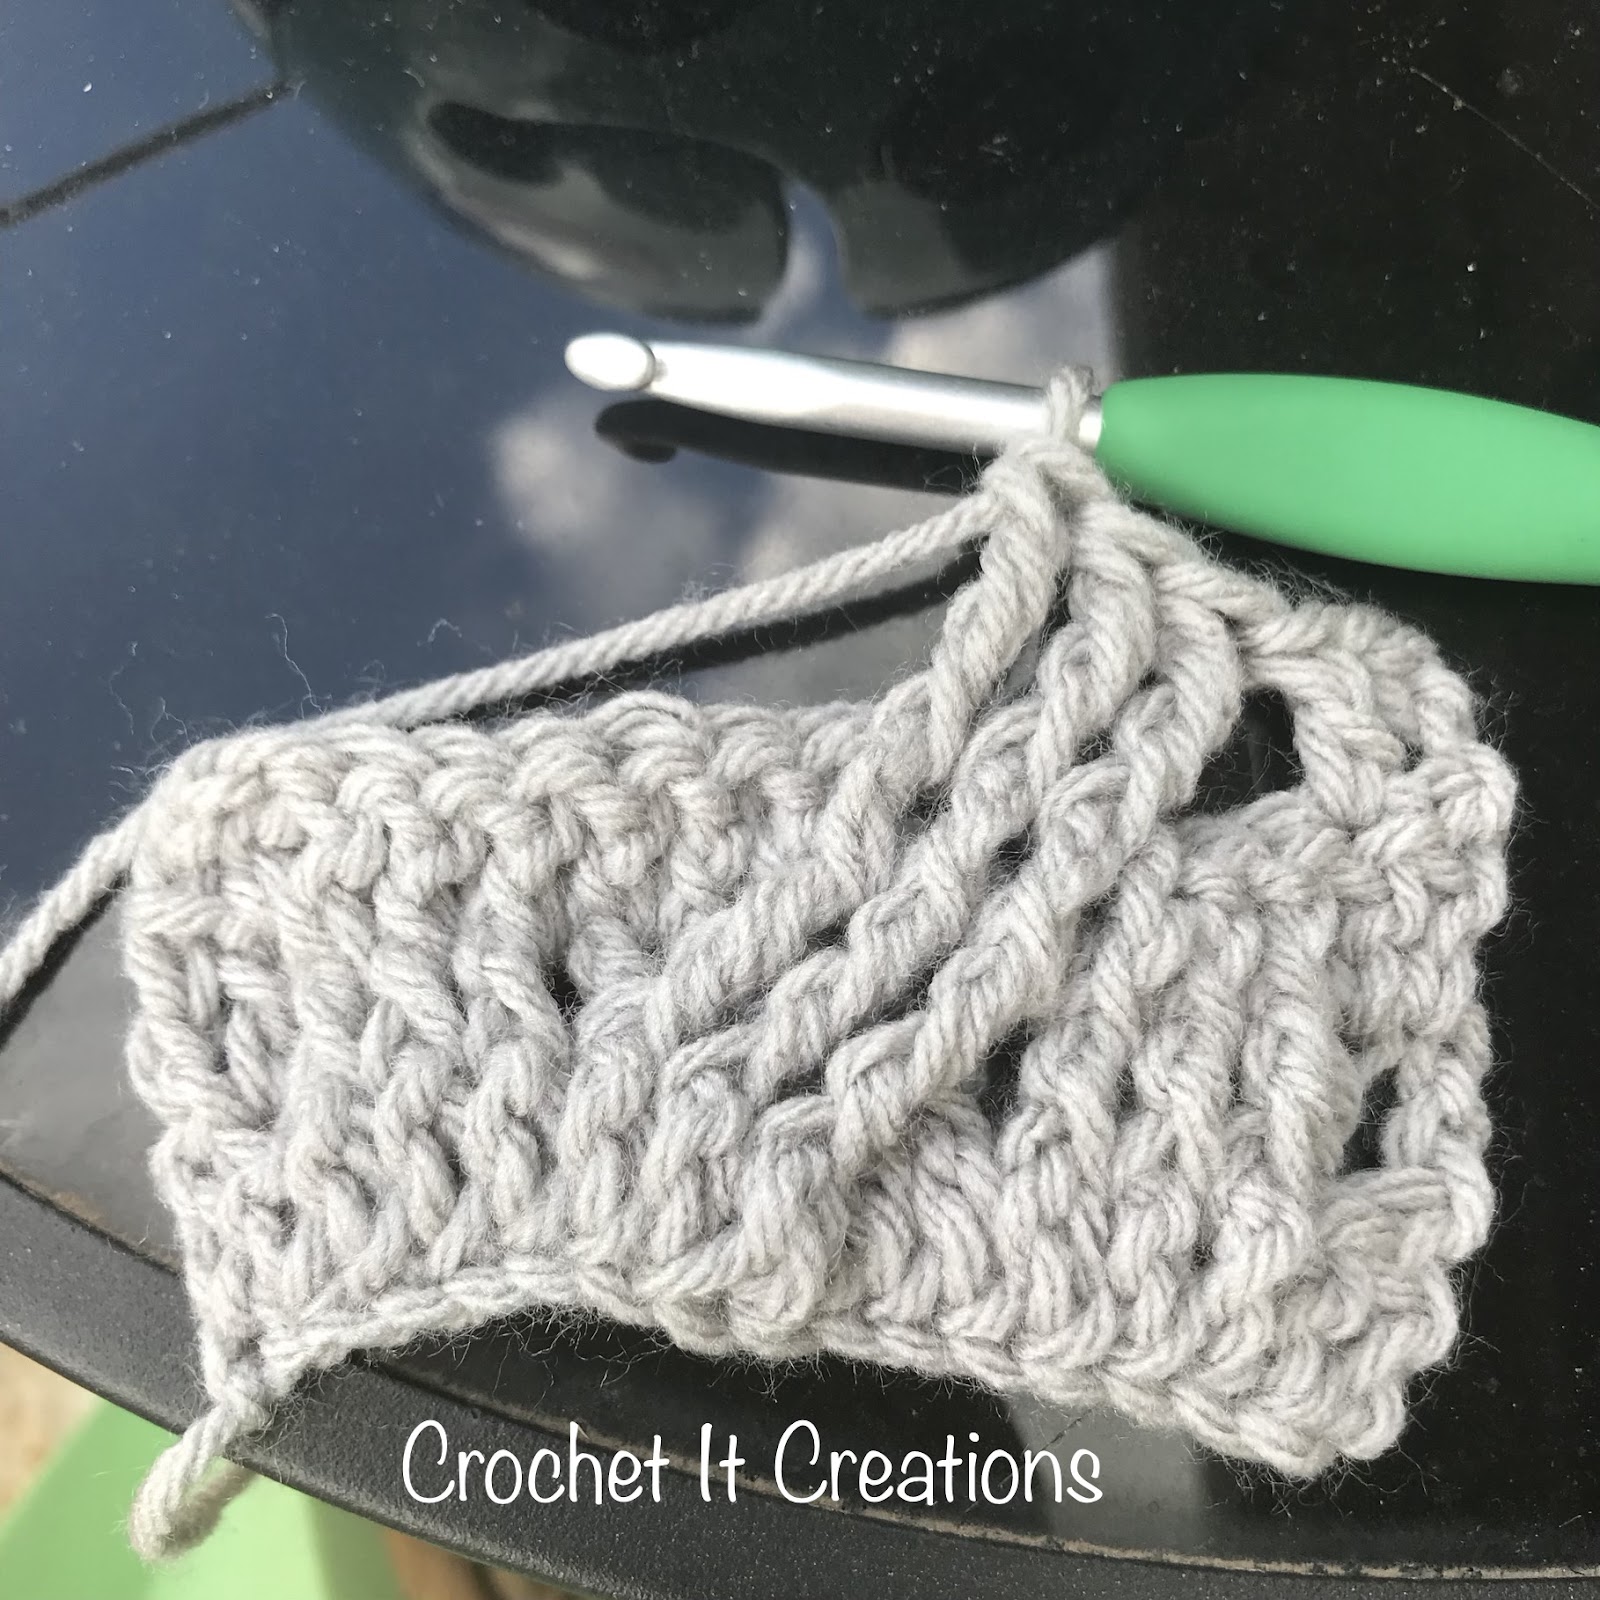
Photo 6: Row 4 – FPTR in 3 skipped sts
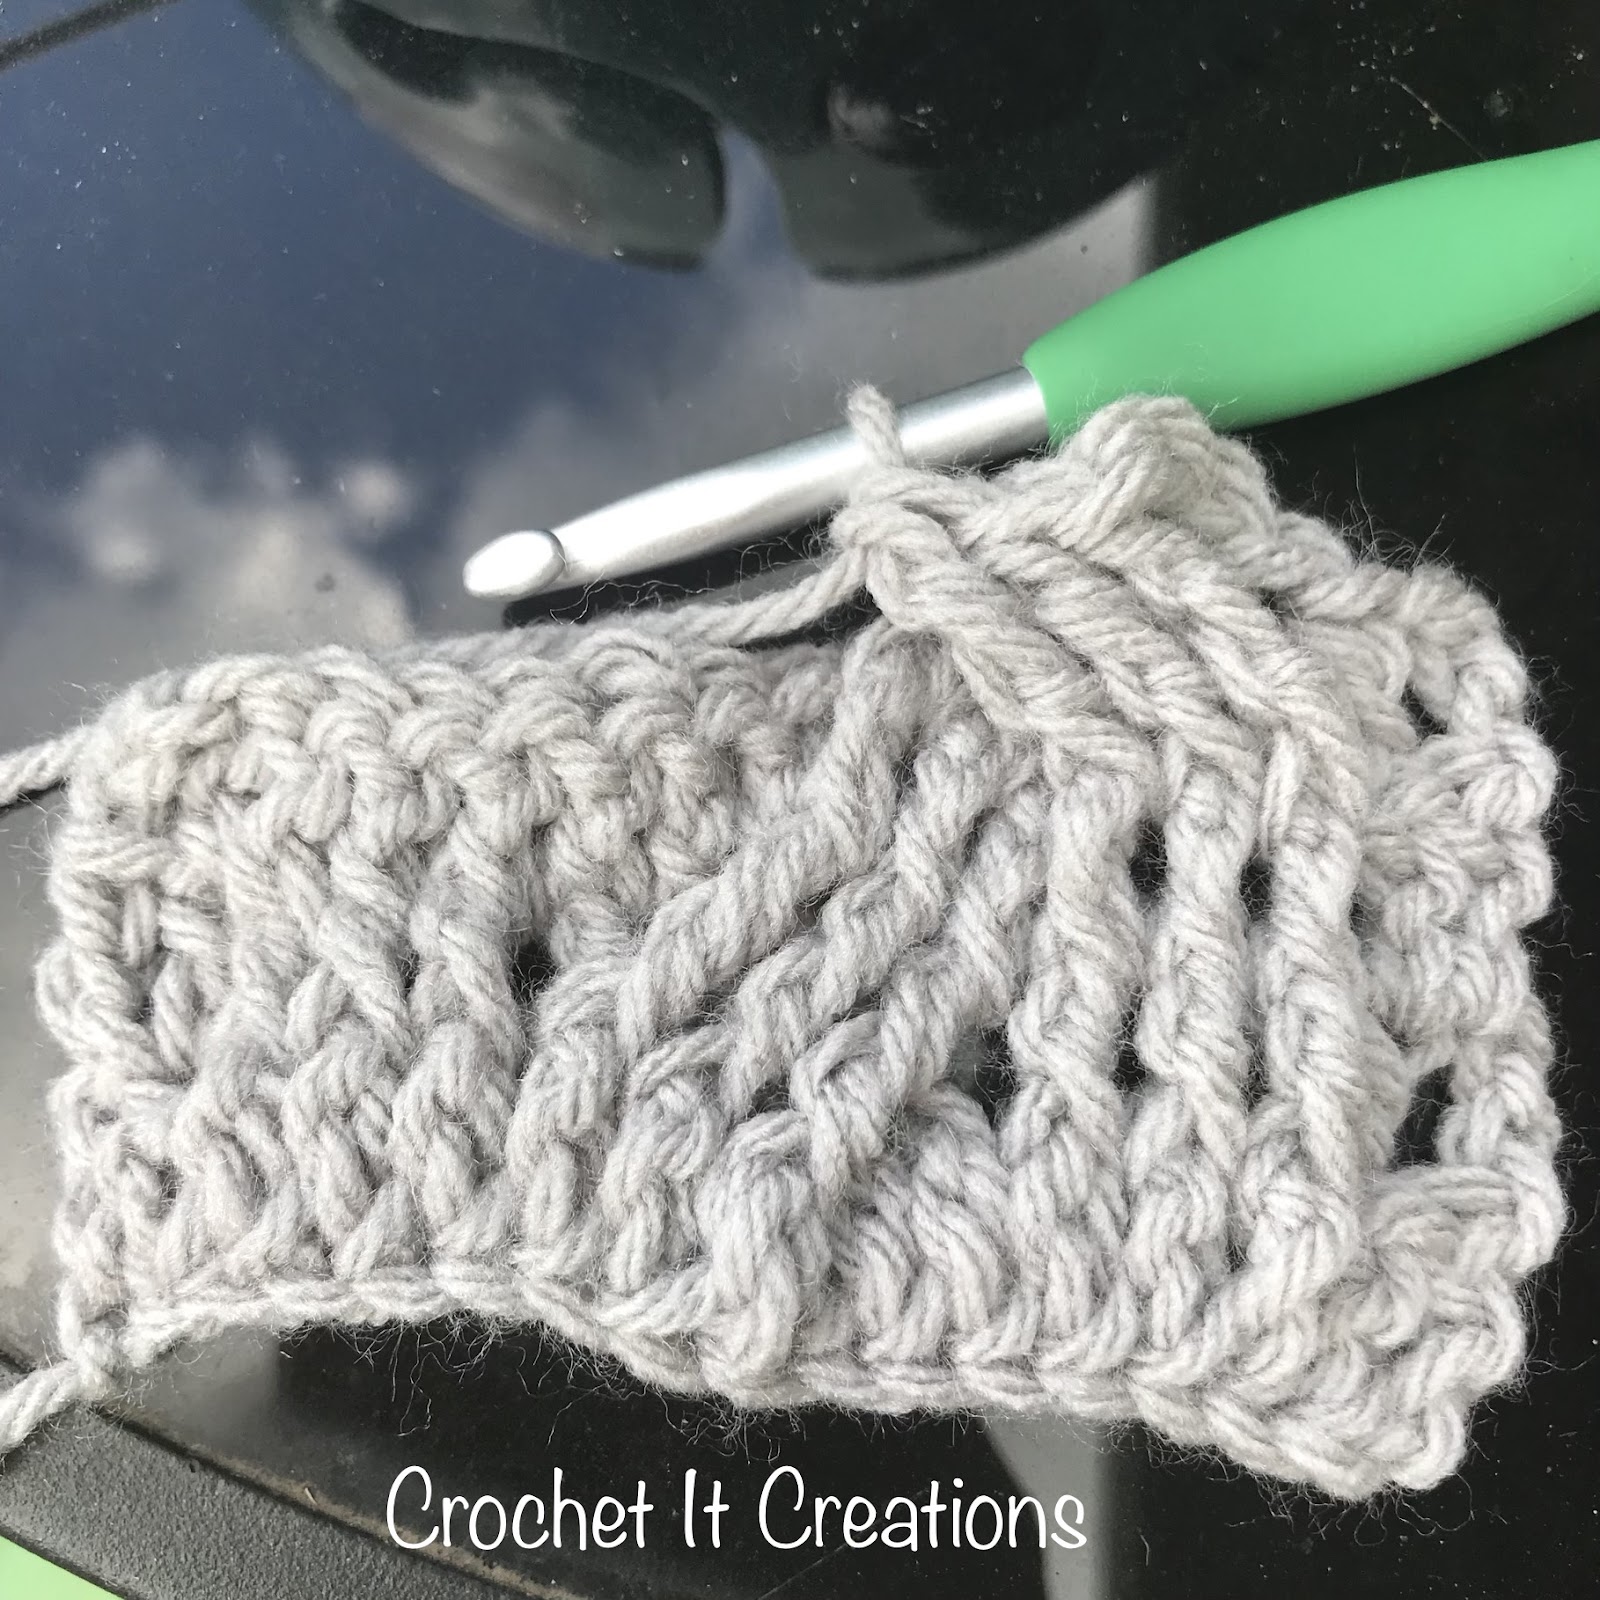
Photo 7: Row 4 completed
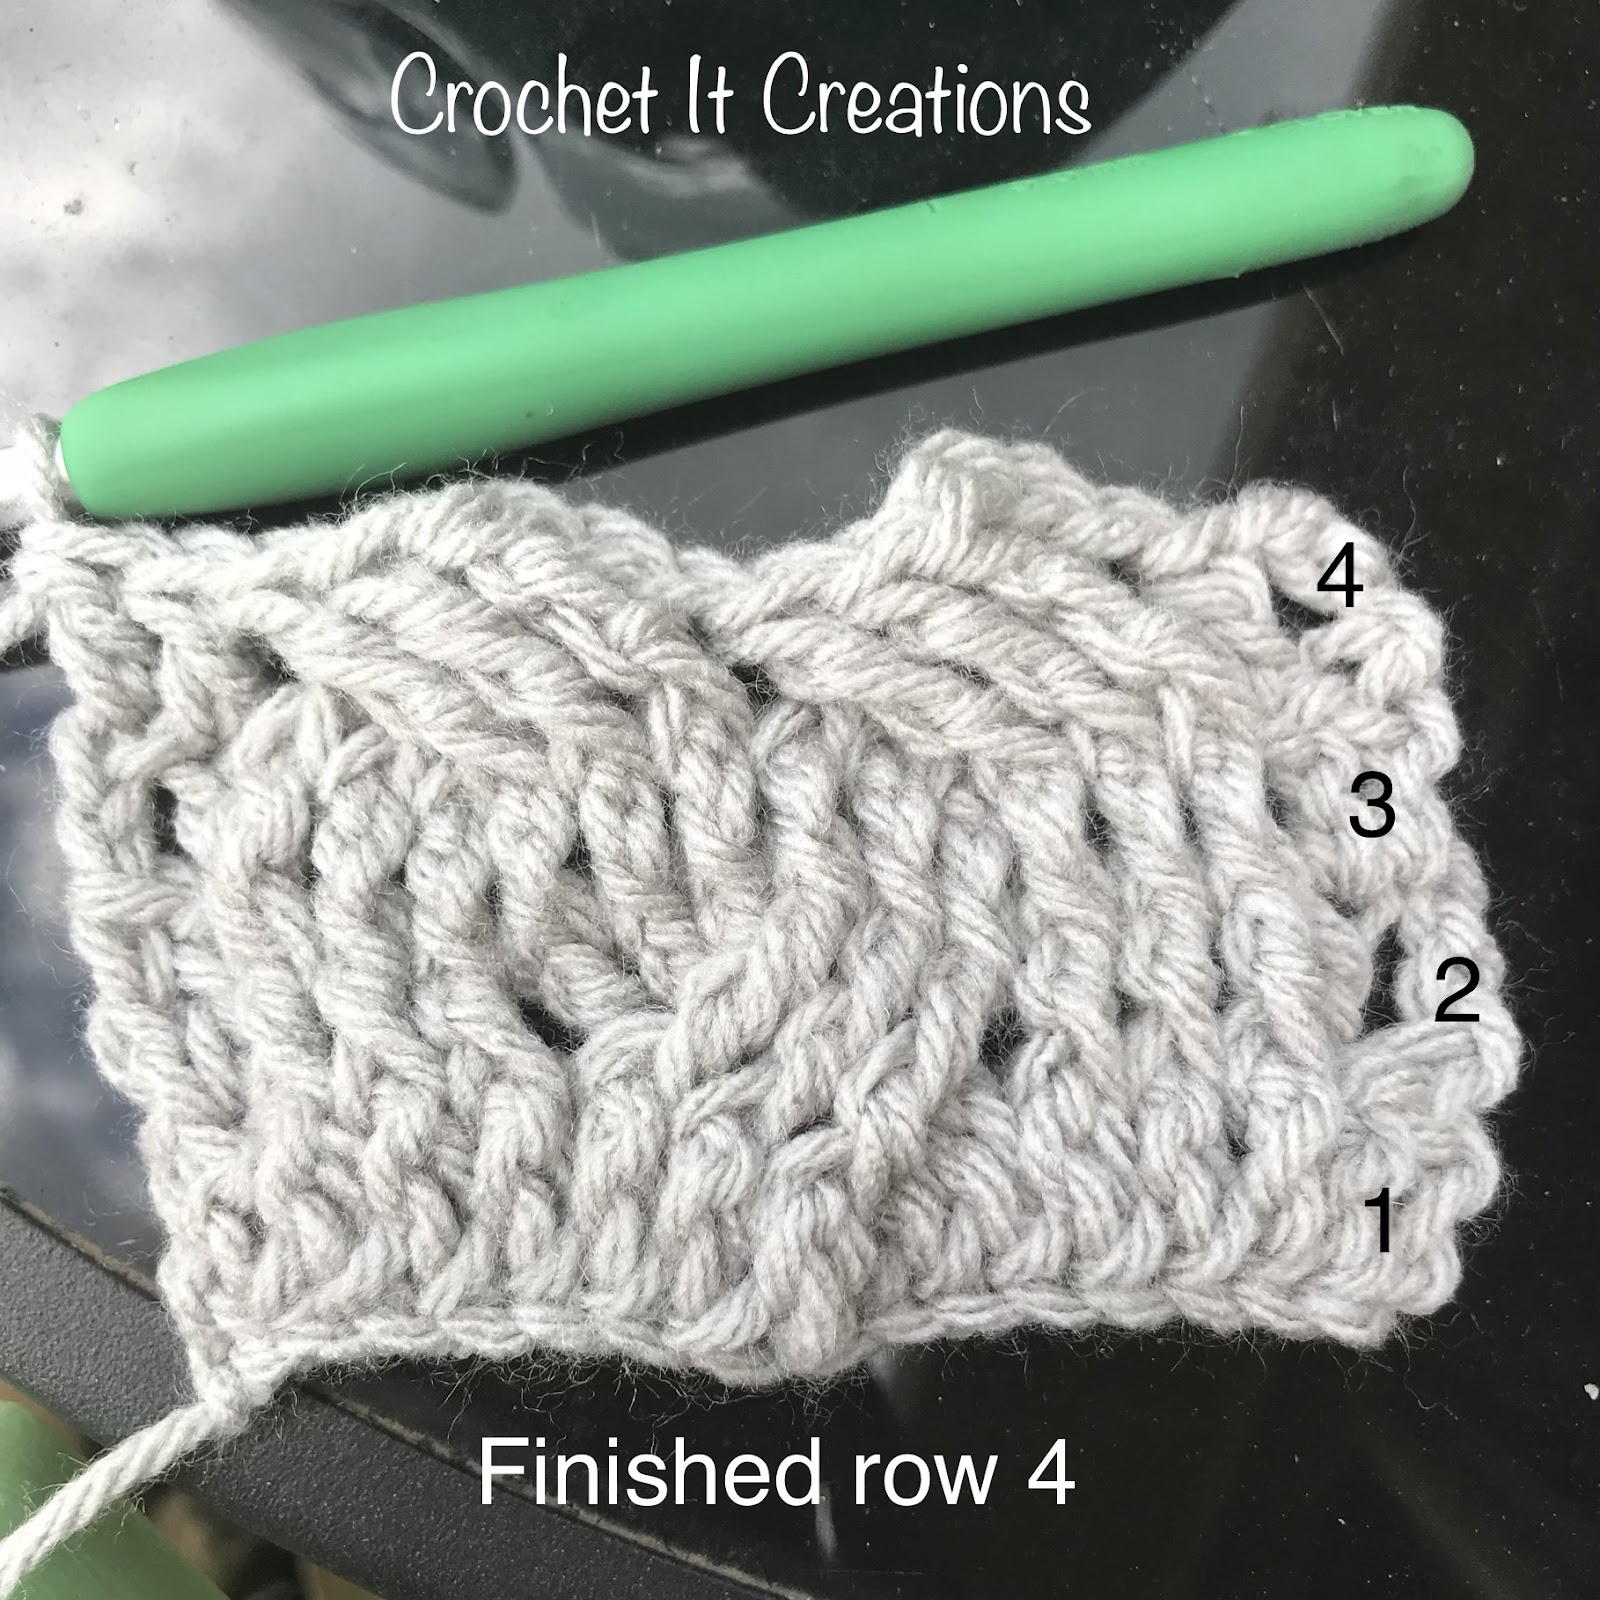
Photo 8: Row 5 Completed – Wrong Side
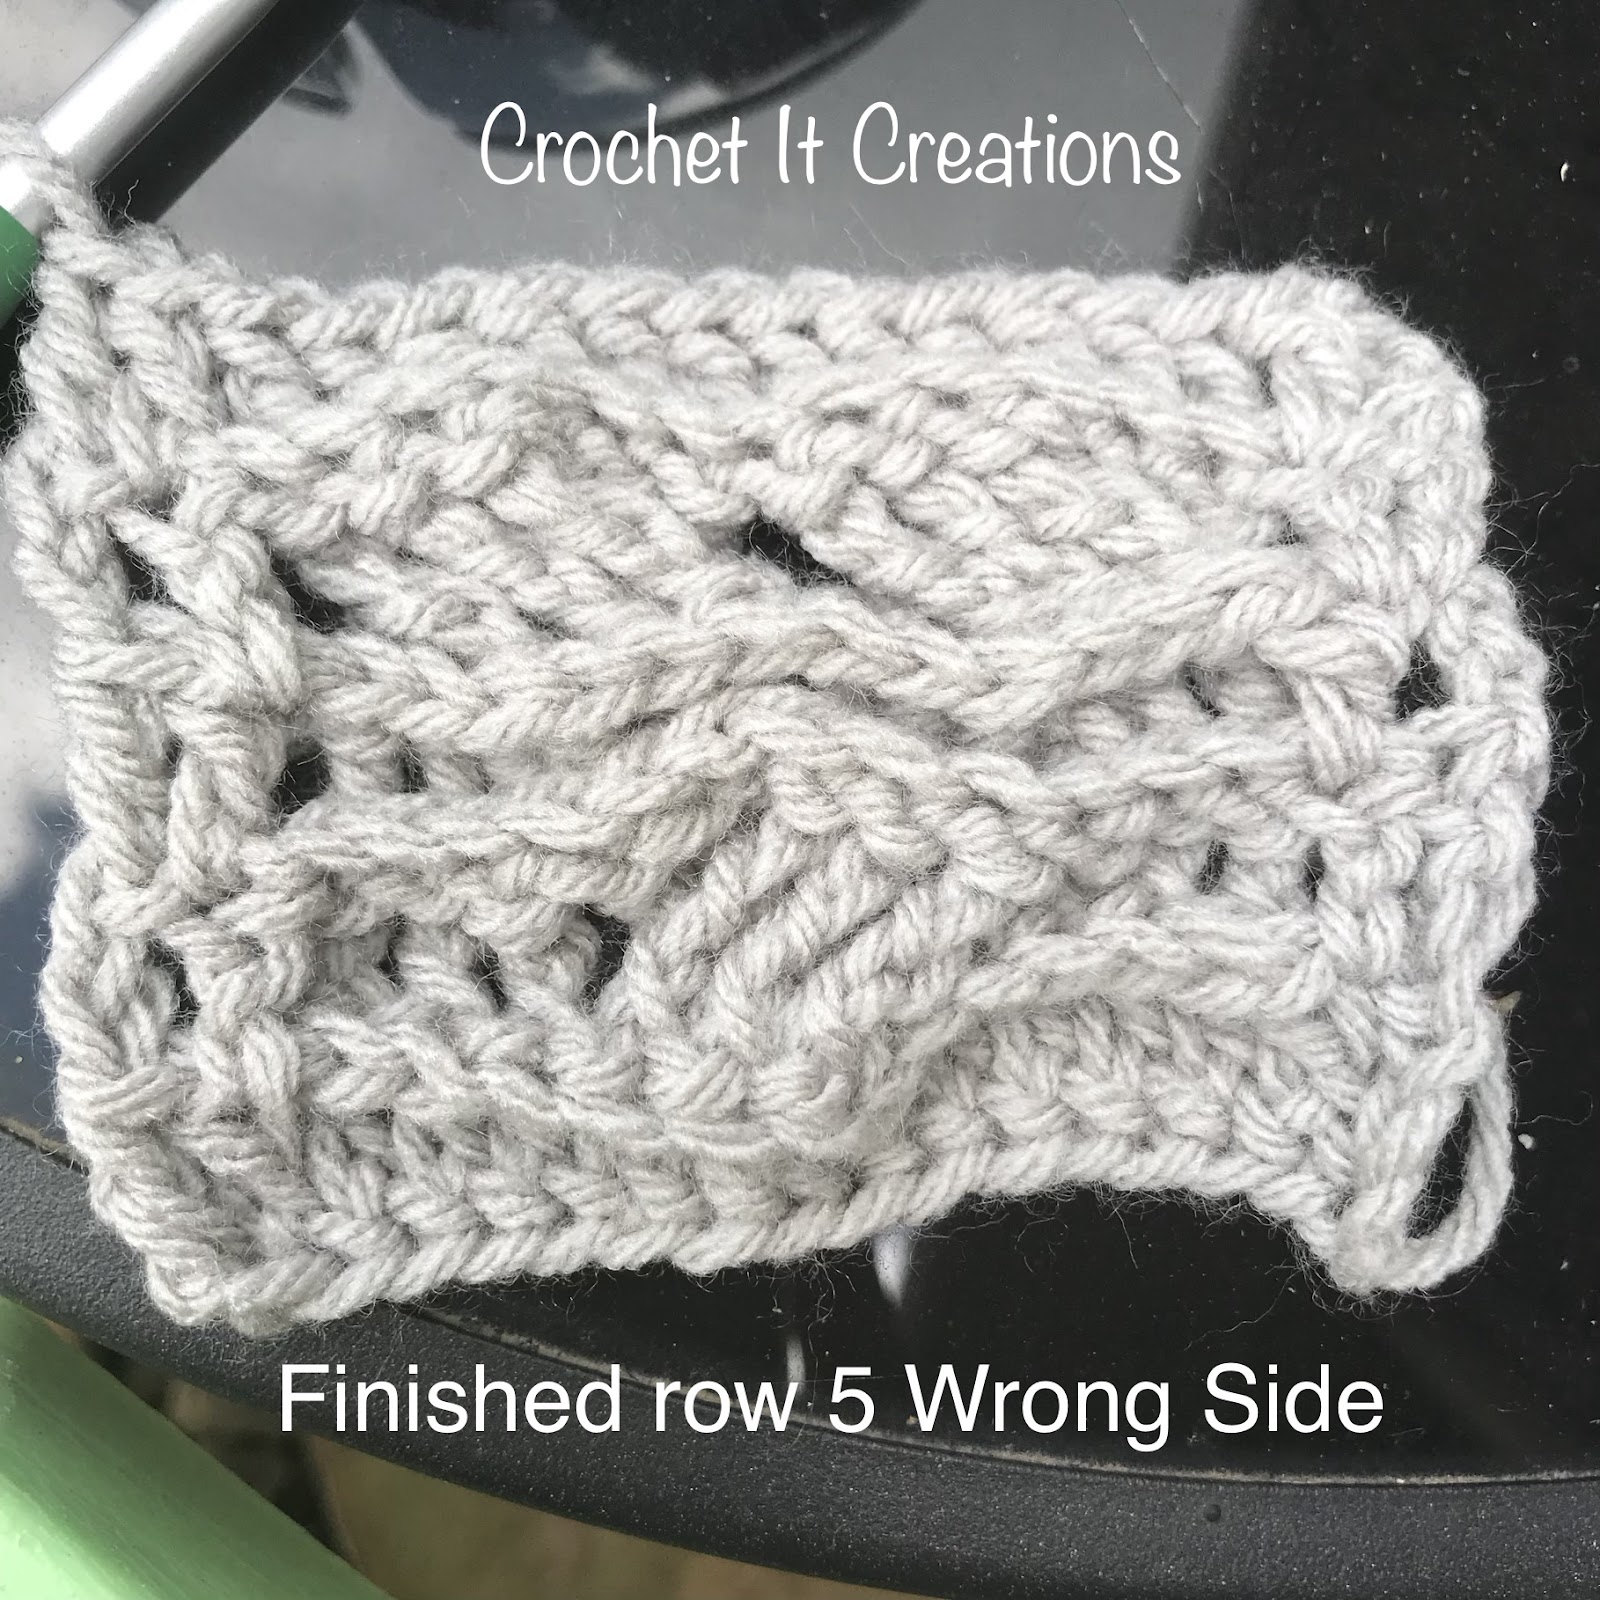
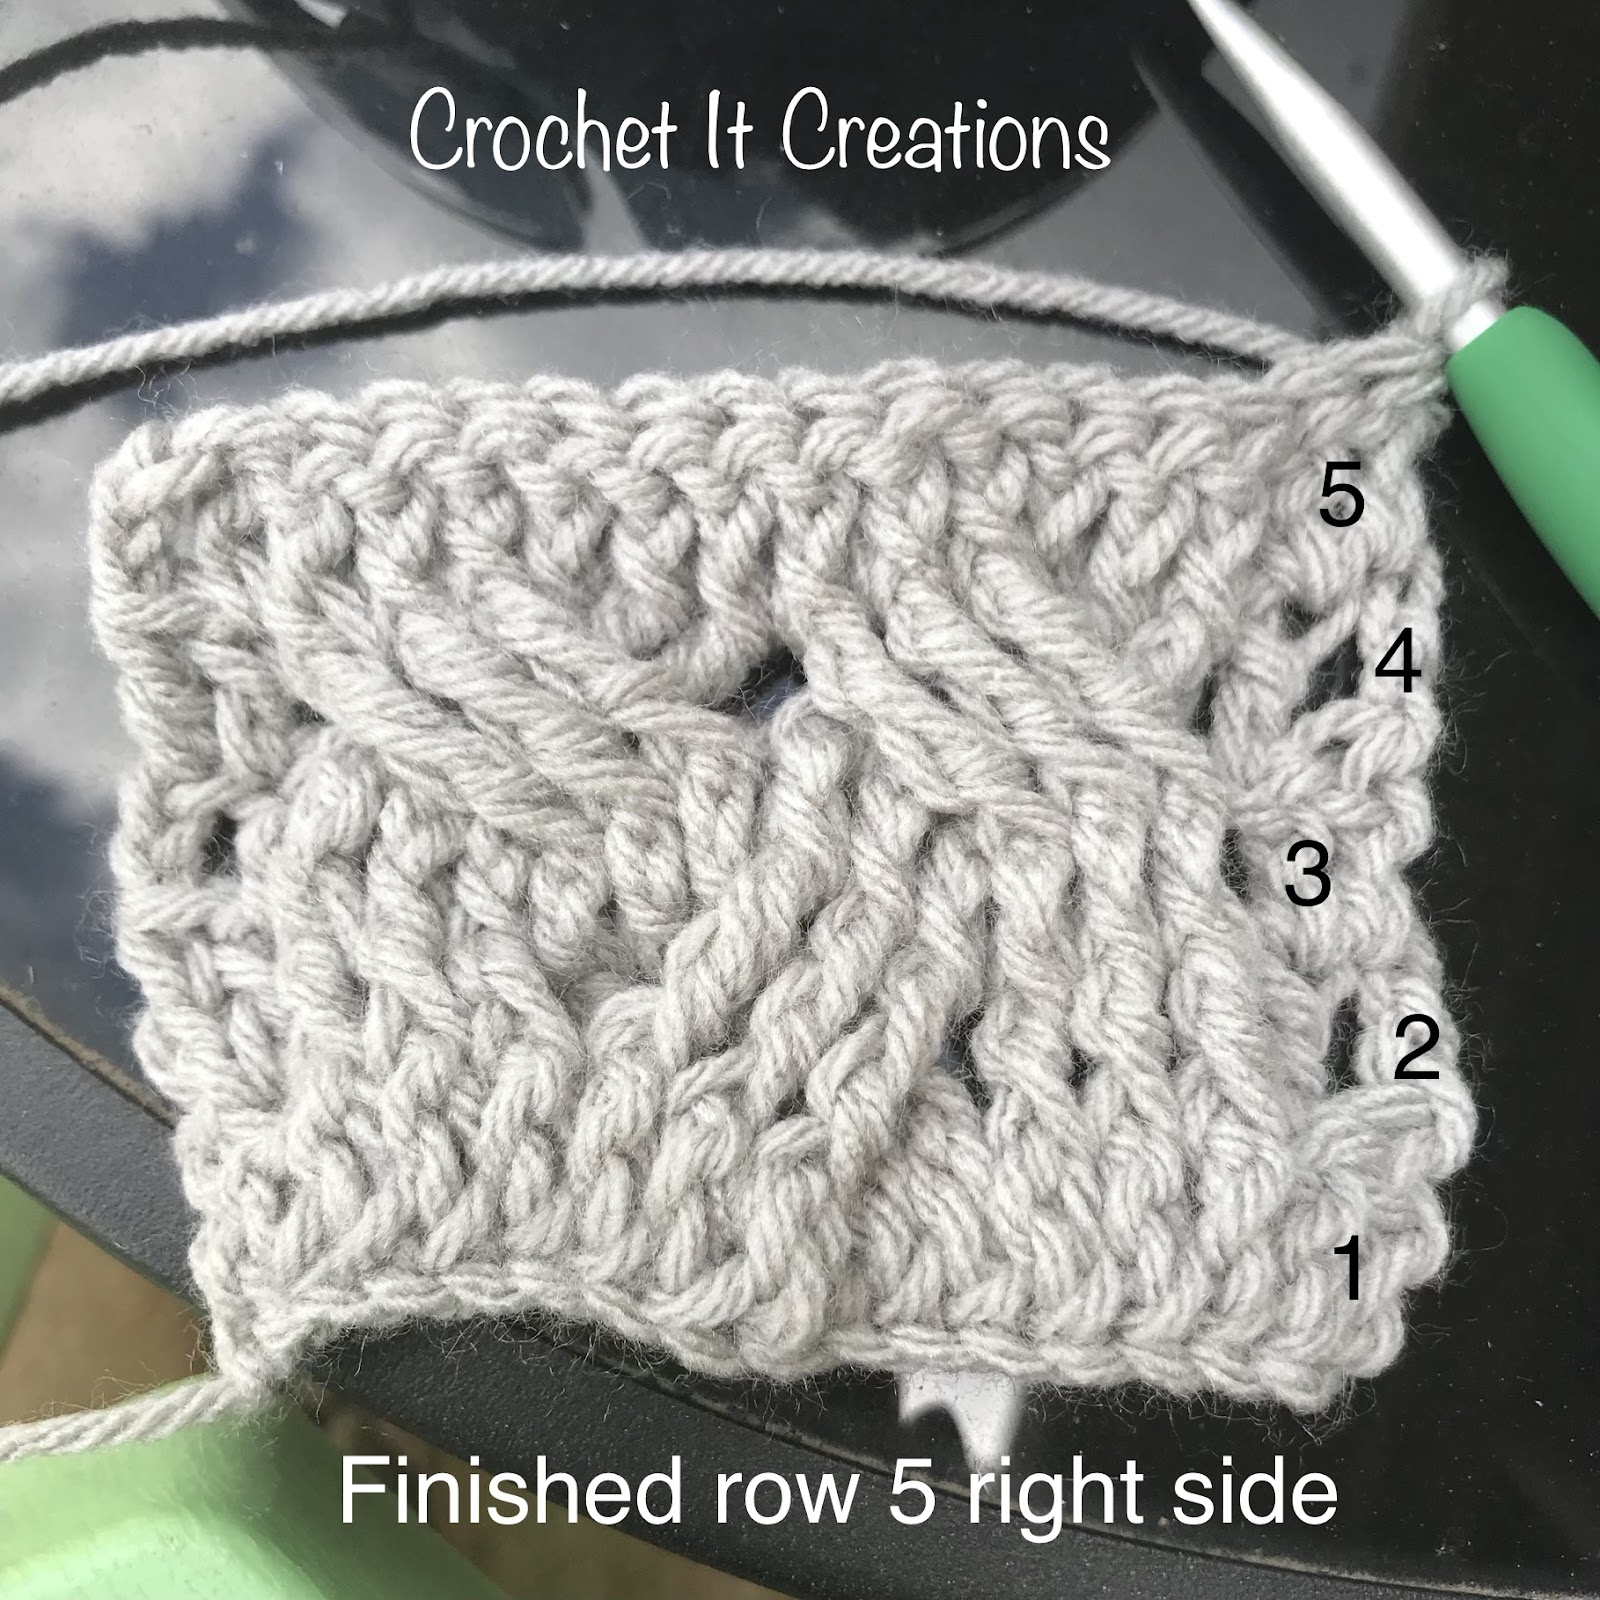
Photo 9: Completed Row 5 – Right Side

Save for later or share with others using the share buttons at the top and bottom of post. If you have any questions please comment below or you can email me at jessica@crochetitcreations.com.
I love to see photos of your work and read your comments. Follow Crochet It Creations on all of your favorite social media sites! Join my Crochet It Creations Crochet Friends Facebook group to further connect!
You may sell your items made from my patterns. Please do not use my photos as your own to sell your work. A link back to my site is much appreciated when selling your items from my patterns. I hope you enjoy!
This site is supported by advertisers and may contain affiliate links. See copyright & disclosure policy here for more information.