Prefer a PDF version to print? Click Here —> 
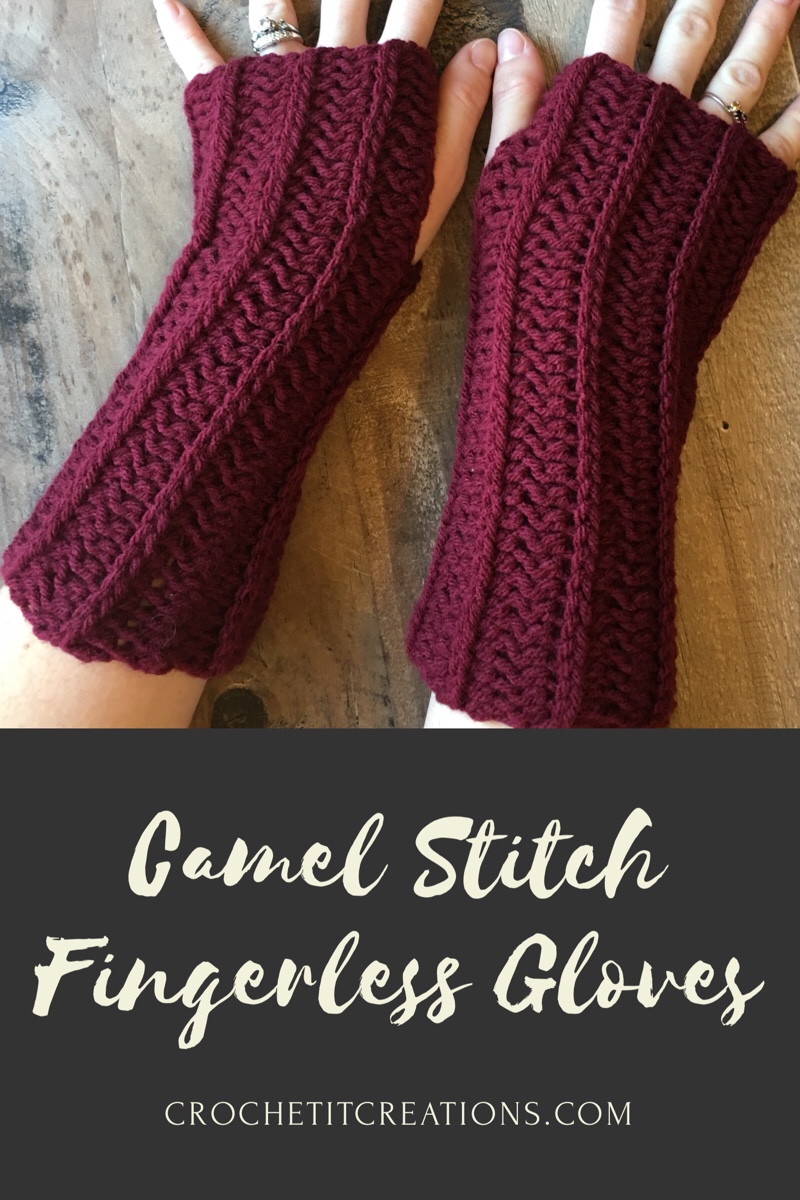
Fingerless Gloves are perfect for keeping your hands warm and still be able to use your touch screen phone. These can be made in any color. Make a Camel Stitch Ear Warmer and Fringe Scarf for the complete ensemble.
The Camel Stitch Fingerless Gloves are constructed in length wise rows using the camel stitch. The camel stitch makes your work look knitted. It is also called the knit stitch to some. There is a thumb hole on the side and open at the top for the other fingers. These work up quick and use little yarn.
See video tutorial at the bottom of post.
Purchase a ad-free printable version for a small fee here from Ravelry

Materials needed
- H crochet hook…Clover Amour are my favorite. Find them here
- Worsted weight #4 yarn. Less than 200 yards used
- Scissors….Fiskar Craft scissors are my favorite. Find them here
- Tapestry Needle….like these
- Measuring tape
Stitches Used
- Foundation single crochet – see post here for how to do foundation rows
- Camel hdc stitch – hdc in the front loop or third loop of the hdc stitch from previous row. This pushes the normal loops that you would crochet in to the back and looks like a chain. Also called Knit Stitch.
- sl st = slip stitch
- Hdc – half double crochet
- Sc – single crochet
Gauge
4″ x 4″ square of the pattern = 16 stitches x 9 rows
Adult size
Row 1: Foundation row 32 hdc. ch 1 and turn. (32) find out how to do a foundation row here. Or you can ch 33 and hdc in 2nd ch from hook across.
Row 2-14: hdc in “third” loop across (or the loop facing you of the hdc, in front of what you would normally be crocheting in). ch 1 turn. (32) It should measure about 8.5″ L x 7″ W

Everyone’s arm size is different. You may need to add or subtract rows. You want them a little snug to allow stretching.
Join together first row to last row by sl st in third loop of last row of hdc and ch (row 1) both together. For thumb hole stop 10 st from the end. sl st on ch right side only for 5 st. Skip 5 hdc on left side. sl st back in third loop and through row 1 for the remaining 5 st.
Turn glove inside out. Finish off and weave in ends or add sc row.
*Optional to add an sc row to top and bottom. (Photos are without)

*Optional to add rows to the thumb holes as follows….
Join with slip stitch to bottom of thumb hole, into the first open st. (10th st from the end).
Row 1: Do Not Ch 1, sl st will count as ch 1. sc in first st and the next 5 st. (last st will be where a sl st was from joining the glove together) Turn and work on the other side of the thumb hole. sc across in 6 st. join to first sc. (12)
Row 2-3: ch 1, hdc in the normal top of the st in each st around. Join (12)
Row 4: ch 1, sc in each st around. Finish off. Weave in ends.

Child size
Row 1: Foundation row 24 hdc. ch 1 and turn. (24) find out how to do a foundation row here. Or you can ch 26 and hdc in 2nd ch from hook across.
Row 2-12: hdc in “third” loop across (or the loop facing you of the hdc, in front of what you would normally be crocheting in). ch 1 turn. (24)
Join together first row to last row by sl st in third loop of last row of hdc and ch (row 1) both together. For thumb hole stop 8 st from the end. sl st on ch right side only for 4 st. Skip 4 hdc on left side. sl st back in third loop and through row 1 for the remaining 4 st.
Turn glove inside out and weave in ends. Or add sc row around.
*Optional to add an sc row to top and bottom.
*Optional to add rows to the thumb holes as follows…
Join with slip stitch to bottom of thumb hole, into the first open st. (8th st from the end).
Row 1: Do Not Ch 1, sl st will count as ch 1. sc in first st and the next 4 st. (last st will be where a sl st was from joining the glove together) Turn and work on the other side of the thumb hole. sc across in 5 st. join to first sc. (10)
Row 2: ch 1, hdc in the normal top of the st in each st around. Join (10)
Row 3: ch 1, sc in each st around. Finish off. Weave in ends.
Purchase a ad-free printable version for a small fee here from Ravelry or here from Craftsy.
Video tutorial below is for clarification on foundation rows, camel stitch, and slip stitch closure. Audio is only in the beginning. Sorry for any inconvenience. I learned that 3 kids, pets, and a husband doesn’t mix well with making videos!
Prefer a PDF version to print? Click Here —>
Save for later or share with others using the share buttons at the top and bottom of post. Most of my patterns are not tested. I simply write up how I make items. If you have any questions please comment below or you can email me. If you do not crochet but would like to order, I take custom orders off of my facebook page. Follow Crochet It Creations on all of your favorite social media sites.
You may sell your items made from my patterns. Please do not use my photos as your own to sell your work. A link back to my site is much appreciated when selling your items from my patterns. I hope you enjoy!
This site is supported by advertisers and may contain affiliate links. See copyright & disclosure policy here for more information.

Thank you for your awesome patterns! I am so in awe of anyone that can create beautiful items. I can read patterns and graphs, but I am really bad at creating anything, so THANK YOU!!
You are so welcome! Let me know if I can help!
[…] Camel Stitch Fingerless Gloves – Crochet It Creations […]