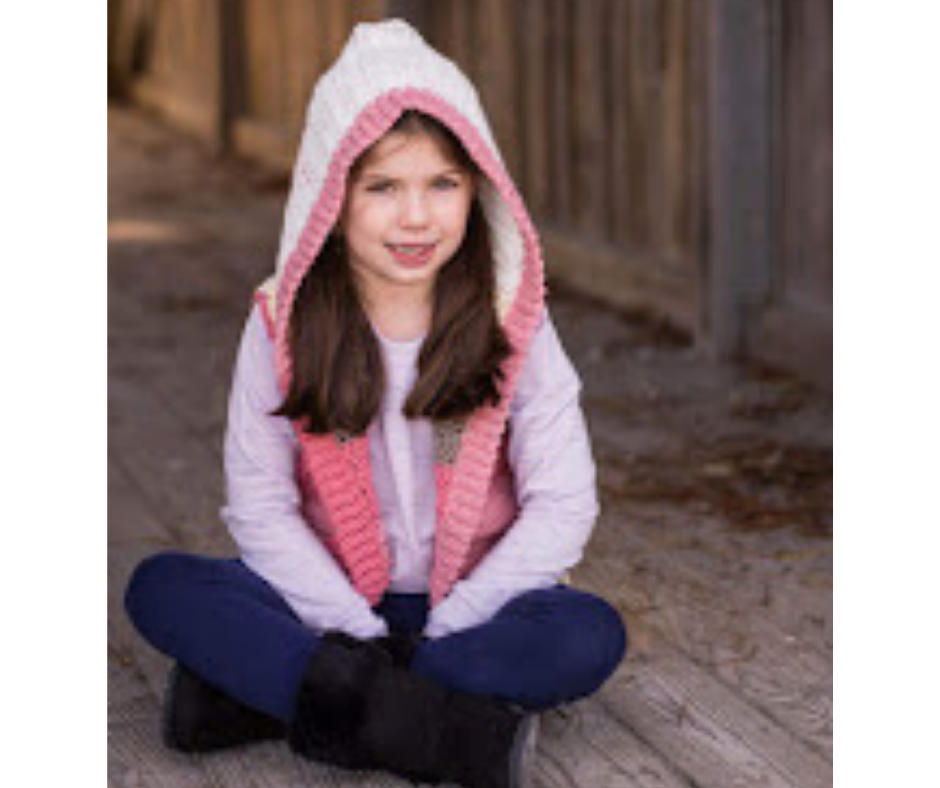
The Hooded Vest is a Crochet Pattern that comes in 5 child sizes, from toddler to teen. It is a beginner friendly pattern using basic crochet stitches!
The Hooded Vest pattern took me 1.5 years to finish! Not because it was that complex but because I made the first size and got professional photos taken, the ones below, then I just put it to the side. I knew that I wanted to finish in other sizes but I just didn’t have the motivation to do so. BUT I am NOT a quitter, so here is the finished pattern below.
I used Caron Big Cakes yarn for the pink hooded vest in the photos. It is a more dense Medium 4 Weight Yarn. Be sure to check your gauge and adjust your hook and yarn accordingly. Other yarns that worked well during testing were Red Heart With Love (I needed to use a J 6mm Hook), Loops & Threads Impeccable, and Big Twist. You can check yarnsub.com for a comparable yarn.
The Hooded Vest pattern comes in 5 sizes: 1/2, 3/5, 6/8, 10/12, and 14/16. Measurements are included and is recommended to measure around the child to be sure accurate fit. If you are unable to measure then go off the clothing size they wear, NOT their age.

Child Hooded Vest Crochet Pattern
Materials Needed
- I 5.5mm crochet Hook, or size to obtain gauge
- Medium #4 weight yarn – Caron Big Cakes used in photos (100% acrylic, 10.5oz/300g, 603yds/551m). It is a slightly thicker #4 yarn, check yarnsub.com for a comparable yarn. Please note that yarn choice can affect sizing.
- Scissors
- Tapestry needle
- Optional to add 3-4 1” buttons
Gauge
- 4” square = 7 rows x 12 DC
Stitches Used/Abbreviations (US Terms)
- FDC – Foundation Double Crochet
- DC – Double Crochet
- HDC – Half Double Crochet
- SC – Single Crochet
- DC2TOG – Double Crochet Two Stitches Together
- FPDC – Front Post Double Crochet
- BPDC – Back Post Double Crochet
- Ch – Chain
- St(s) – Stitch(es)
Pattern Notes
- Beginning chain DOES NOT count as a stitch.
- Use the chart to determine fit. Measurements are taken around the widest part of the torso. If unable to measure, use the size the child wears in clothing.
- Vest is made in 5 parts working from the bottom up.
- Optional to replace beginning chain 2 and first DC with a Chainless Starting Double Crochet.

Chart 1: Finished Vest Details
| Size | Yardage | Chest Meas. | Vest Meas. | Length |
| 1/2 | 375 | 19-21” | 24” | 14” |
| 3/5 | 450 | 22-23” | 26” | 16” |
| 6/8 | 575 | 25-26.5” | 30” | 18” |
| 10/12 | 700 | 28-30” | 33” | 20” |
| 14/16 | 850 | 31.5-32.5” | 36” | 22” |
Working the Vest
- Part 1 – Bottom of vest in a rectangle up to arm holes.
- Part 2 – Back panel, from arm holes up to neck.
- Part 3 – Front panels, from arm holes across the front of the chest.
- Part 4 – Hood, worked from the neck up.
- Part 5 – Border, worked across the bottom, front and arm holes.
Part 1 – Bottom of Child Vest
Row 1: FDC to Stitch Count # in chart 2, turn. OR replace by chaining to amt of FDC + 2, DC in 3rd ch from hook and across.
Row 2 – Finished Row # in chart: Ch 2, DC across, turn. Fasten off, continue on to Part 2.
Chart 2: Stitch and Row count for Part 1
| Size | Stitch Count | Finished Row |
| 1/2 | 70 | 15 |
| 3/5 | 76 | 17 |
| 6/8 | 88 | 20 |
| 10/12 | 96 | 23 |
| 14/16 | 106 | 26 |
Photo 1: Working Part 1 with Color Blocking

Part 2 – Back Panel
Count over sts to amt listed in chart, Sl St in next st.
Row 1: Ch 2, DC across to St Count # in chart 3, turn.
Row 2 – 5: Ch 2, DC2TOG, DC across, DC2TOG, turn.
Row 6 – Finished Row # in chart: Ch 2, DC across, turn.
Fasten off.
Chart 3: Back Panel Counts for Part 2
| Size | Count Over | Stitch Count | Finished Row |
| 1/2 | 17 | 36 | 10 |
| 3/5 | 19 | 38 | 11 |
| 6/8 | 22 | 44 | 12 |
| 10/12 | 24 | 48 | 13 |
| 14/16 | 26 | 54 | 14 |
Photo 2: Back Panel Completed

Photo 3: Completed Parts 2 & 3 with the Arm Holes

Part 3 – Front Panels
RIGHT FRONT PANEL – Attach yarn to the corner of PART 1 with a Sl St.
Row 1: Ch 2, DC across to St Count # listed in chart 4, turn.
Row 2: Ch 2, DC2TOG, DC across, turn.
Row 3: Ch 2, DC across, DC2TOG, turn.
Rows 4 & 5: Repeat rows 2 & 3
Row 6 – Finished Row # in chart: Ch 2, DC across, turn.
Fasten off, leaving a long tail for sewing shoulder seams.
LEFT FRONT PANEL – Attach yarn by Sl St in the next st over from PART 2 (at the other arm hole).
Row 1: Ch 2, DC across to St Count # listed in chart 4, turn.
Row 2: Ch 2, DC across, DC2TOG in last 2 sts, turn.
Row 3: Ch 2, DC2TOG, DC across, turn.
Rows 4 & 5: Repeat rows 2 & 3
Row 6 – Finished Row # in chart: Ch 2, DC across, turn.
Fasten off, leaving a long tail for sewing shoulder seams.
Chart 4: Front panels stitch and row count for Part 3
| Size | Stitch Count | Finished Row |
| 1/2 | 17 | 10 |
| 3/5 | 19 | 11 |
| 6/8 | 22 | 12 |
| 10/12 | 24 | 13 |
| 14/16 | 26 | 14 |
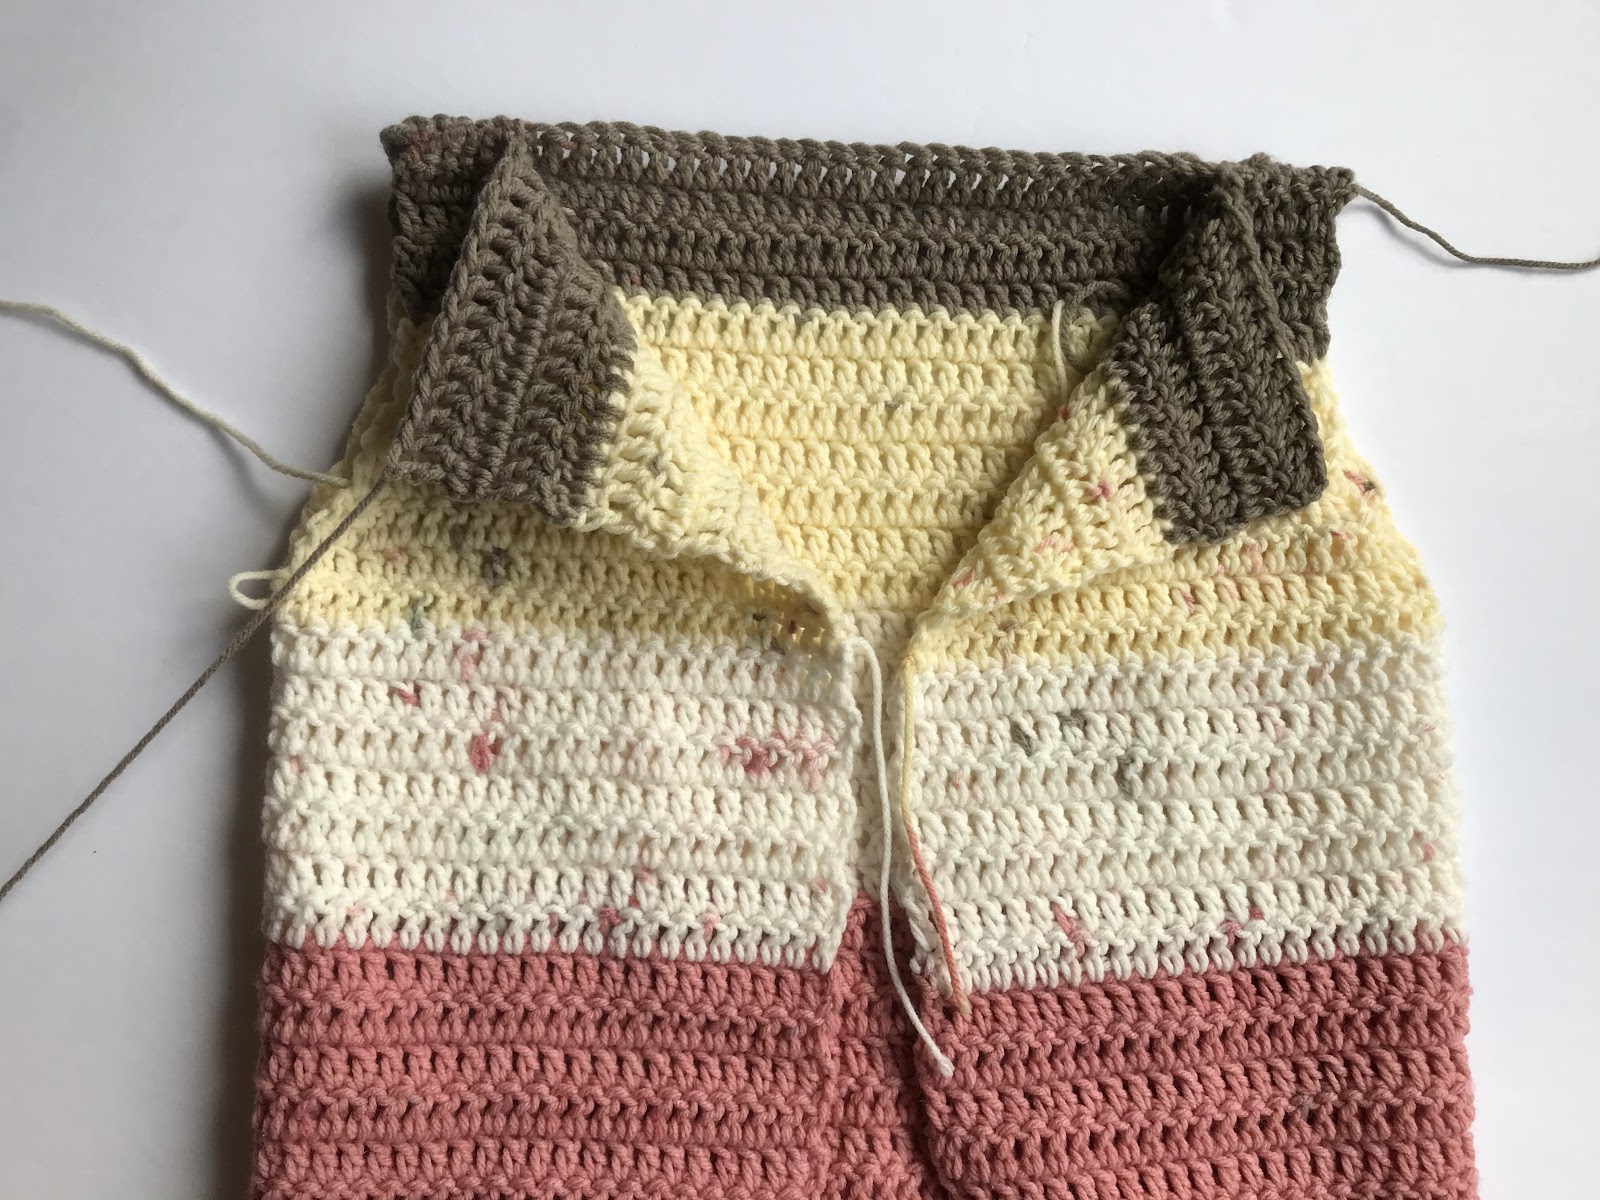
Fold in the front panels at the arm holes. Sew together the front and back panels ONE THIRD of the FRONT PANEL ACROSS to create a shoulder seam using the Mattress Stitch Technique. Leaving the rest unworked for the hood.
Photo 4: Fold front panels over to sew the shoulder

Photo 5: Shoulders Sewn
Part 4 – Hood
Attach yarn to the corner of the front panel with a Sl St.
Row 1: Ch 2, DC around front panels and neck, placing DC2TOG in the corner where the shoulder seam is sewn, turn. (see Stitch Count # on Chart 5)
Row 2 – Row Count # Before Decreasing in chart 5: Ch 2, DC across, turn. Count half way across, place stitch marker at mid point.
Next Row – Finished Row # on chart 5: Ch 2, DC across to stitch marker, DC2TOG, DC across the remaining half, turn.
Photo 6: Working the first row of the hood

Photo 7: DC2TOG in the shoulder seam to close the gap

Fasten off leaving a long tail for sewing hood together. Fold the in half together and sew closed. See photo 9 to reduce the point at the tip of the hat by sewing at a diagonal from the inside.
Chart 5: Stitch and Row count for hood and Part 4
| Size | St Count (Row 1) | Row Count Before Dec. | Finished Row |
| 1/2 | 36 | 8 | 15 |
| 3/5 | 42 | 8 | 16 |
| 6/8 | 50 | 9 | 18 |
| 10/12 | 54 | 10 | 20 |
| 14/16 | 62 | 11 | 22 |
Photo 8: Ready to sew the hood

Photo 9: Optional to remove the point on the hood by sewing across the corner from the inside.

Part 5 – Border
Sleeves: Attach yarn to the bottom arm hole with a Sl St, Ch 1, SC around, join, finish off. Repeat on the other side.
Panel: Attach yarn to the bottom corner of the front panel with a Sl St.
Row 1: Ch 2, DC around the entire front border, ending with an even number of sts, turn.
Row 2 – 3(4 for size 10/12 & 14/16): Ch 2, [FPDC in 1 st, BPDC in next] repeat around. Fasten off.
Bottom: Attach yarn to the bottom of the vest with a Sl St, Ch 1, SC across, fasten off. Weave in all ends.
Photo 10: Before adding border to hooded vest

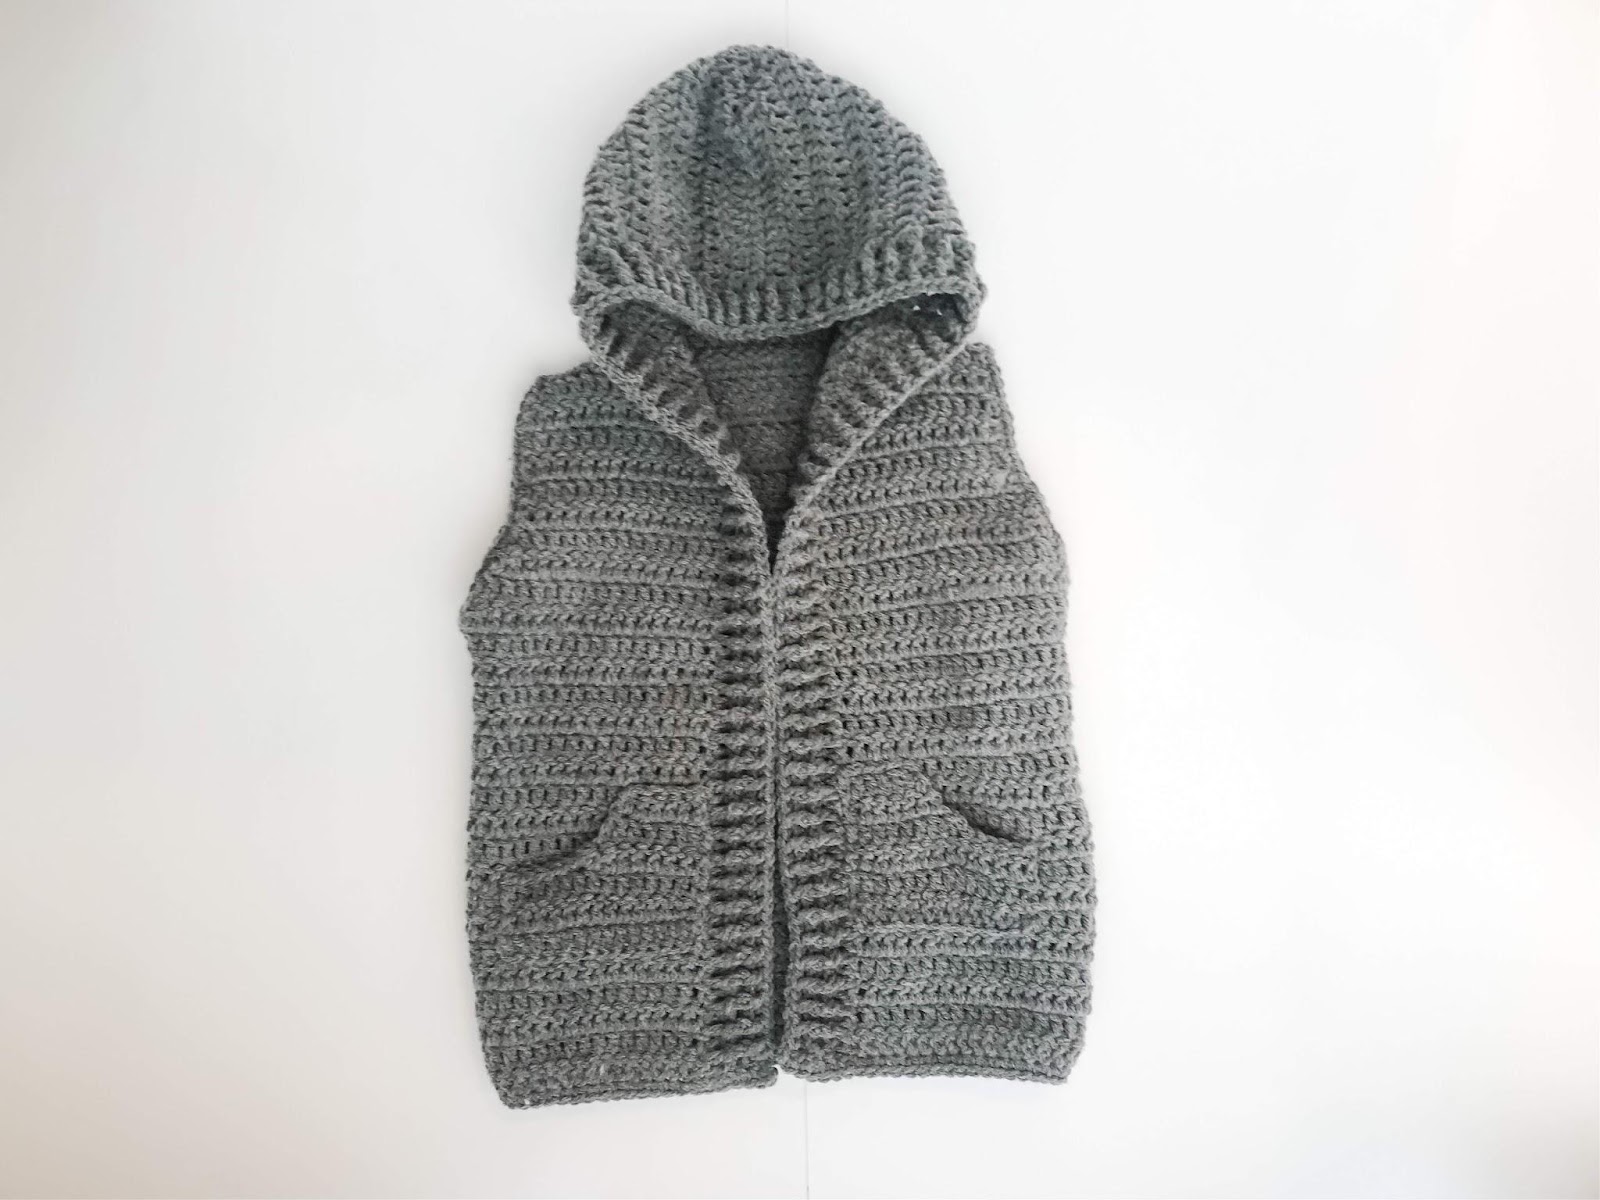
Photo 11: Finished border and ends weaved in

Optional to add pockets. Written as Hooded Vest smaller sizes – 1/2, 3/4, and 6/8 first with larger sizes, 10/12 and 14/16 in parentheses.
Row 1: FDC 14(16), turn. (14,16)
Row 2 – 3(4): Ch 2, DC across, turn. (14, 16)
Row 4(5): Sl St in 6 sts, ch 1, HDC in same st as sl st, DC2TOG, DC across, turn. (8,10)
Row 5(6): Ch 2, DC across, DC2TOG in the last 2 DC sts, skip HDC, turn. (6, 8)
Row 6(7): Ch 2, DC2TOG, DC across, turn. (5, 7) stop here for smaller sizes
Row 8: Ch 2, DC across, DC2TOG, turn. (6)
Ch 1, SC around the entire pocket, join. Fasten off leaving a long tail for sewing on.
Sew pockets on each front panel as shown in Photo 9.
Photo 8: Pocket

Photo 9: Sewing pockets on

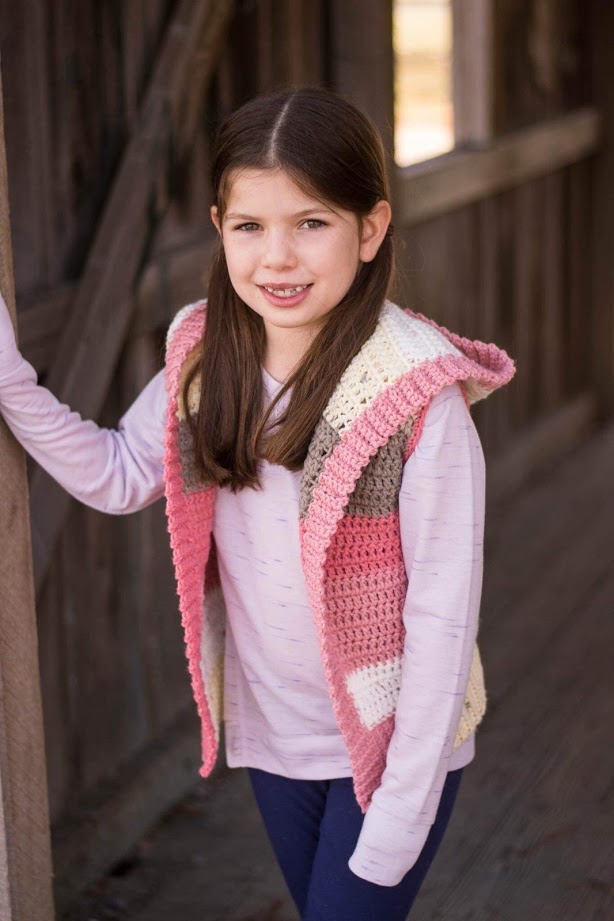
Photo 10: Finished Child Hooded Vest with pockets
Save for later or share with others using the share buttons at the top and bottom of post. If you have any questions please comment below or you can email me at jessica@crochetitcreations.com.
I love to see photos of your work and read your comments. Follow Crochet It Creations on all of your favorite social media sites! Join my Crochet It Creations Crochet Friends Facebook group to further connect!
You may sell your items made from my patterns. Please do not use my photos as your own to sell your work. A link back to my site is much appreciated when selling your items from my patterns. I hope you enjoy!
This site is supported by advertisers and may contain affiliate links. See copyright & disclosure policy here for more information.

[…] Originalmuster und die Fotos sind an crochetitcreations.com. Mehr Infos zu […]