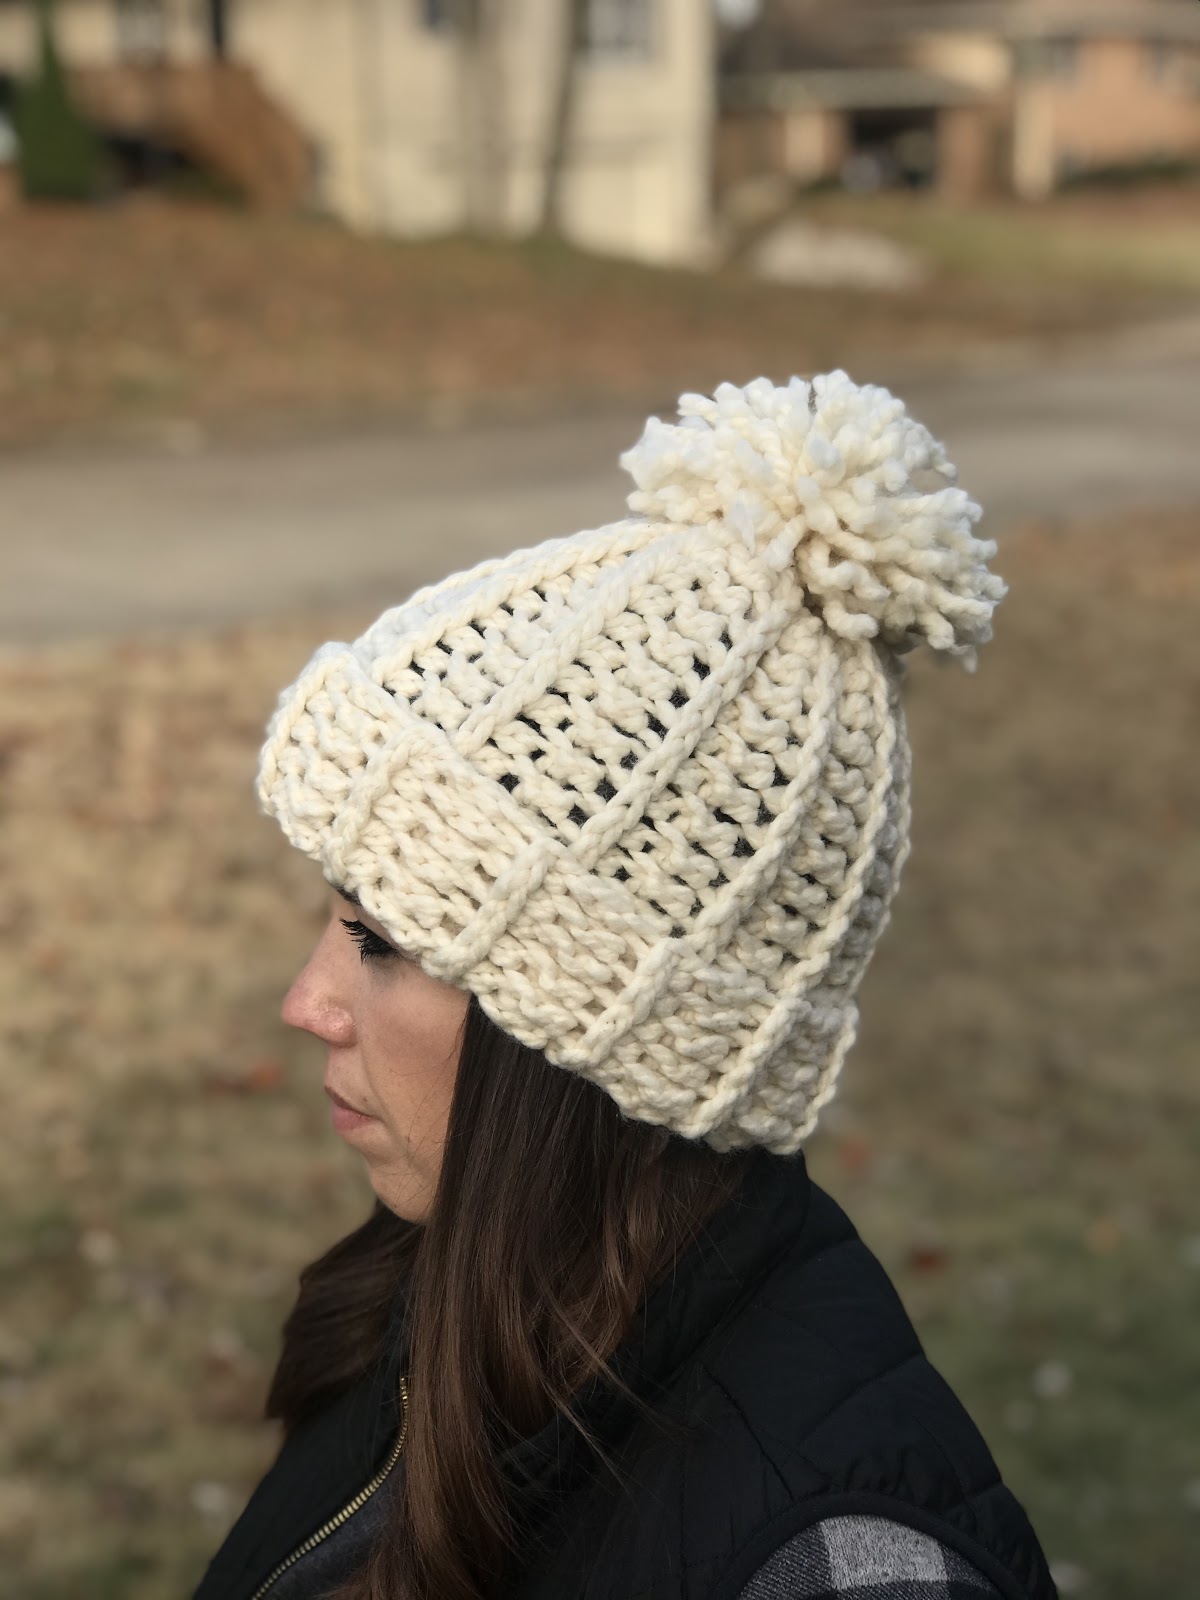
The Olympic Winter games have been so fun to watch! And every crocheter is eyeing those cute crochet or knit hats! Every one of them I look at and think “I could totally make that!”. I’m sure everyone else is thinking the same thing. This Chunky Snow Beanie Crochet Pattern is inspired by the USA snowboarders hat worn by Chloe Kim.
I already had a pattern written up called “The Snow Beanie” that I published back in December. See pattern here. The Snow Beanie uses the camel stitch and makes it look knitted. I LOVE this stitch. It is half double crochet stitches make in the third loop. I have several patterns written with this stitch. After watching the Olympics, I knew that The Snow Beanie would be perfect replica of the snowboarders hat, but using chunky yarn.
The difference between this pattern and the original Snow Beanie hat is the yarn, crochet hook, and amount of stitches/rows. I also changed the closing of the top to use single crochet together stitches. This helps give it a nice clean closure to the top.

This hat also works up FAST! Complete the look with a loose pom pom on top. The pom pom is made with less yarn so it’s not real full, like the Olympic Hats. You could also finish with adding a cloth tag.
I would love to see photos of your work! Please tag me on any of my social media accounts. I also check my email at least once a day. Happy Hooking!
Purchase the PDF printable ad-free version here from Ravely for a small fee. It also comes with the original Snow Beanie Pattern.
Chunky Snow Beanie Crochet Pattern
Materials Needed
- Size M/N 9.0mm crochet hook, or hook needed to obtain gauge.
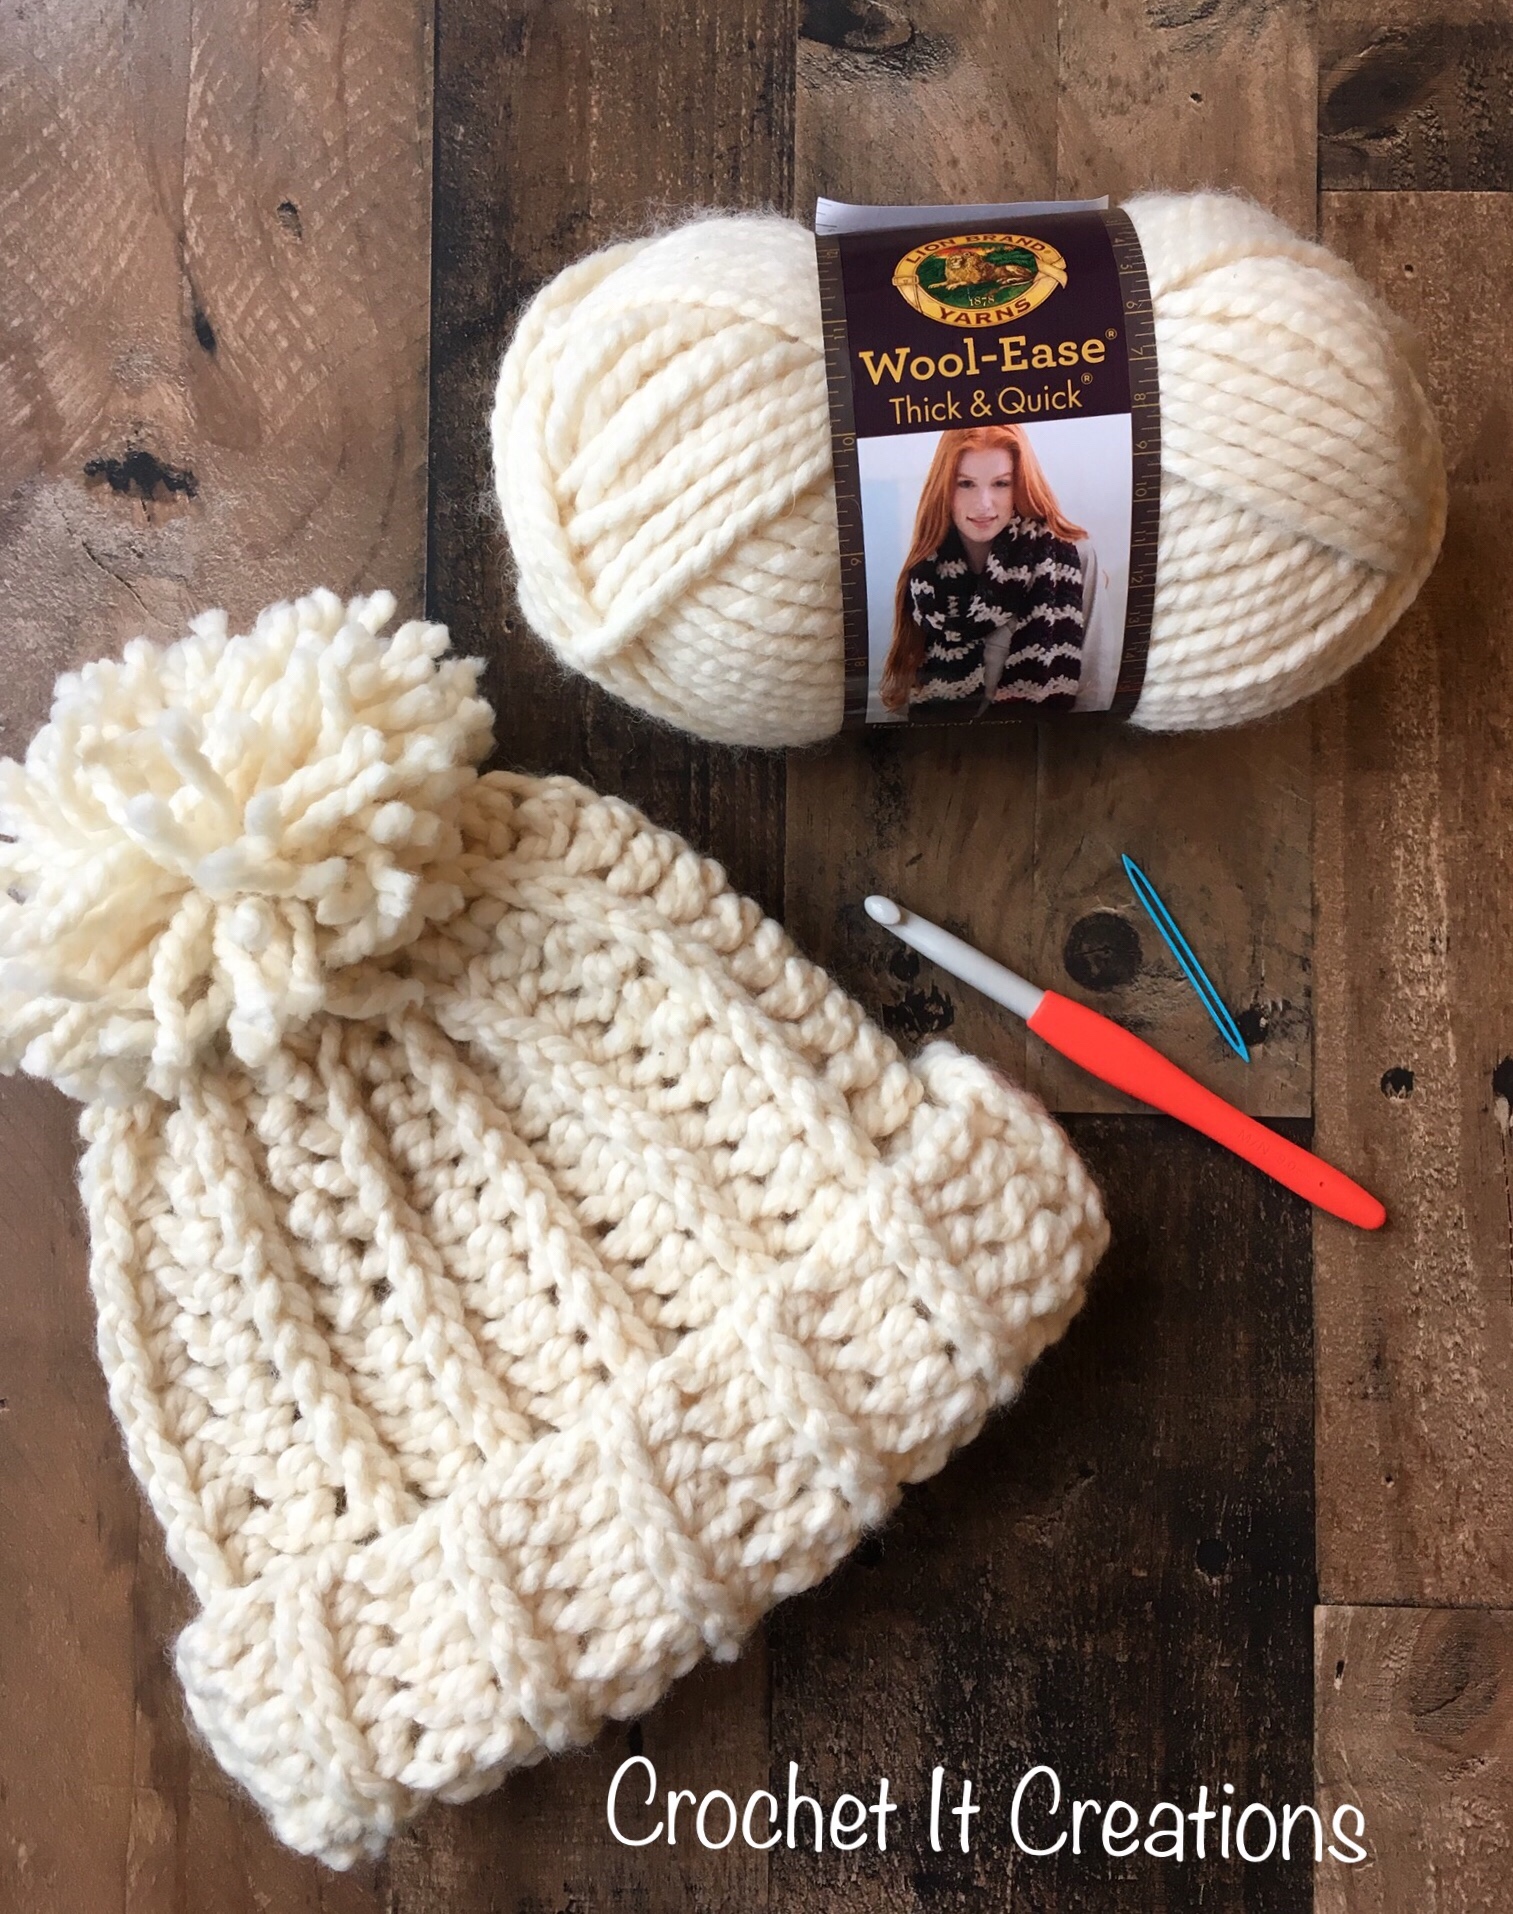
- 1 skein of Lion Brand Wool-Ease in Fisherman Super Bulky #6 Weight Yarn (80% acrylic/20% wool, 106yds/97m, 6oz/170g)
- Scissors
- Finishing Needle
Stitches Used/Abbreviations
- Ch – Chain
- FHDC – Foundation Half Double Crochet
- HDC – Half Double Crochet
- CS – Camel Stitch – HDC in the third loop of the HDC stitch from previous row. The third loop is found behind the top loops that you would normally work in, in this pattern however the third loop will be facing you since you turn on each row.
- Sl St – Slip Stitch
- SC2TOG – Single Crochet 2 Stitches Together
Gauge
- 4″ square = 5 rows x 8 CS
Pattern Notes
- Beginning chain DOES NOT count as a stitch.
- Beanie is worked in flat rows in a vertical rectangle.
- The ADULT will use EXACTLY 1 skein of Lion Brand Wool-Ease yarn (106 yards)
- Make the pom pom by hand (or a phone, or a book) using the remainder of the skein.
Chart 1 – Starting Stitches and Ending Row Count
| Size | Measurements (before brim is folded) | FHDC | Ending Row |
| NB | 6” H x 12”W | 12 | 14 |
6 mo | 7”H x 15”W | 14 | 18 |
1 yr | 7.5H x 16”W | 15 | 19 |
2 yrs | 8”H x 17”W | 16 | 20 |
3-5 yrs | 9”H x 18”W | 18 | 21 |
6-10 yrs | 9.5”H x 19”W | 19 | 22 |
Adult | 10”H x 20”W | 20 | 24 |
Row 1: FHDC to the # listed in the chart, turn. (Or chain to the amount of chart + 1, HDC in 2nd ch from hook and each ch across)
Row 2 – until # listed in chart: Ch 1, CS in each stitch across, turn.
Do not finish off – Close the beanie by folding in half. Slip Stitch through the third loop of last row and the chain of the foundation row, all the way across to make a tube.
Turn hat right side out.
Close the top of the Beanie – Ch 1, SC2TOG in to the end of each row around (single crocheting 2 rows together). Finish off leaving a long tail for closing the top of the hat
Attach a tapestry needle to the end of the long tail. Weave needle in and out of the end of the stitches pulling tightly to close the hole at the top. Push the needle through the top and knot a few times on the inside weaving in and out to secure.
Fold up the brim and leave like this. Or Make and attach pom pom to top with the leftover yarn.
Photo 1 – Photo of the Camel Stitches

Photo 2 – Finished Snow Beanie with supplies

Purchase the PDF printable ad-free version here from Ravely for a small fee. It also comes with the original Snow Beanie Pattern. I greatly appreciate every single pattern purchase. Thank you! It’s what keeps this blog going!
Save for later or share with others using the share buttons at the top and bottom of post. If you have any questions please comment below or you can email me at jessica@crochetitcreations.com.
I love to see photos of your work and read your comments. Follow Crochet It Creations on all of your favorite social media sites! Join my Crochet It Creations Crochet Friends Facebook group to further connect!
You may sell your items made from my patterns. Please do not use my photos as your own to sell your work. A link back to my site is much appreciated when selling your items from my patterns. I hope you enjoy!
This site is supported by advertisers and may contain affiliate links. See copyright & disclosure policy here for more information.

Hi there, can you please explain the part where you close the top by ch 1 and sc4tog 6 times. when I do this 6 times I ams left with quite a few rows before I get back to the start again. Should I do this What am I not doing right?? Thanks.
Are you making more than 24 rows? 6 x 4 is 24 so should come out even if you are placing the stitches at the end of the rows
Thanks for your quick response. I didn’t count the rows I just carried on until I had reached 20” so I guess that is why it didn’t work out. So what it works out as is 8 x 4 (i have more rows). So from here is says to use a wide needle to close the top. Is this where I would slip stitch the top closed and then I can add a pompom? sorry just not been crocheting for very long.
Oh that make sense. Honestly I would do what you said sc4tog 8 times. Then yes, use a needle to close the top. Just weave in and out of the sc4togs that you just made. Pull it tight. Weave in and out of the center to secure it closed. Then sew on the pom pom. Make sense?
thank you and yes that makes perfect sense now. Will be finishing it off tonight. 🙂
I hope that helps Kay! If not please let me know
For rows 2-24 do I crochet in back loop only to get the rib pattern?
You are crocheting in the third loop (camel stitch) of the hdc. Which faces you. There’s a video under the Camel Stitch Fingerless Gloves
So do you have a pattern for a child size of this hat?
I do not but definitely could be adjusted easily for a child. I have a chart for hat sizes and you could make it based off the chart. Try searching in the search bar. Or you can message me in my Facebook group and I can share the chart. I hope that helps!
Hi! When i offered my daughter to make her a chunky hat, she went on Pinterest and chose this pattern! I have slightly thinner yarn (#5) and a smaller hook, so I want to make it by using your measurements instead of counting stitches. I’m clear about the width, but unsure about the length. Is it 11″ + 2.5″ for the brim (for a total of 13.5″), or do you simply mean that the total length is 11″ and 2.5″ will be folded up to make the brim? Thanks!
Hi Claude! I actually have this same pattern that uses #5 yarn called the snow beanie. Just search for it in the search bar. It used Lion Brand Scarfie yarn. And the total length is 11.5” which includes the folded up brim. Most adult hats are about 8.5” height. I hope that helps!
Thank you for your beautiful beanie and pattern. I have a question on the finishing row. You state to fold the beanie in half and slip stitch all the way across. Do you mean a simple slip stitch like when finishing off a project? Thank you kindly for answering my silly question!
Yes, ma’am just slip stitch through both rows in each stitch to close the beanie.
I made the adult size using the wool ease yarn. I had to switch to a 10 mm hook because the 9 mm was just making it too small. Even then, the hat is really too small for my adult head. But the hat came out great and I had enough yarn left to make a sloppy pom pom. The video for the foundation stitch was extremely helpful. Another video showing how you slip stitch the edges together would be welcome. Thank you for sharing this pattern.
How did you make the Pom Pom?
I wrapped the remaining yarn around a mini ipad. tied the center then cut the loops
[…] Chunky Snow Hat Free Crochet Pattern is here. […]
[…] Click For Free Pattern […]