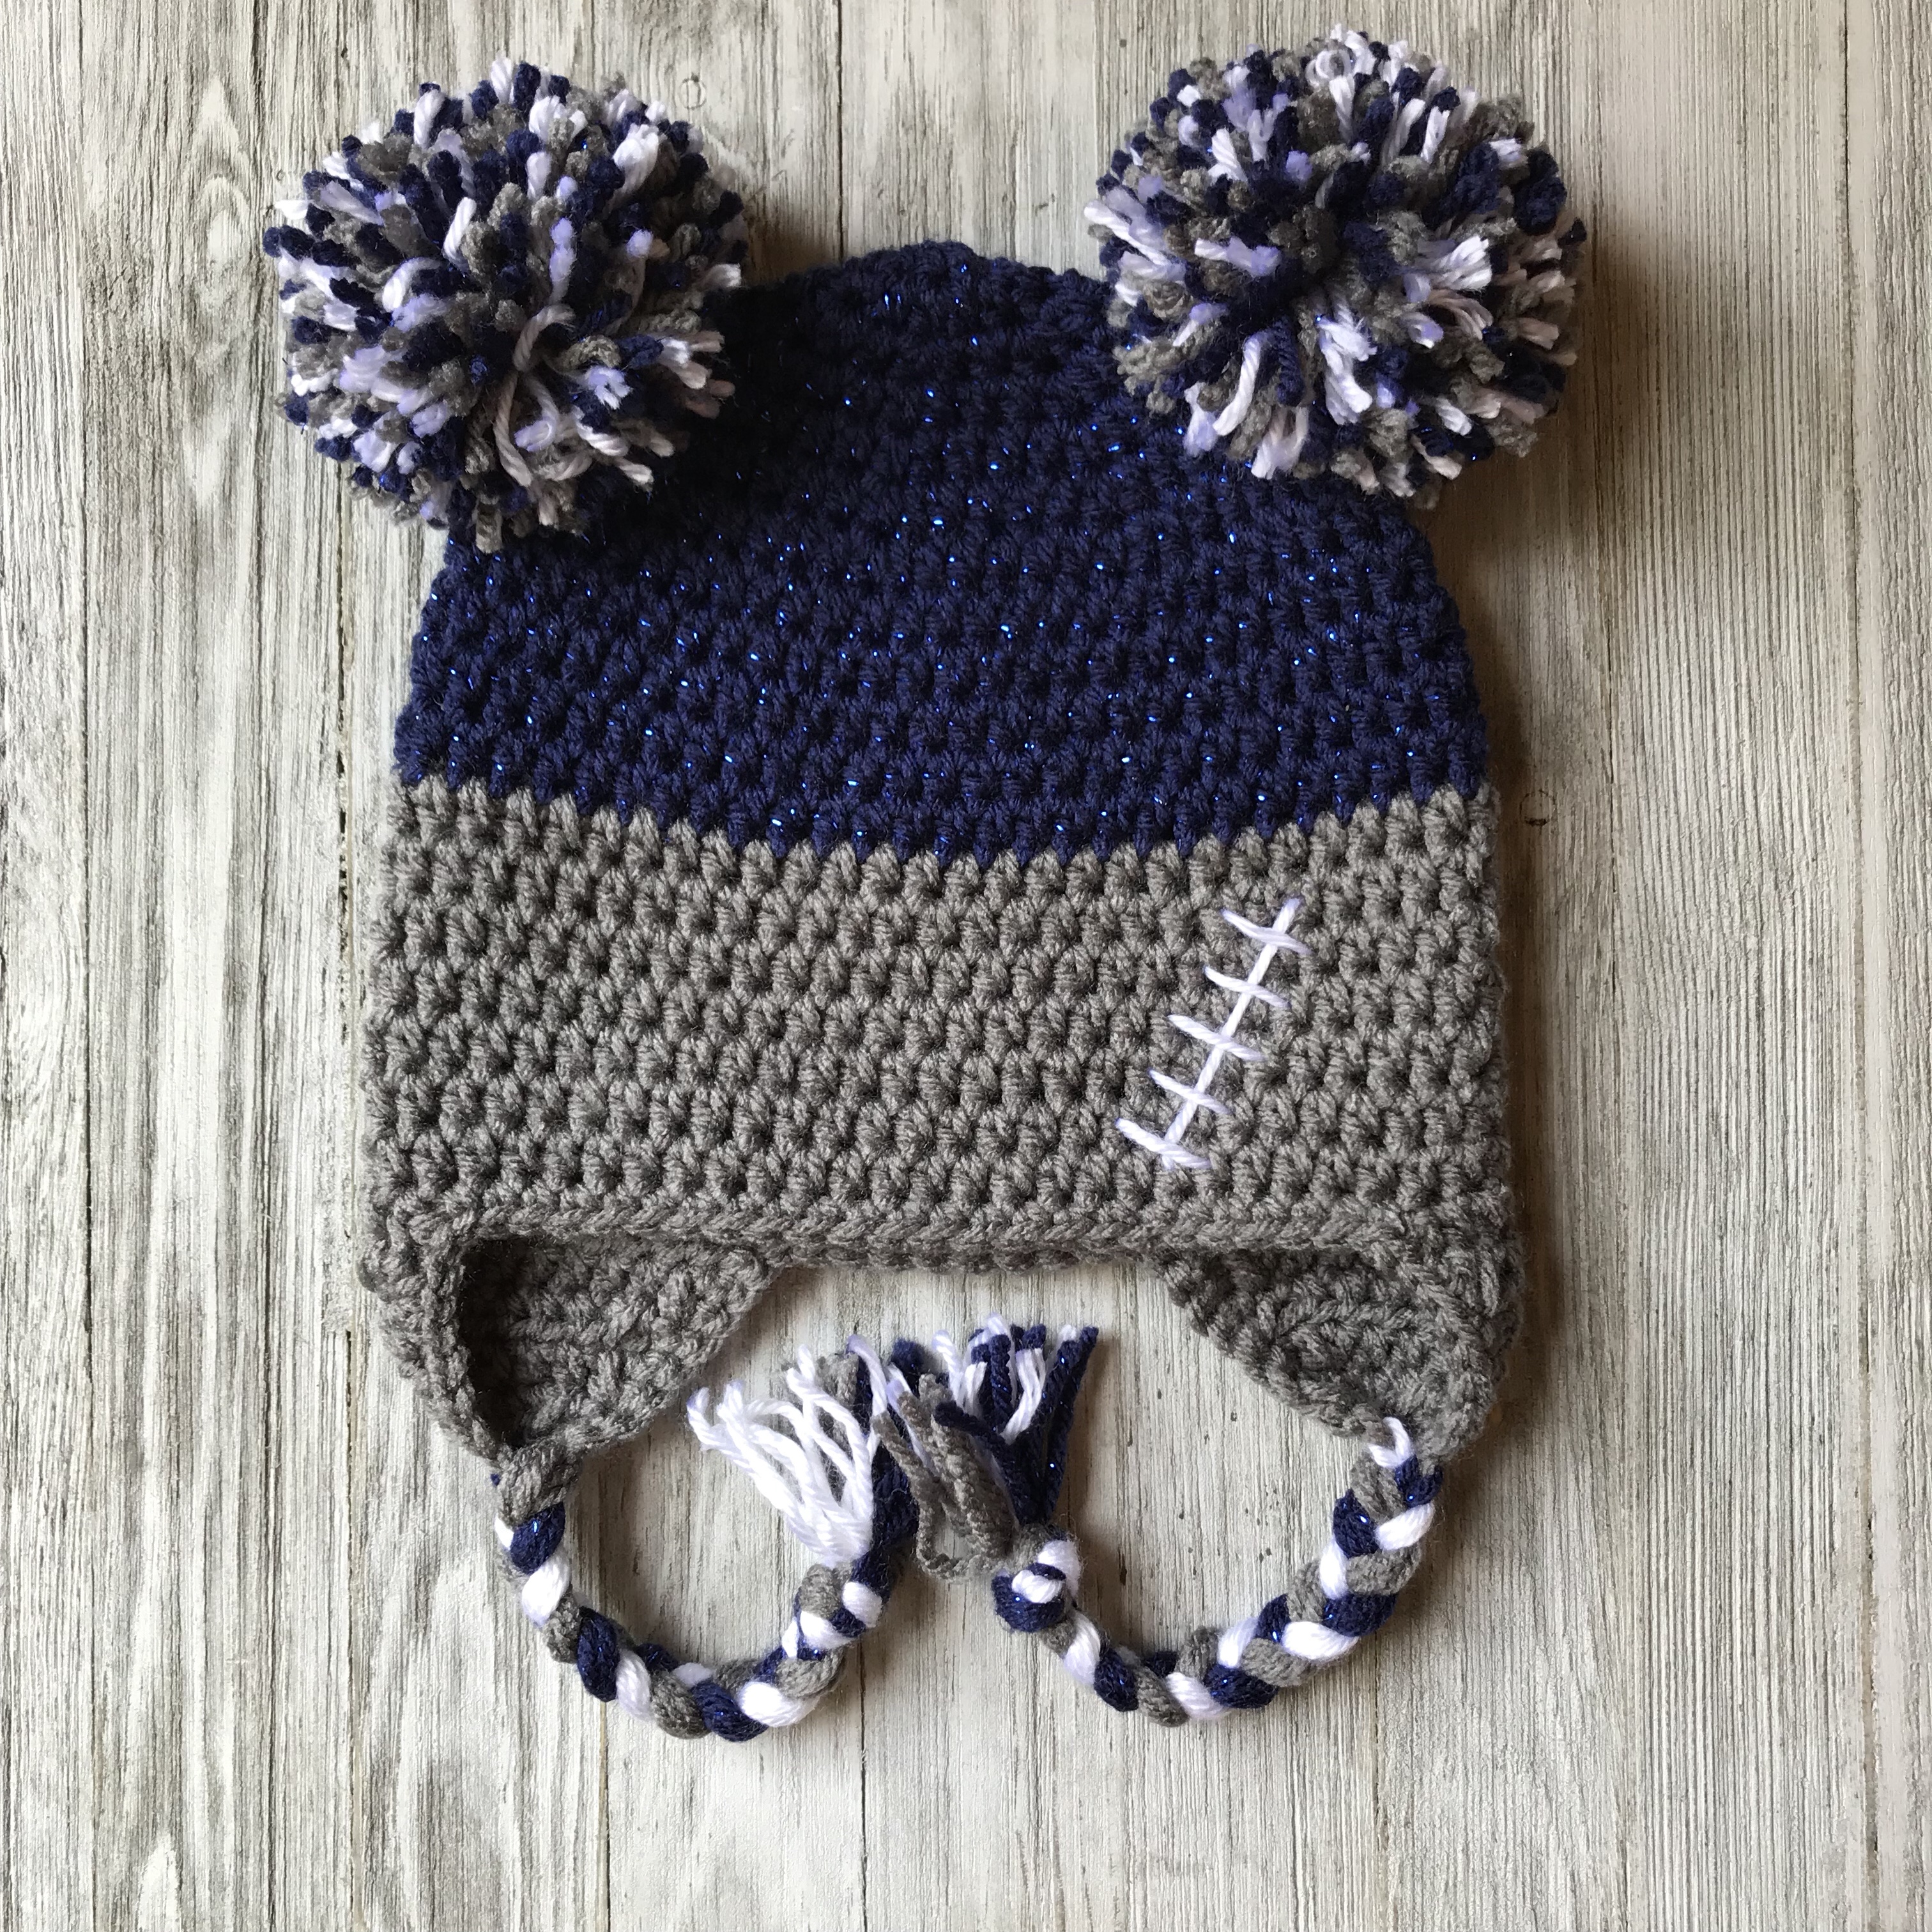
The Fan Football Beanie Crochet Pattern is perfect for Game Day! Make in your favorite team colors and customize to your own preferences. Perfect for High School football Friday Night Lights!
Pattern below was made using the Basic Crochet Beanie, which comes in Newborn to Adult Sizes. Find the pattern HERE. Pattern can be made with or without ear flaps.
Pattern below uses 3 colors. 2 main team colors and white for accent. Braids and double pom poms were added. Make yours with or without braids. With or without pom poms. Use 1 pom pom instead of 2. The options are all yours.

Step 1 – Crochet Beanie
Make a Basic Crochet Beanie in size needed using pattern HERE. Make with or without ear flaps.
The photo is size 3-5 years and is worked 12 rows in one color, then changed to next color for remaining 7 rows. The pattern will need to be more rows at the top of one color than the bottom.
Step 2 – Adding Braids
Cut 24 strands of yarn approximately 24″ long. If using 3 colors, cut 8 strands of each color.
A tip to make the strands all the same length…. wrap yarn around a folder, or something the length you want, 24 times and cut one end.
See post HERE about how to add braids to crochet hats.
Step 3 – Add PomPom(s)
I used a Clover Pom Pom Maker for this hat and added 2 to the hat. I used the large size maker. I preferred 2, but you could add 1 to the top center or none.
However, there are times where I make pom poms with my hand. See post HERE about how to make yarn pom poms by hand.
Sew pom pom(s) on to the hat. You want to make sure these are secure on there. I suggest to take the 2 strands and knot on the inside of the hat. Using tapestry needle take each strand and sew from the inside of the hat and through the pom pom. Do this several times and knot again several times to each strand.

Step 4 – Add Football Laces
Using a tapestry needle and color preferred, attach yarn to the inside of the beanie. I usually do this by weaving in different directions a few times. Sew a long line at an angle, then add the laces.

Save for later or share with others using the share buttons at the top and bottom of post. If you have any questions please comment below or you can email me at jessica@crochetitcreations.com.
I love to see photos of your work and read your comments. Follow Crochet It Creations on all of your favorite social media sites! Join my Crochet It Creations Crochet Friends Facebook group to further connect!
You may sell your items made from my patterns. Please do not use my photos as your own to sell your work. A link back to my site is much appreciated when selling your items from my patterns. I hope you enjoy!
This site is supported by advertisers and may contain affiliate links. See copyright & disclosure policy here for more information.


