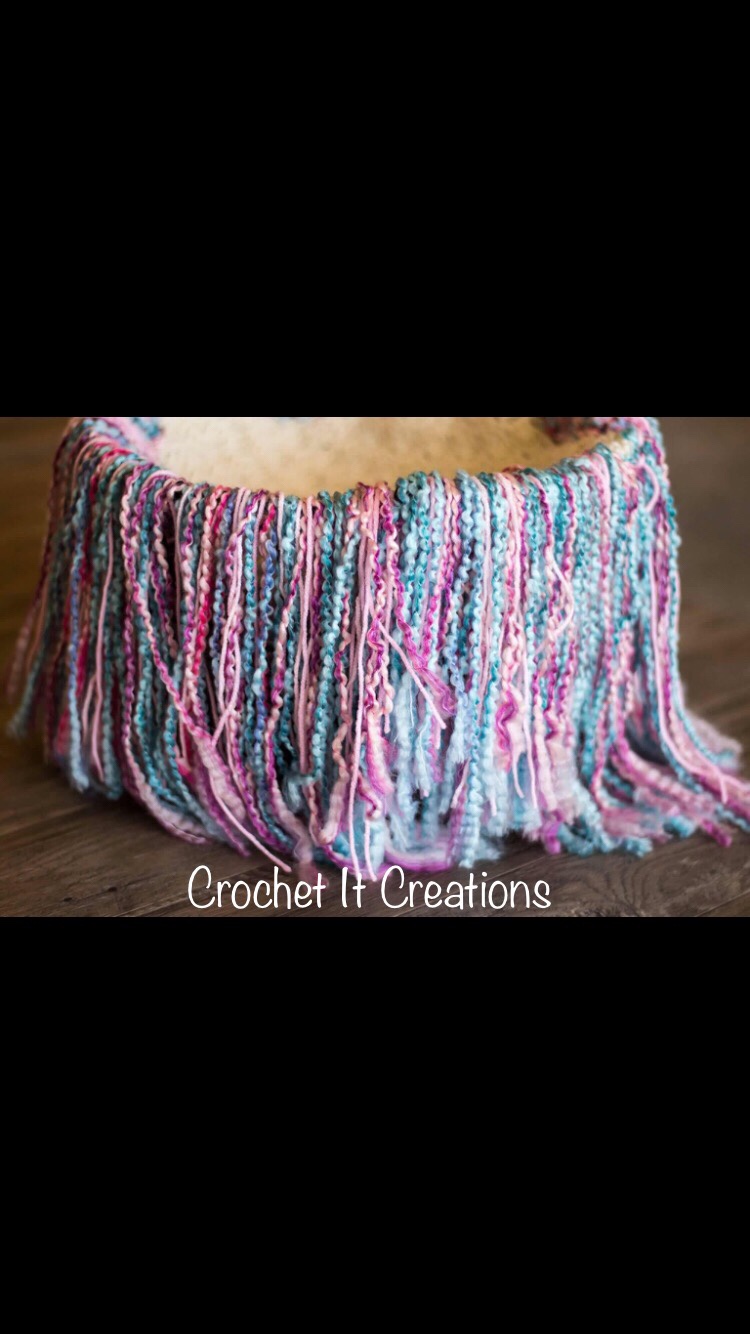
Do you crochet and do photography?? Or have a friend who does photography?? Or maybe just sell your crochet items?? This post on How to Make a Fringe Photo Prop is perfect for taking adorable photos. Imagine an sweet little newborn sleeping in the middle of that basket….aaaawww.

I have a friend who is a photographer and asked me to make her a few photo props. I started out with making some blanket squares. I made 2 using the Corner to Corner Crochet Blanket pattern with the Crab Stitch Border in about 18″ x 18″ square. Then I made 2 using the Bean Blanket Pattern in a square. I made 1 red, 1 cream, 1 tan, and 1 grey. They turned out perfect and I cannot wait to see them used in photos!

Then she wanted some fringe blankets that hang over baskets. Like the photo above. Since Easter is coming up, she wanted 1 in pastels and the other in browns. These Fringe Photo Props are fairly simple to make if you know how to crochet. Or, I suppose you could purchase something square and add fringe to it.

I used a basic worsted weight yarn and crocheted a Corner to Corner Blanket in 12″ square. Then, I added a border of single crochet, placing 2 sc then 3 sc at the ends of the dc blocks. Repeating the 2 sc then 3 sc sequence around with 3 sc in the 4 corners. See the video on the crab stitch border for up close look of single crochets. I did not add the crab stitch for the Fringe Photo Prop, but I did for the C2C squares.

How to Make a Fringe Photo Prop
Materials Needed
- K 6.5mm crochet hook
- 1 skein of Lion Brand Homespun or more skeins if using more than 1 color
- 1 skein of worsted weight yarn in a neutral color
- 1 – 12″ wide book or anything that wide
- scissors
- tapestry or finishing needle
How to make
- Crochet a Corner to Corner Blanket 12″ square using K hook and worsted weight yarn. See pattern here for how to crochet a C2C Blanket
- Take your 12″ book and your skein(s) of Homespun Yarn, wrap the yarn around the book a LOT. This will use about 1 whole skein or 1/2 of 2 skeins.
- Cut the ends of the yarn on 1 side of the book. This will give you many 24″ long pieces of yarn.
- Using K Crochet Hook, tie 4 pieces of yarn to one of the sc from the border. Make sure you are holding these pieces even when you are putting them on there. See video below for how to add fringe.
- Skip 3 sc and tie 4 more pieces of yarn to the next sc. Repeat this around. If you have extra pieces of yarn left over, place a few in between the fringe pieces until you have used up all your yarn.
- The fringe pieces should be even around since they were cut even, but trim up as necessary.
- Place C2C in a basket/crate/box/whatever you are using and let the fringe hang over the edges and take adorable photos!
This video is for adding fringe to my Fringe Infinity Scarf Pattern. Notice, it is skipping the same number of stitches and is exactly the same concept. Make sure you are keeping the yarn pieces even when tying them on there.
These would be so cute for different holidays. I’m imagining Red and Green for Christmas and Red, White, and Blue for 4th of July, and so on! The possibilities are endless.
I hope you enjoy this post as it was written just for YOU! Please let me know if you have any questions or even any suggestions! I love to hear feedback and see photos of your finished work.
Save for later or share with others using the share buttons at the top and bottom of post. If you have any questions please comment below or you can email me. I love to see photos of your work and read your comments. Follow Crochet It Creations on all of your favorite social media sites!
You may sell your items made from my patterns. Please do not use my photos as your own to sell your work. A link back to my site is much appreciated when selling your items from my patterns. I hope you enjoy!
This site is supported by advertisers and may contain affiliate links. See copyright & disclosure policyhere for more information.