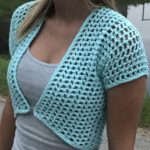
The Kaycee Tunic is a child size crochet top pattern in toddler through teen. It uses lace stitches to make it light weight for warmer months. Or layer during cooler months. Pattern uses light weight yarn, such as Lion Brand Coboo. It’s similar to my Kayce Cardi Crochet Pattern.
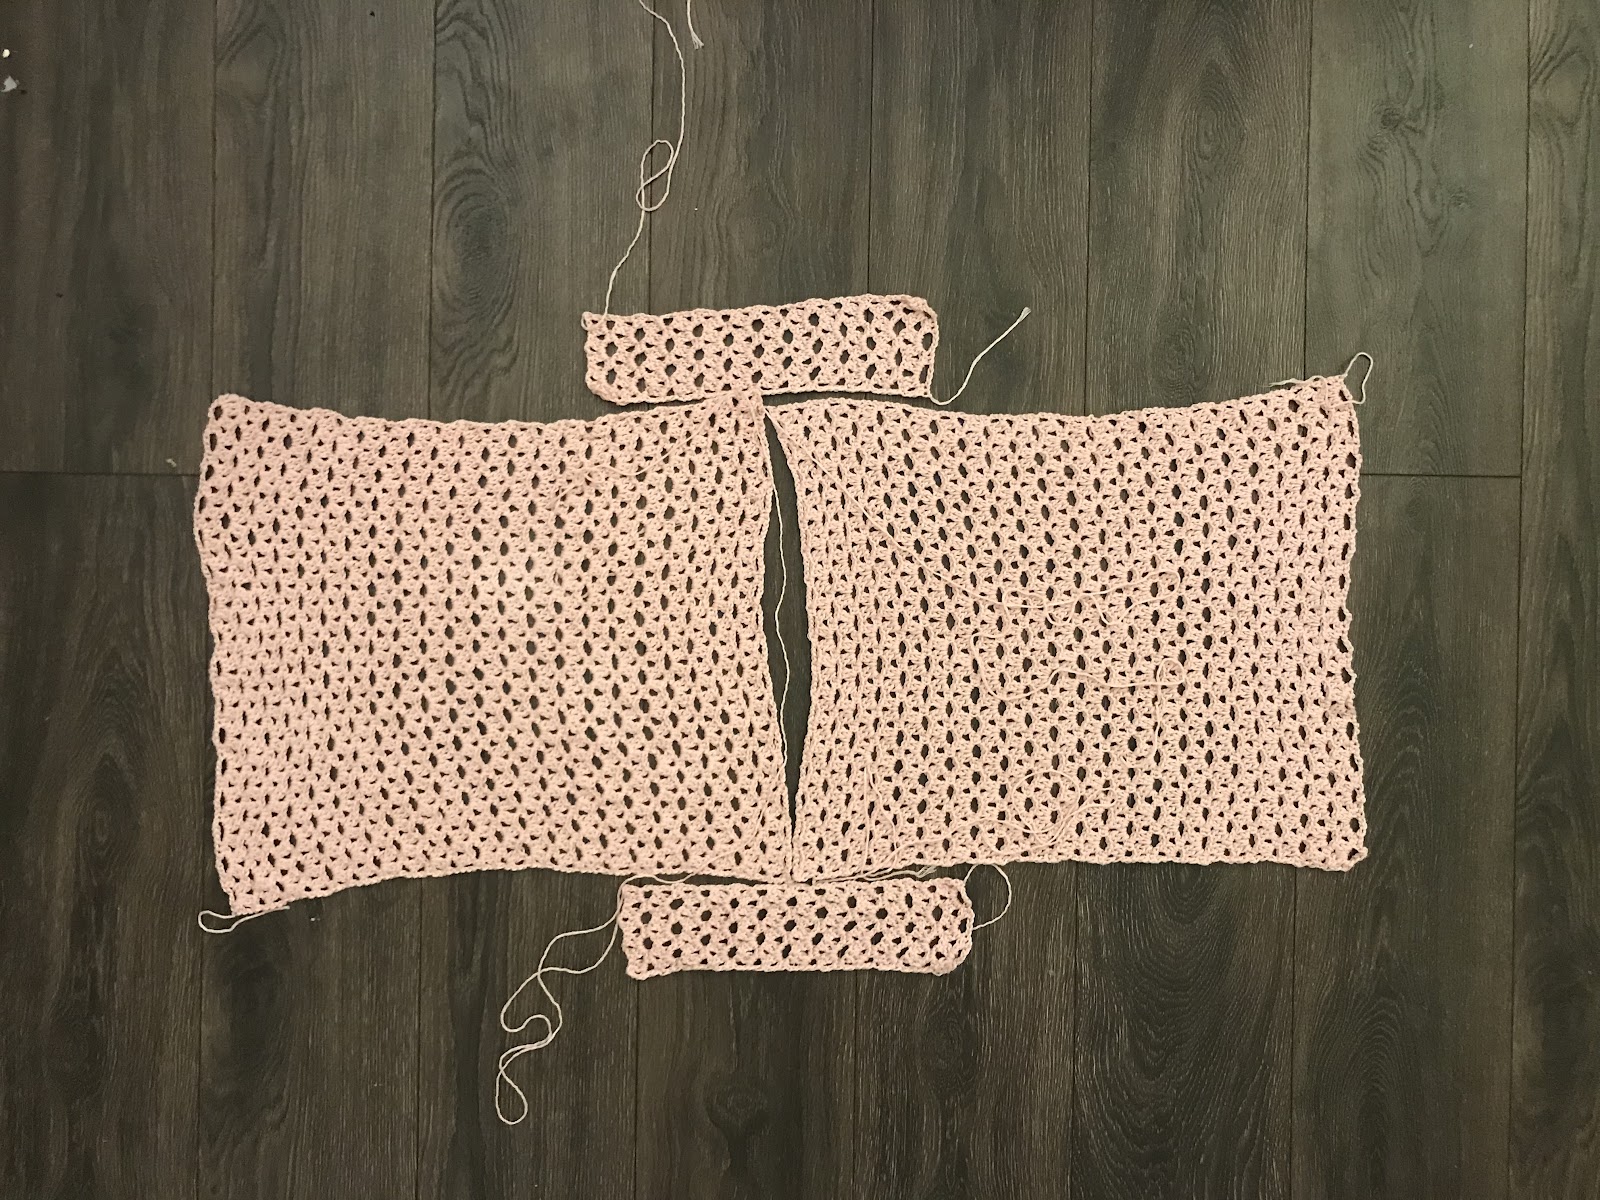
The tunic pattern is worked up in 4 panels of the same stitch repeat. No decreasing or increasing is necessary. There is sewing needed to attach the panels. Typical Crochet It Creations have minimal sewing and I tried different ways to eliminate what I could. So, if you are not a fan of sewing (like me), you can try slip stitching the panels together instead of sew.

Like I mentioned, the Kaycee Tunic crochet top comes in child sizes. Toddler size 2/4, child small 6/8, child large 10/12, and teen 14/16. The Kaycee Cardi came in child and adult sizes and that was my intention for the tunic, however during the testing phase things just weren’t working out. The stitches have a lot of stretch and the sizes just didn’t work out. I may attempt the adult sizes again.
Lion Brand Coboo Light #3 Yarn was used in the photos. It is a cotton/bamboo blend yarn. It’s super soft and light weight. It works perfect for summer or a beach cover up. You can replace with a similar weight yarn as long as you check gauge and adjust accordingly.

Kaycee Tunic Crochet Pattern
Materials Needed
- I 5.5mm Crochet Hook, or hk needed to obtain gauge
- Lion Brand Coboo Yarn (50% Cotton Bamboo, 232yd/212m, 3.5oz/100g) or use any light #3 that meets gauge
- Scissors
- Tapestry Needle
- Stitch Markers
Gauge
- 4” square = 8 rows and 4 shells (2DC, ch 2, 2DC) of the pattern. Obtain swatch by chaining 27 and following rows 1-5 of the pattern.
Stitches Used/Abbreviations (US Terms)
- Ch – Chain
- SC – Single Crochet
- DC – Double Crochet
- Join – Slip Stitch to 1st Stitch
Skill Level

Pattern Notes
- Lion Brand Coboo yarn is a light and soft yarn. It’s cotton/bamboo blend is perfect for summer clothing. Check yarnsub.com for a similar yarn or substitute for a yarn of your preference that meets gauge.
- Beginning ch 1 DOES NOT count as a SC, but beginning ch 3 DOES count as a DC.
- Beginning chain is multiple of 6 + 3, row repeat is 4 rows.
- Garment is made to be loose fitting and can fit a range of sizes. If you would like a longer fitting top, simply add more rows to panels 1 & 2. Since row repeat is multiples of 4, I suggest adding rows in multiples of 4. 4 rows will add 2 inches.
- The pattern repeat instructions are written out and is used for all 3 panels. Use Table 2 to determine your beginning chain count and ending row count. If you need clarification on working the pattern with the table see end of pattern where an example is written out for the toddler size.
- The panels are sewn together using a technique called the Mattress Stitch. See video HERE for how to construct the stitch pattern and sewing together.
- Pattern is for child sizes only, during the testing phase the adult sizes didn’t work out. Due to the nature of the stitches, they stretched too much.
Table 1. Sizes and Yarn Yardage
| Size | Bust Size | Yardage Used |
| Toddler (2-4) | Fits up to 24” | 2 Coboo cakes, 300 yds |
| Small Child (6-8) | Fits up to 26” | 2 Coboo cakes, 400 yds |
| Child (10-12) | Fits up to 28” | 3 Coboo cakes, 500 yds |
| Teen (14-16) | Fits up to 32” | 3 Coboo cakes, 600 yds |
Start crocheting pattern by using Table 2 and written pattern instructions to determine amount to chain and row to end on. Begin making 2 of Panel 1, the front and back body of the cardigan. Make two of Panel 2, the sleeves.
Table 2. Beginning Chain and Ending Row Count
| Size | Panel 1 (make 2) – Beg Ch | Panel 1- End Row Count | Panel 2 (make 2) – Beg Ch | Panel 2 – End Row Count |
| Toddler (2-4) | Ch 75 | 33 Rows | Ch 15 | 16 Rows |
| Small Child (6-8) | Ch 87 | 37 Rows | Ch 15 | 20 Rows |
| Child (10-12) | Ch 99 | 41 Rows | Ch 21 | 24 Rows |
| Teen (14-16) | Ch 105 | 45 Rows | Ch 21 | 28 Rows |

Start Tunic Here – All Panels Pattern Stitch Repeat
Chain according to Table 2 amount for size and panel making. Note that beginning chain will be longer that the actual panel measurements as the width will become more narrow as working.
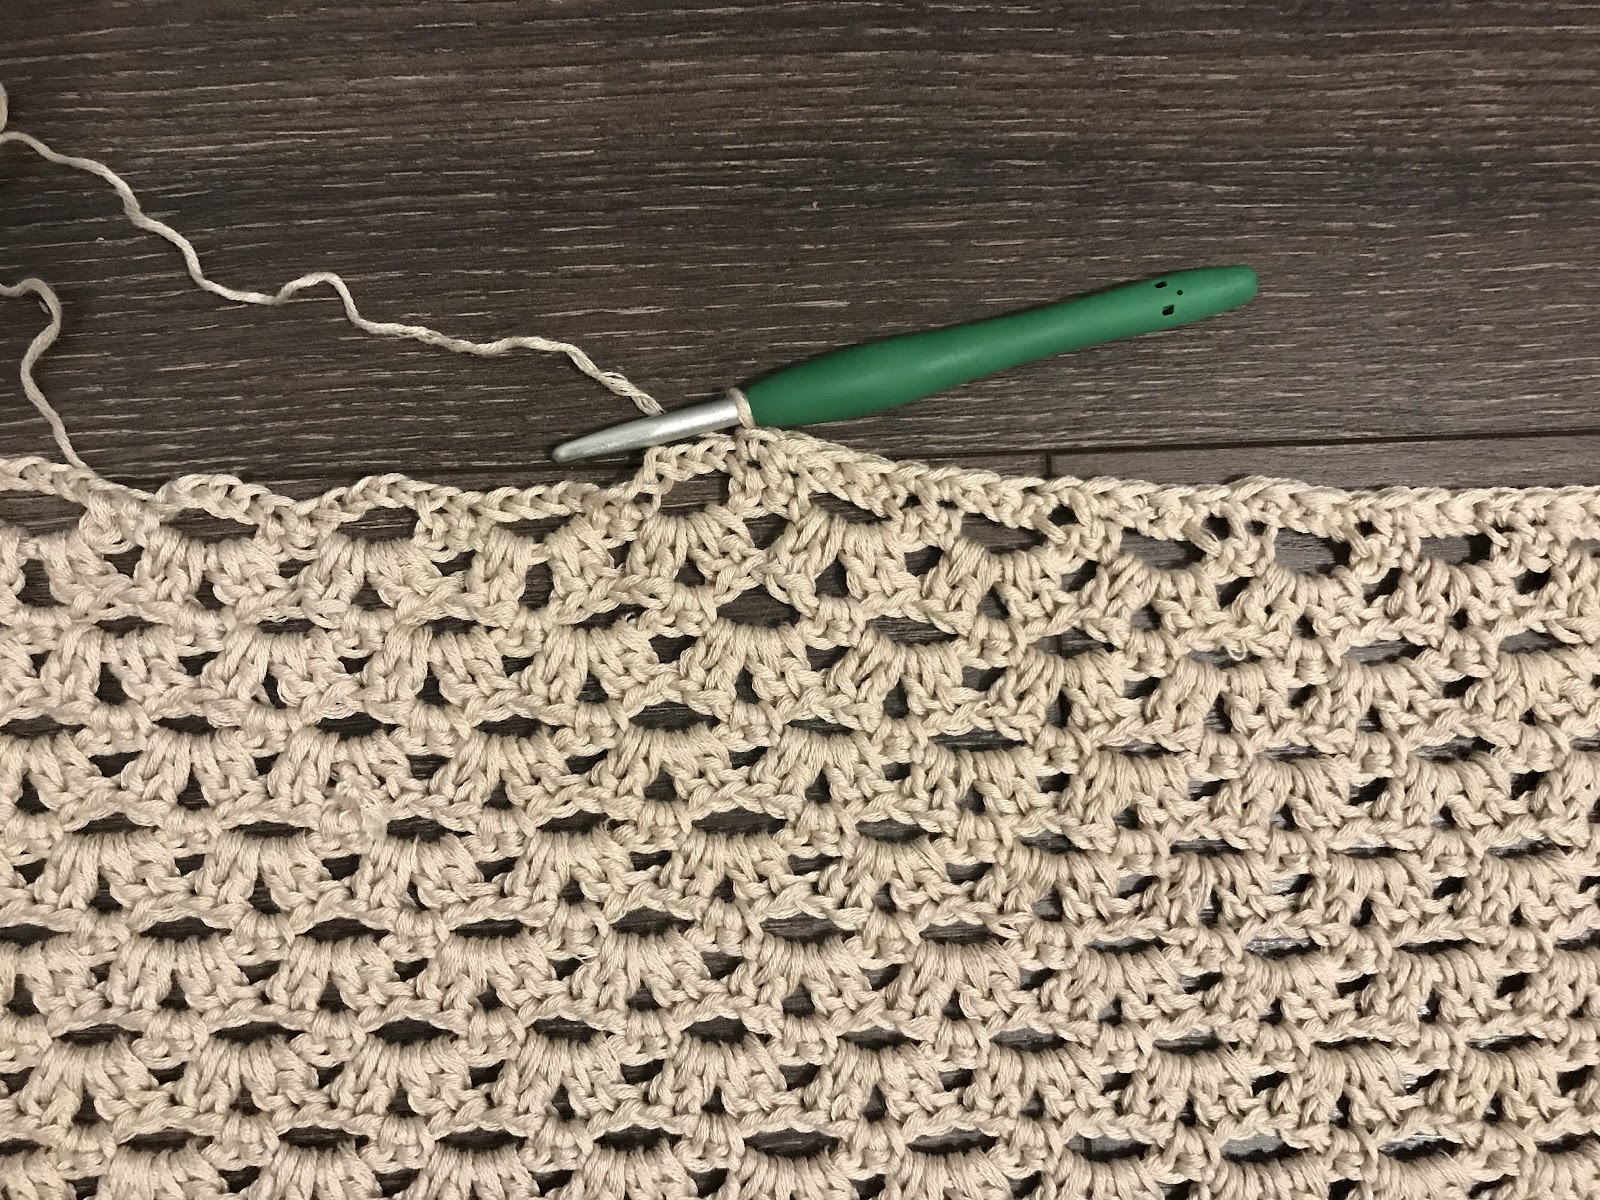
Row 1: SC in second ch from hook and SC in next ch, *ch 4, skip 4 chs, SC in next 2 chs;* repeat from * to * across. Turn.
Row 2: Ch 3 (counts as DC), (2DC, ch 2, 2DC) in each ch-4 space across, skip 1 stitch, DC in last stitch. Turn.
Row 3: Ch 5 (counts as DC + ch 2), *2SC in ch-2 space, ch 4;* repeat from * to * across, ch 2, DC in last stitch. Turn.
Row 4: Ch 4 (counts as DC + ch 1), 2DC in first ch-2 space, (2DC, ch 2, 2DC) in each ch-4 space across, 2DC in last ch-2 space, ch 1, DC in last stitch. Turn.
Row 5: Ch 1, SC in first stitch and ch-1 space. *ch 4, 2SC in ch-2 space;* repeat from * to * across, ch 4, SC in ch-1 space and SC in last stitch. Turn.
Repeat rows 2 – 5 until meets row requirements for size and panel making. Finish off, leaving a long tail for sewing together.
When you are finished with all 4 pieces, move on to construction to sew the panels together.
Photo 1. Pattern repeat
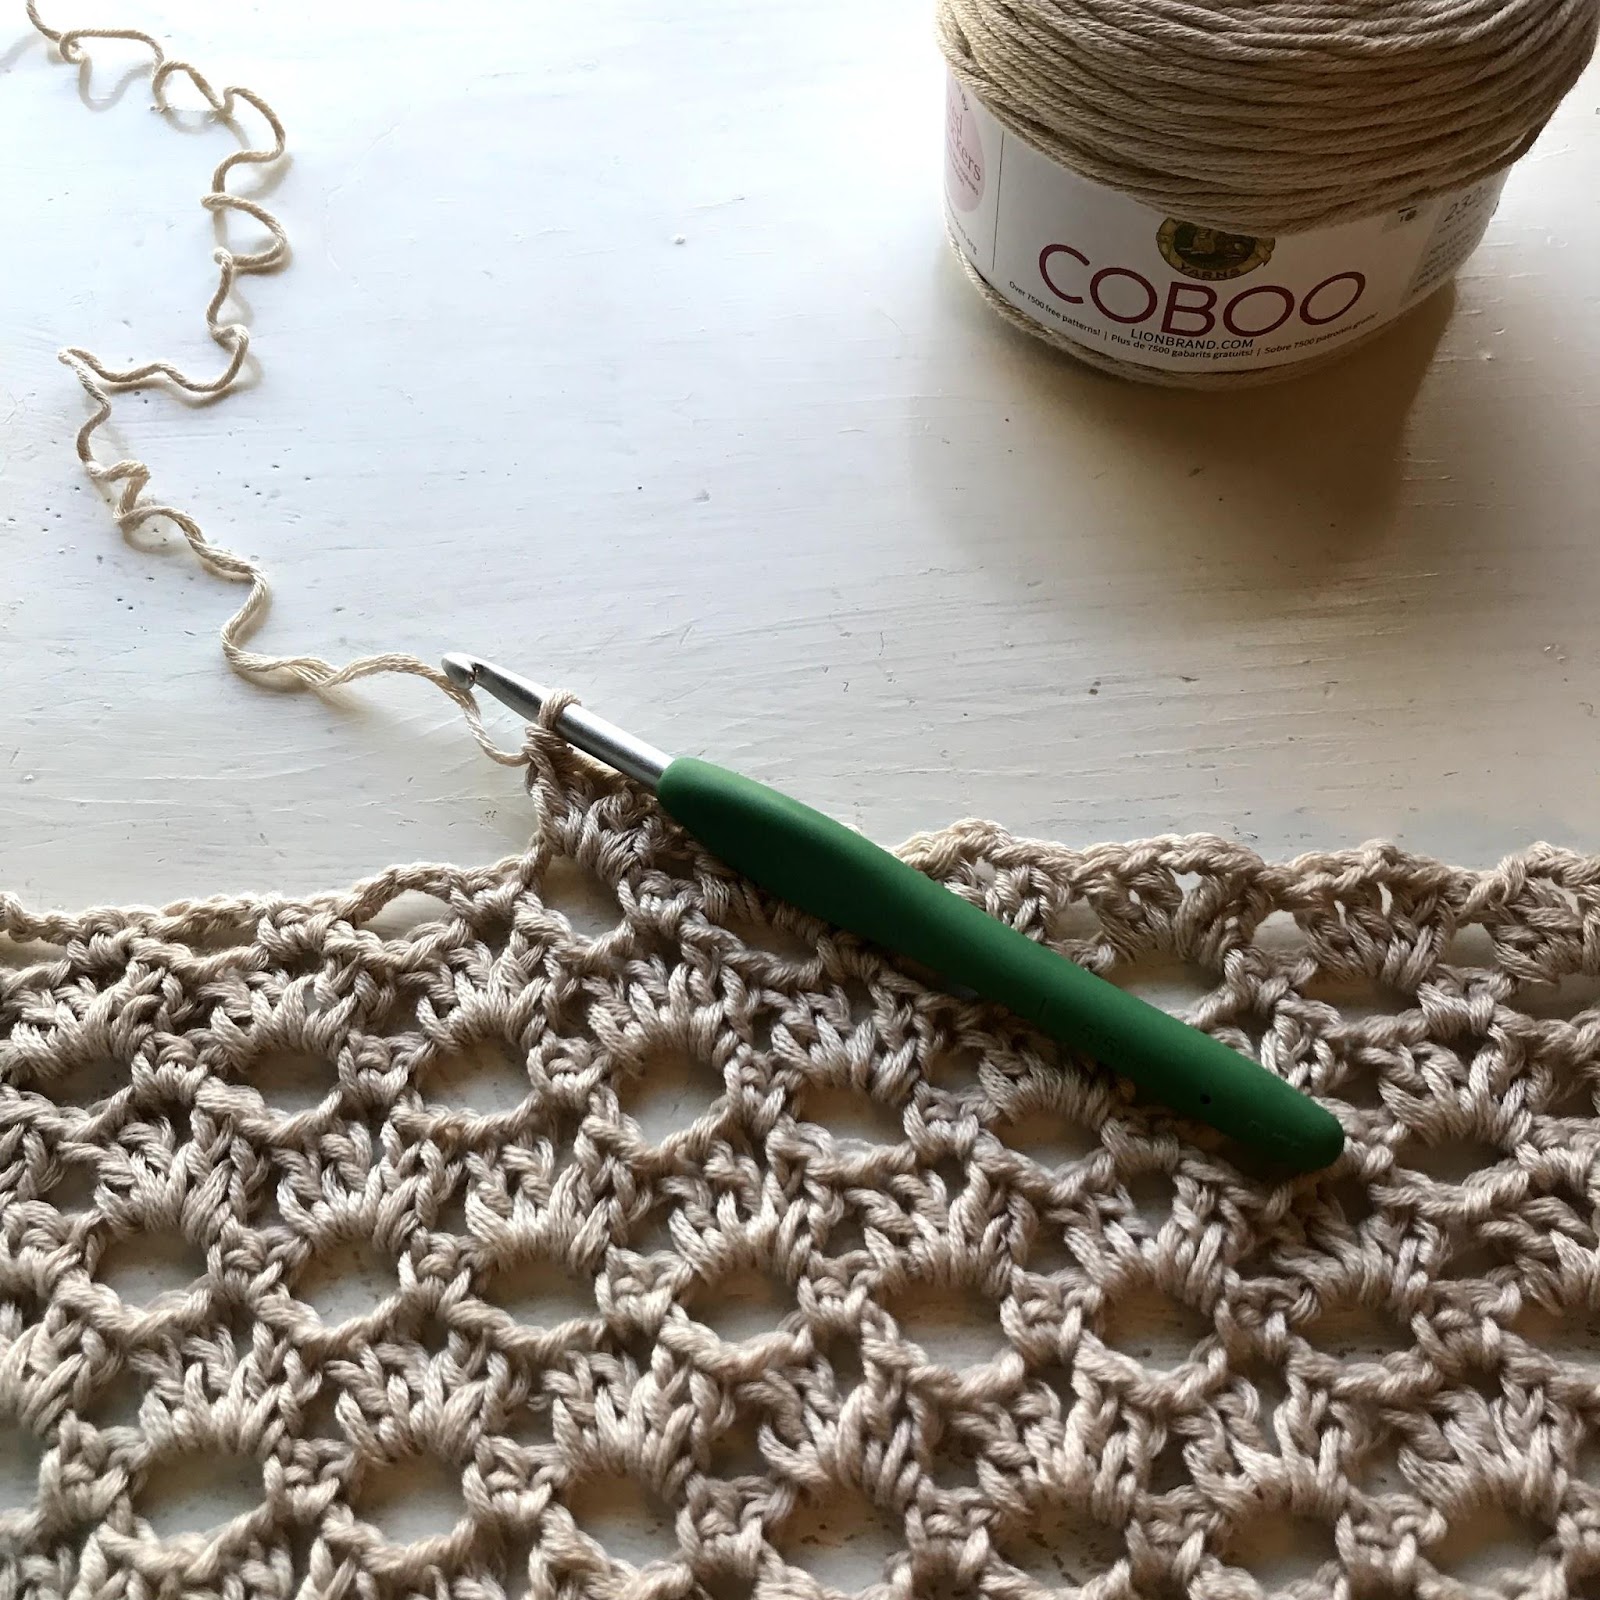
Table 3. Panel Measurements for Each Size
| Size | Panel 1 | Panel 2 |
| Toddler (2-4) | 12”W x 16”L | 2”W x 8”L |
| Small Child (6-8) | 14”W x 18”L | 2”W x 10”L |
| Child (10-12) | 16”W x 20”L | 3”W x 12”L |
| Teen (14-16) | 17”W x 22”L | 3”W x 14”L |
Construction
Lay Panel 1 out flat. Line up other Panel 1to be facing at the shoulders. The last rows from both Panels 1s will be matching up at the shoulder.
Choose a right side to your work and make sure you have it facing up on both panels so they match. Use your long tail and mattress stitch them together from the shoulders in toward the neck for as far in as your liking.
See companion video for the Kaycee Cardi Crochet Pattern HERE which can be a guidance for the stitch repeat and sewing together, although it is a different pattern.
Photo 2. How to lay the Panels for sewing
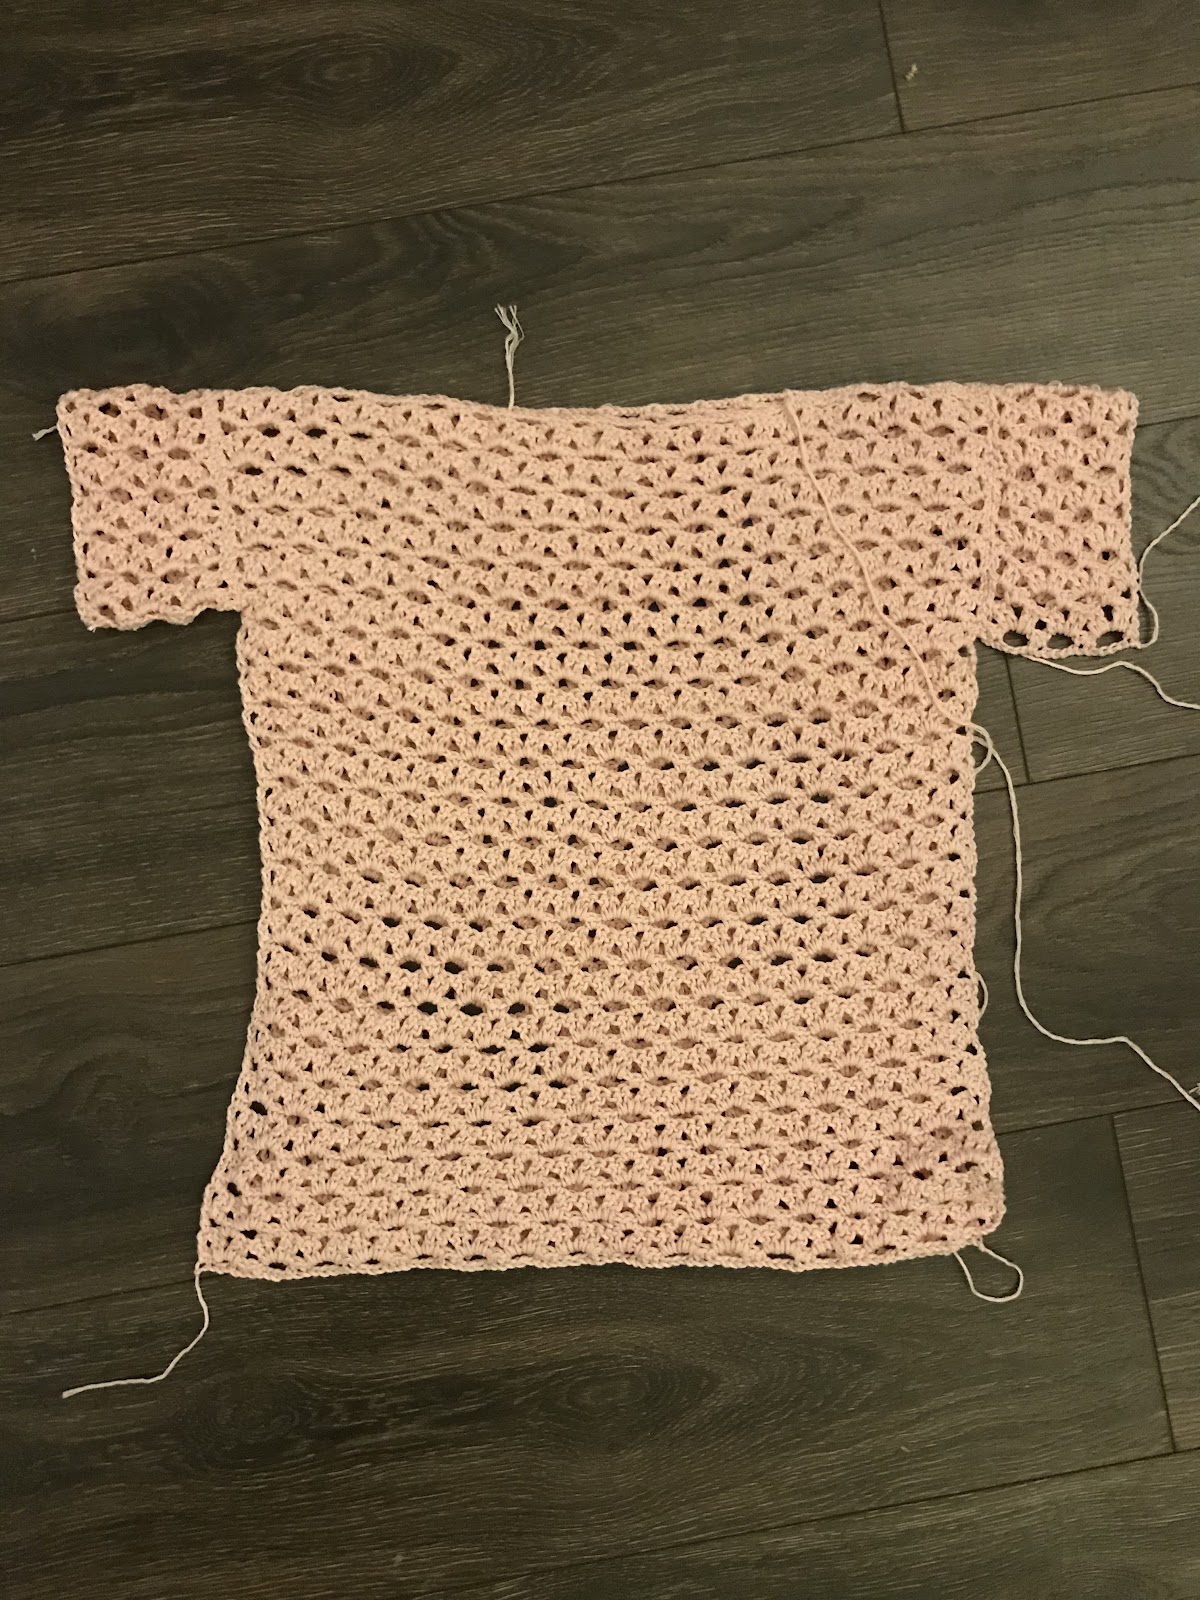
Lay Panel 2s centered at the shoulders where you just sewed Panel 1stogether, making sure the right side faces up to match. Mattress stitch panel 2 to the side in the middle of the shoulder to form the sleeve.
Fold garment in half at the shoulder seams. Sew Panel 2 closed at the bottom to make a sleeve and continue to sew down the sides closing Panel 1s.
Photo 3. Sewing sides of Panel 1s together and under sleeves.
Now you are ready for the border.
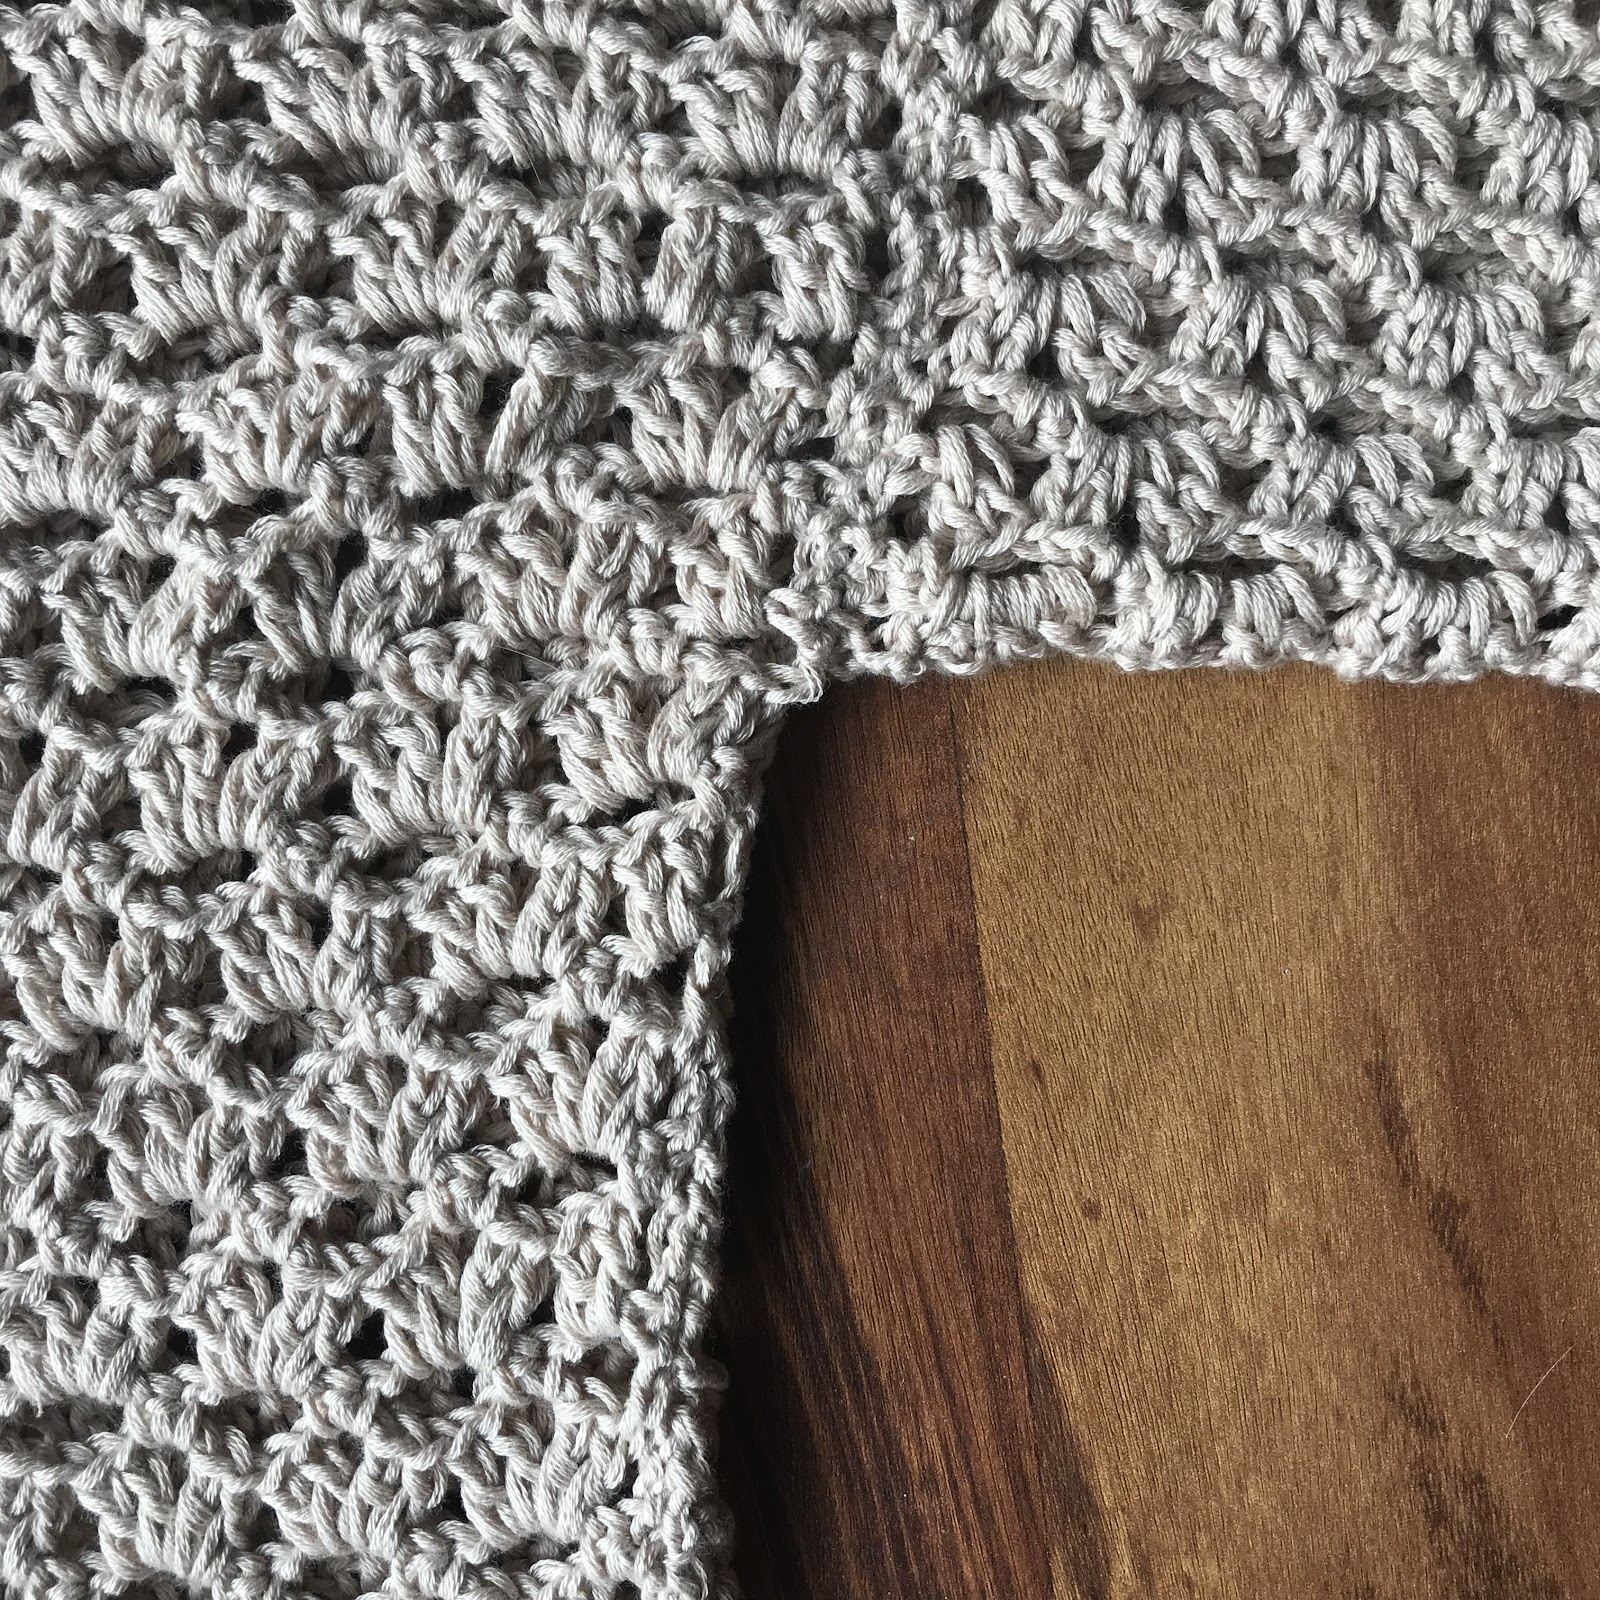
Photo 4. Photo of the sleeve seam
Border
Slip stitch to one of the sleeves (Panel 2), ch 1, SC evenly around. Join. Finish off. Repeat on other sleeve.
Slip stitch to neck. Ch 1, SC evenly around the neck, join.
Slip stitch to bottom. Ch 1, SC across bottom you may notice that the beginning chain stitches look uneven. Even this out by placing SC in each SC, then SC2TOG twice in chains of ch-4 space.
Photo 5. Bottom border and sc2tog stitches
Weave in all ends and you are done! You did it!
If you prefer to see the directions written out, here is an example of the toddler size. If you are making other sizes, substitute the beginning chain and row count per Table 2.
Example of Toddler Size Tunic Written Out
Panel 1 – make 2
Chain 75
Row 1: SC in second ch from hook and SC in next ch, *ch 4, skip 4 chs, SC in next 2 chs;* repeat from * to * across. Turn. (74)
Row 2: Ch 3 (counts as DC), (2DC, ch 2, 2DC) in each ch-4 space across, skip 1 stitch, DC in last stitch. Turn. (74)
Row 3: Ch 5 (counts as DC + ch 2), *2SC in ch-2 space, ch 4;* repeat from * to * across, ch 2, DC in last stitch. Turn. (74)
Row 4: Ch 4 (counts as DC + ch 1), 2DC in first ch-2 space, (2DC, ch 2, 2DC) in each ch-4 space across, 2DC in last ch-2 space, ch 1, DC in last stitch. Turn. (74)
Row 5: Ch 1, SC in first stitch and ch-1 space. *ch 4, 2SC in ch-2 space;* repeat from * to * across, ch 4, SC in ch-1 space and SC in last stitch. Turn. (74)
Rows 6 – 33: repeat rows 2 – 5. Finish off
Panel 2 – make 2
Chain 15
Row 1: SC in second ch from hook and SC in next ch, *ch 4, skip 4 chs, SC in next 2 chs;* repeat from * to * across. Turn. (14)
Row 2: Ch 3 (counts as DC), (2DC, ch 2, 2DC) in each ch-4 space across, skip 1 stitch, DC in last stitch. Turn. (14)
Row 3: Ch 5 (counts as DC + ch 2), *2SC in ch-2 space, ch 4;* repeat from * to * across, ch 2, DC in last stitch. Turn. (14)
Row 4: Ch 4 (counts as DC + ch 1), 2DC in first ch-2 space, (2DC, ch 2, 2DC) in each ch-4 space across, 2DC in last ch-2 space, ch 1, DC in last stitch. Turn. (14)
Row 5: Ch 1, SC in first stitch and ch-1 space. *ch 4, 2SC in ch-2 space;* repeat from * to * across, ch 4, SC in ch-1 space and SC in last stitch. Turn. (14)
Rows 6 – 16: repeat rows 2 – 5 ends with a row 4 repeat (DC row). Finish off, leaving a long tail for sewing.
*Move on to construction to sew the panels together.
I do suggest to fold garment instead of hanging to store to prevent it from stretching.
If you want to try out the cardigan pattern, which uses the same type of stitches but is open in the front, find it HERE from Ravelry. You can also see the Toddler Size video HERE from Crochet It Creation’s YouTube channel of the basic stitches and sewing the garment together.


Save for later or share with others using the share buttons at the top and bottom of post. If you have any questions please comment below or you can email me at jessica@crochetitcreations.com.
I love to see photos of your work and read your comments. Follow Crochet It Creations on all of your favorite social media sites! Join my Crochet It Creations Crochet Friends Facebook group to further connect!
You may sell your items made from my patterns. Please do not use my photos as your own to sell your work. A link back to my site is much appreciated when selling your items from my patterns. I hope you enjoy!
This site is supported by advertisers and may contain affiliate links. See copyright & disclosure policy here for more information.

I mostly knit, so am not as familiar with crochet instructions. In row 3 of the pattern, it says
*2SC in ch-2 space, ch4,* repeat from * to * across, ch2,
DC in last stitch. Am I to understand that towards the end of the row I’ll ch-4, then ch-2 (thereby having a ch-6), then a DC in last stitch?