Do you remember the Ana Series? 7 Beautiful patterns with fun textured stitches. Well, I’ve got a new series – the Mainstream Patterns. So, check out the Mainstream Cowl Crochet Pattern!
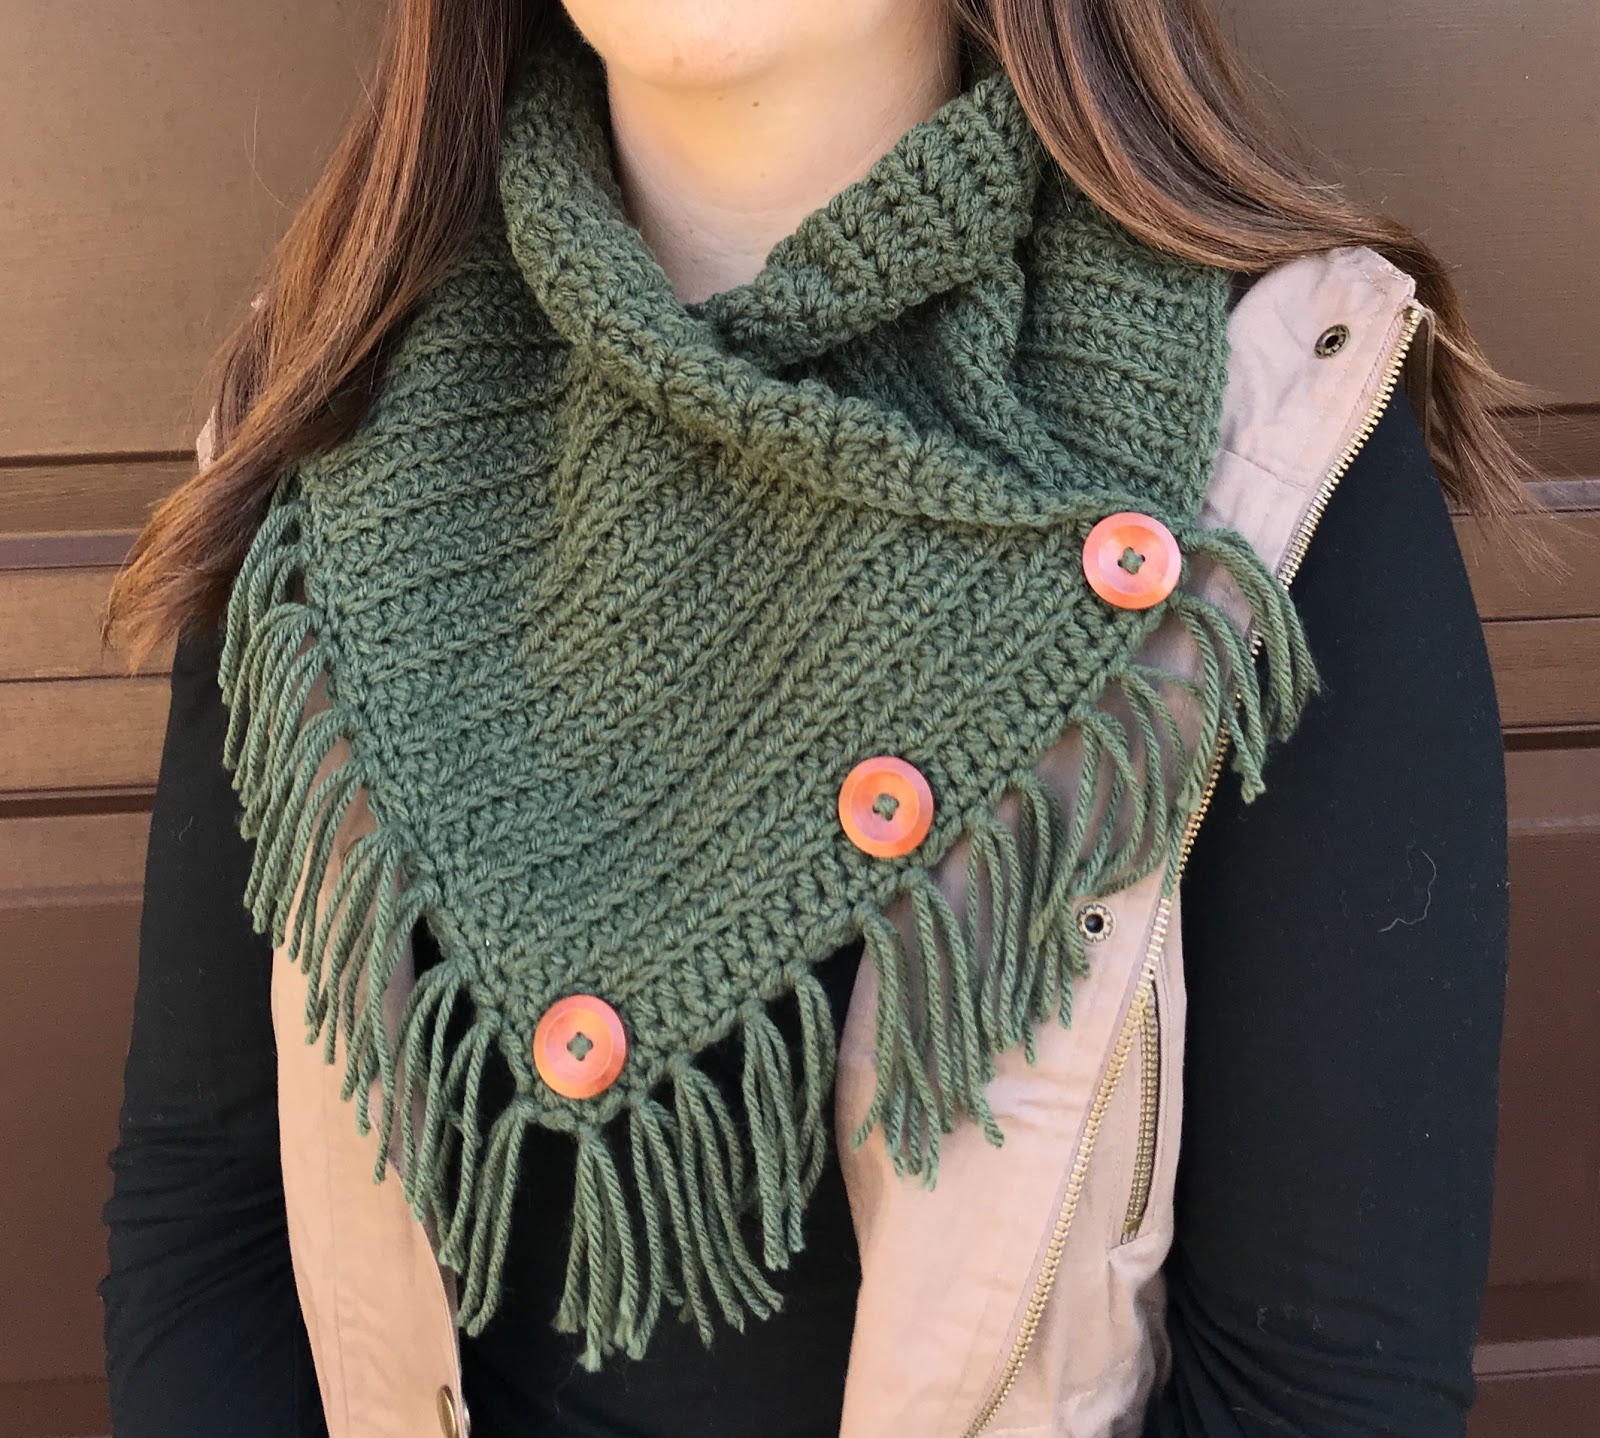
The Mainstream Cowl is a fun, easy pattern. It is worked in a rectangle with half double crochet stitches. Add buttons and some fringe to complete the look.
A cowl is basically a neck warmer. It’s a closer fit than a regular scarf, but it’s not bulky. It slides over your head and lies perfectly across your chest.

Mainstream Cowl Crochet Pattern
Materials Needed
- I 5.5 mm Crochet Hook, or size needed to obtain gauge
- 250 Yards Medium #4 Weight Yarn, 100% acrylic used
- Scissors
- Tapestry Needle
- Optional: 3 or 4 – 1” wooden buttons
Gauge
- 4” square = 8 rows x 14 HDC using BLO, FLO of the pattern
Stitches Used/Abbreviations (US Terms)
- SC – Single Crochet
- FHDC – Foundation Half Double Crochet
- HDC – Half Double Crochet
- Sl St – Slip Stitch
- Ch – Chain
- Join – Sl St to the top of first stitch
- St(s) – Stitch(es)
- RS – Right Side
- WS – Wrong Side
Pattern Notes
- Beginning chain DOES NOT count as a stitch
- Pattern is worked in a long rectangle
Row 1: FHDC 28, turn.
Row 2 (RS): Ch 1, HDC in BLO across, HDC through both loops on last st, turn. (28)
Row 3 (WS): Ch 1, HDC in FLO across, HDC through both loops on last st, turn. (28)
Rows 4 – 70: Repeat rows 2 & 3
Measuring approximately 34”L x 8.5”W
Do not finish off, continue to work border around. Ch 1, turn and work along the sides of the rows. SC evenly around (I typically place 1 SC in 1 row, then 2 SC in the next row) placing 3 SC in each corner, join. Finish off, leaving a long tail for sewing on buttons, about 2 ft.
Photo 1 – Finished Rectangle
With WS of the rectangle facing up, fold one side over the other where the corners meet together to make a point (see Photo 3). RS is now showing.
Photo 2 – Upclose photo of Right Side
Photo 3 – Folded Crochet Cowl
Using tail and tapestry needle, sew on 3-4 buttons through both layers. They will not be functioning buttons, more for style. If you are not adding fringe, sew the corners together where the 2 layers meet up to hold together.
Photo 4 – Finished Cowl before fringe
To attach fringe, cut strips of yarn about 6” long. I do this by wrapping yarn around a small notepad or whatever I can find. Then I cut one side so all the strips are the same length.
Attach fringe to the front of the cowl going through both layers.
Photo 5 – Attaching Fringe
Photo 6 – Finished Crochet Cowl with Fringe
Save for later or share with others using the share buttons at the top and bottom of post. If you have any questions please comment below or you can email me at jessica@crochetitcreations.com.
I love to see photos of your work and read your comments. Follow Crochet It Creations on all of your favorite social media sites! Join my Crochet It Creations Crochet Friends Facebook group to further connect!
You may sell your items made from my patterns. Please do not use my photos as your own to sell your work. A link back to my site is much appreciated when selling your items from my patterns. I hope you enjoy!
Also, check out the matching Mainstream Beanie & Ear Warmer Crochet Patterns


