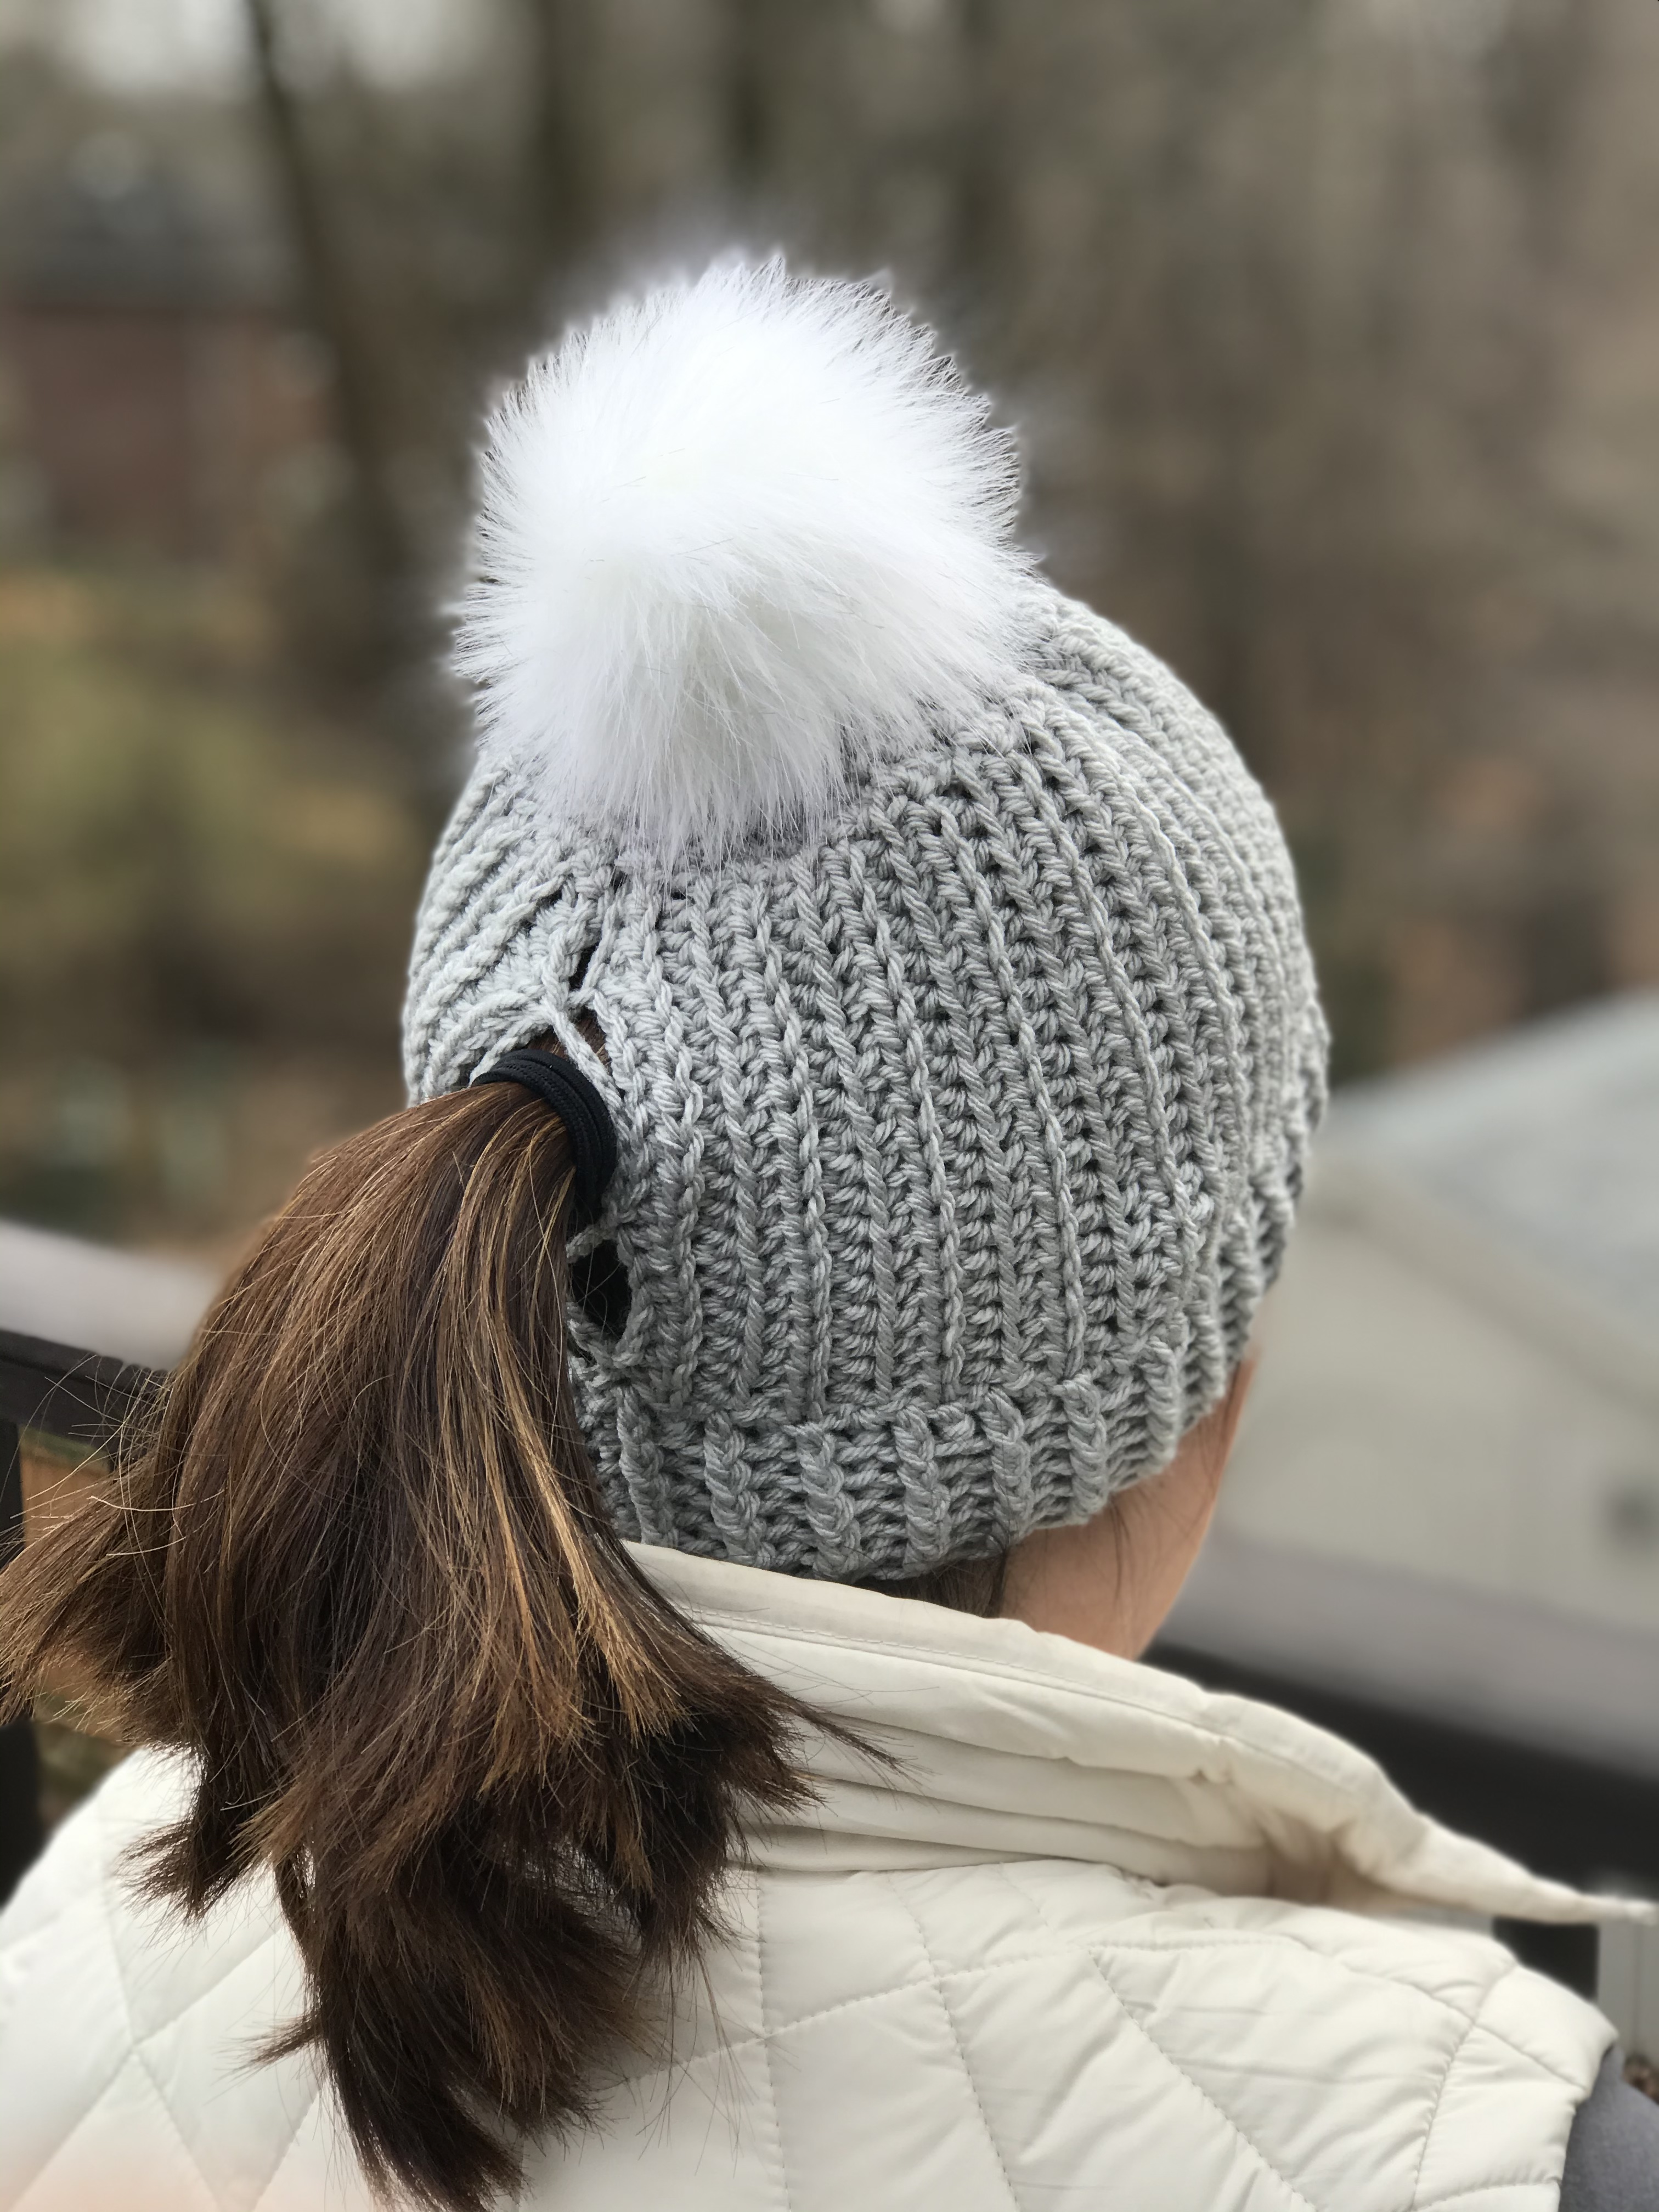
It’s a Crocheted Hat and it’s perfect for your Ponytail!
If you are familiar with my Mainstream Patterns, you will love this pattern too! If you are not familiar with my Mainstream patterns, then let me tell you about them.
I have a whole series of Mainstream Patterns that are worked with Half Double Crochet Stitches using Back Loop and Front Loop Only technique. It gives them a beautiful look in a simple way. The patterns come in a Beanie, Twisted Ear Warmer, Cowl, and now a Ponytail Hat!
What you will notice with the Mainstream hats is that they are first worked in vertical rows. This is a simple technique that looks almost knitted. It is perfect for this Ponytail Hat as it can leave an opening for your Ponytail. The opening can be for a Ponytail at 3 different levels: low pony, medium pony, and high pony.

Mainstream Ponytail Hat Crochet Pattern
Materials Needed
- H 5 mm Crochet Hook, or size needed to meet gauge
- 175 to 200 yards of I Love This Yarn! from Hobby Lobby Medium #4 Weight Yarn (100% acrylic, 7oz/199g, 355yds/325m)
- Scissors
- Tapestry Needle
- Optional: Supplies to make Faux Fur Pom Pom
Stitches Used/Abbreviations (US Terms)
- SC – Single Crochet
- SC2TOG – Single Crochet 2 Stitches Together
- HDC – Half Double Crochet
- FHDC – Foundation Half Double Crochet
- FPHDC – Front Post Half Double Crochet
- BPHDC – Back Post Half Double Crochet
- Sl St – Slip Stitch
- Ch – Chain
- FLO – Front Loop Only
- BLO – Back Loop Only
- WS – Wrong Side
- RS – Right Side
Gauge
- 4” square = 15 HDC x 9 rows using BLO, FLO repeat
Sizes
- Pattern is for sizes Child 6-10 yrs (8”H x 19”W) and Adult (8.5”H x 20”W).
Pattern Notes
- Pattern is written with Child listed first and Adult written after.
- Hat is made with an opening in the back for your ponytail at any level.
- Beginning chain DOES NOT count as a stitch.
- Learn how to make your own Faux Fur Pom Poms with faux fur fabric purchased from your local craft store. See post HERE for step-by-step instructions. Or if you purchase Pom Poms with elastic, sew a button to the inside.

Body of Beanie in Vertical Rows
Row 1 (WS): FHDC 16(18), turn. OR Ch 17(19), HDC in 2nd ch from hook and each ch across, turn. (16, 18)
Row 2 (RS): Ch 1, HDC BLO across, HDC in BOTH loops of last st, turn. (16, 18)
Row 3 (WS): Ch 1, HDC FLO across, HDC in BOTH loops of last st, turn. (16, 18)
Rows 4 – 36 (40): Repeat rows 2 & 3
Ch 1, turn and Sl St in each st across the last row.
Ch 6, join the bottom corner of the first row to form a circle. See photo 3. This will create an opening for the ponytail between the first and last row of the Body of the Beanie. Work the brim horizontally across the chain and the bottom of the rows.
Photo 1 – Working in FLO & BLO with RS facing in photo
Photo 2 – Sl St across the last row, WS facing in photo

Photo 3 – Ch 6, Sl St to the first row to form a circle.

Bottom Brim
Rnd 1: Ch 1, HDC in each of the 6 chains and evenly in the ends of the rows around, join with a Sl St to top of first st. (60, 66) *Tip to place 3 sts over each 2 rows of HDC.
Rnd 2 – 5 (6): Ch 1, [FPHDC in 1 st, BPHDC in next st] around, join. Finish off, weave in the end.
Photo 4 – Working HDC brim across bottom of rows

Photo 5 – FPHDC & BPHDC for the brim

Top of Beanie
Join to the top of Beanie (right of the opening) with a Sl St, see photo 6.
Rnd 1: Ch 1, SC evenly around (working over the ponytail opening), join. (54, 60)
EXTRA ROUND ADULT SIZE ONLY: Ch 1, [SC in 8 sts, SC2TOG] repeat around, join. (54)
ALL SIZES – Rnd 2: Ch 1, [SC in 4 sts, SC2TOG] repeat around, join. (45)
Rnd 3: Ch 1, [SC in 3 sts, SC2TOG] repeat around, join. (36)
Rnd 4: Ch 1, [SC in 2 sts, SC2TOG] repeat around, join. (27)
Rnd 5: Ch 1, [SC in 1 st, SC2TOG] repeat around, join. (18)
Rnd 6: Ch 1, SC2TOG in each st around, join. (9)
Finish off leaving a tail for closing the hole. Using a tapestry needle, weave in and out of the last row’s stitches. Pull tight to close hole, knot from the inside a few times and weave in the end. Optional to attach a yarn or Faux Fur Pom Pom to the top.
Photo 6 – SC around the top of the beanie

Make Criss Cross
Join with Sl St to the bottom right of Ponytail opening. Ch 10, Sl St to 8th st up from the bottom on the left, Ch 8, Sl St to 16th st from the bottom on the right. Finish off. (see photos 7-9)
Join with Sl St to the bottom left of the Ponytail opening. Ch 10, Sl St to 8th st up from the bottom on the right, Ch 8, Sl St to 16th st from the bottom on the left. Finish off. Weave in all ends. (see photos 10-14)
Photo 7: Join with Sl St to bottom right of opening
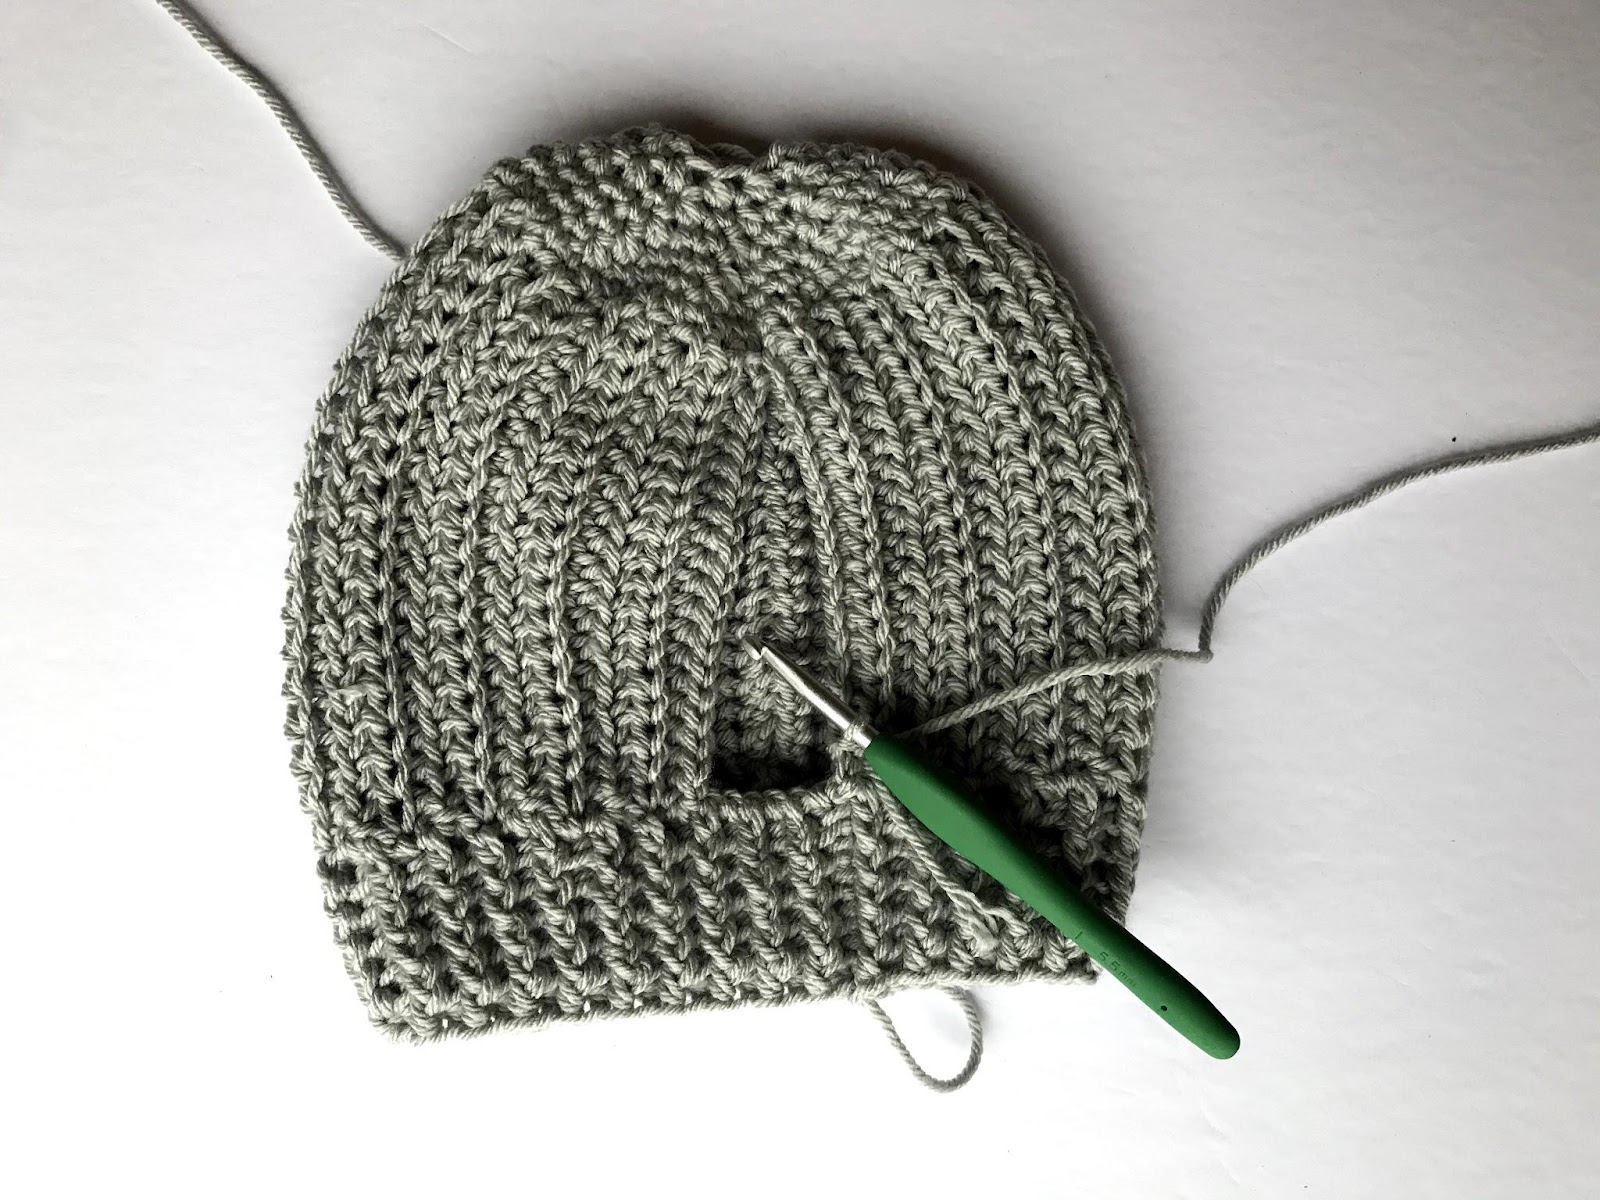
Photo 8: Ch 10, Sl St to the 8th st up on the left

Photo 9: Ch 8, Sl St to the 16th st on the right
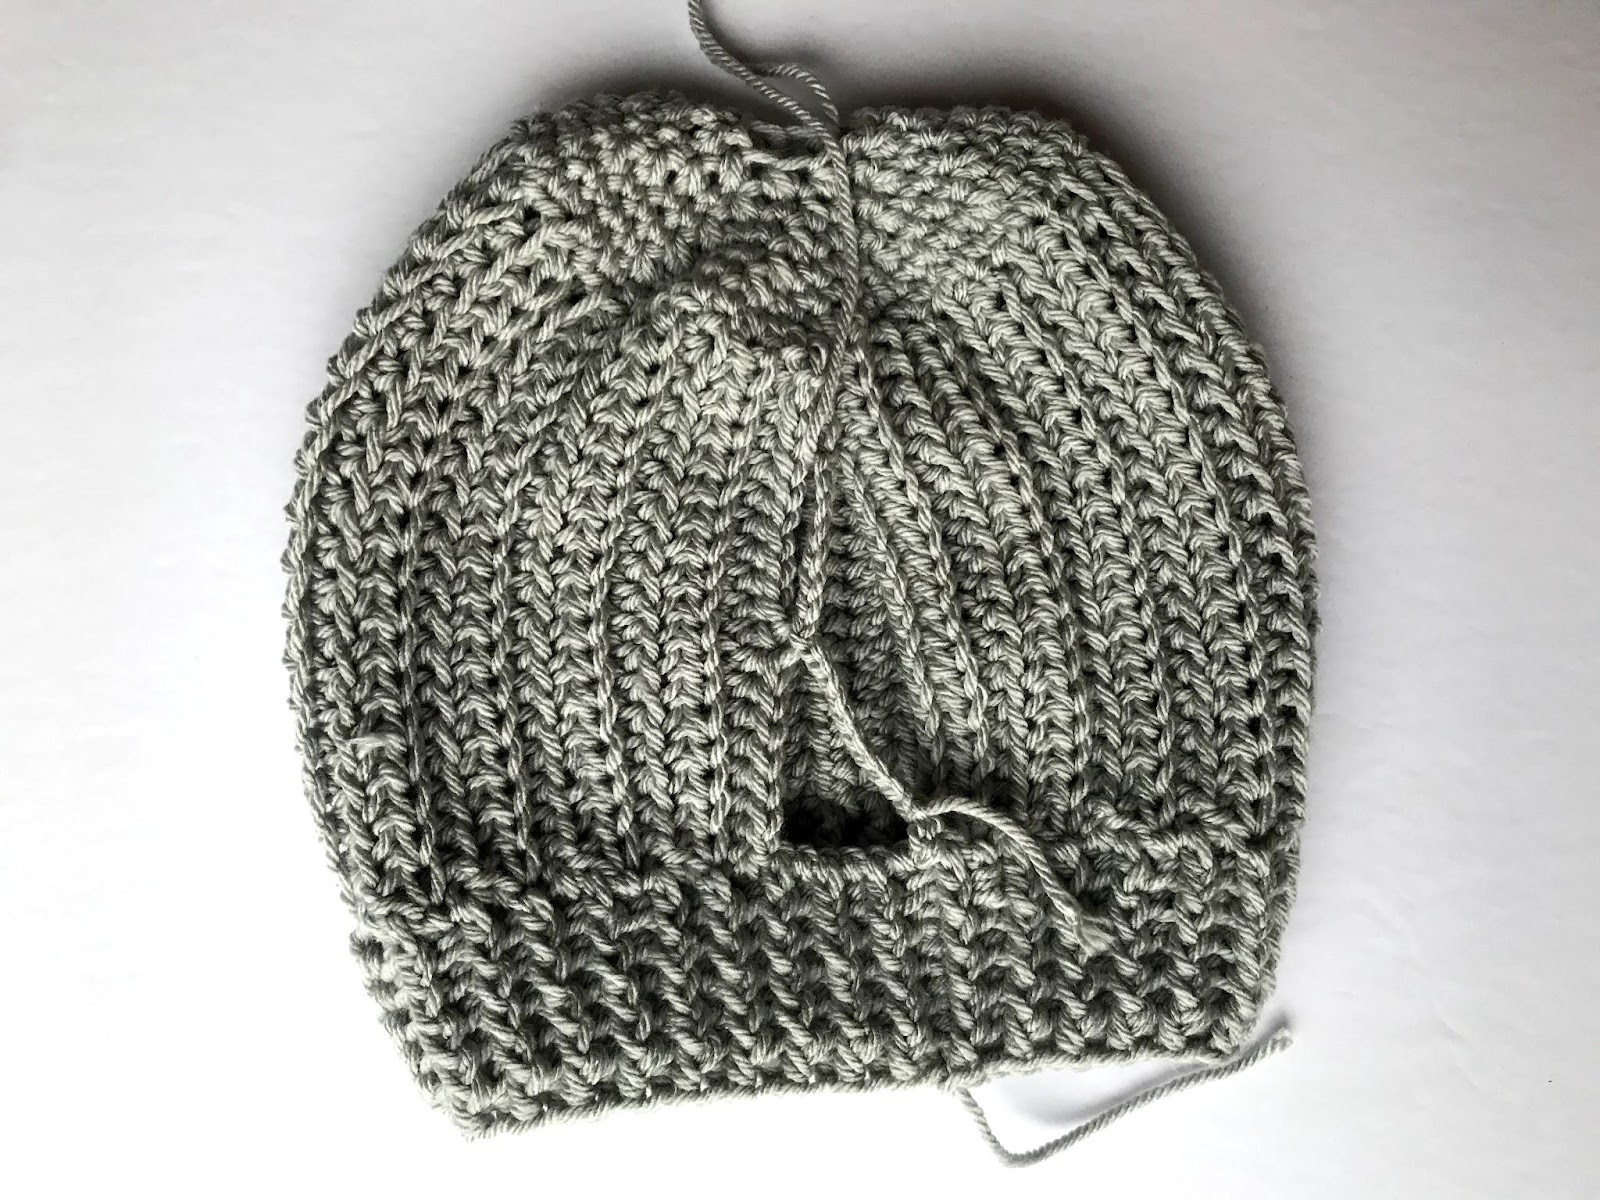
Photo 10: Sl St to the bottom left of opening

Photo 11: Ch 10, Sl St to the 8th st up on the right

Photo 12: Ch 8, Sl St to the 16th st on the left

Photo 13: Weave in all ends, optional to add a Pom Pom
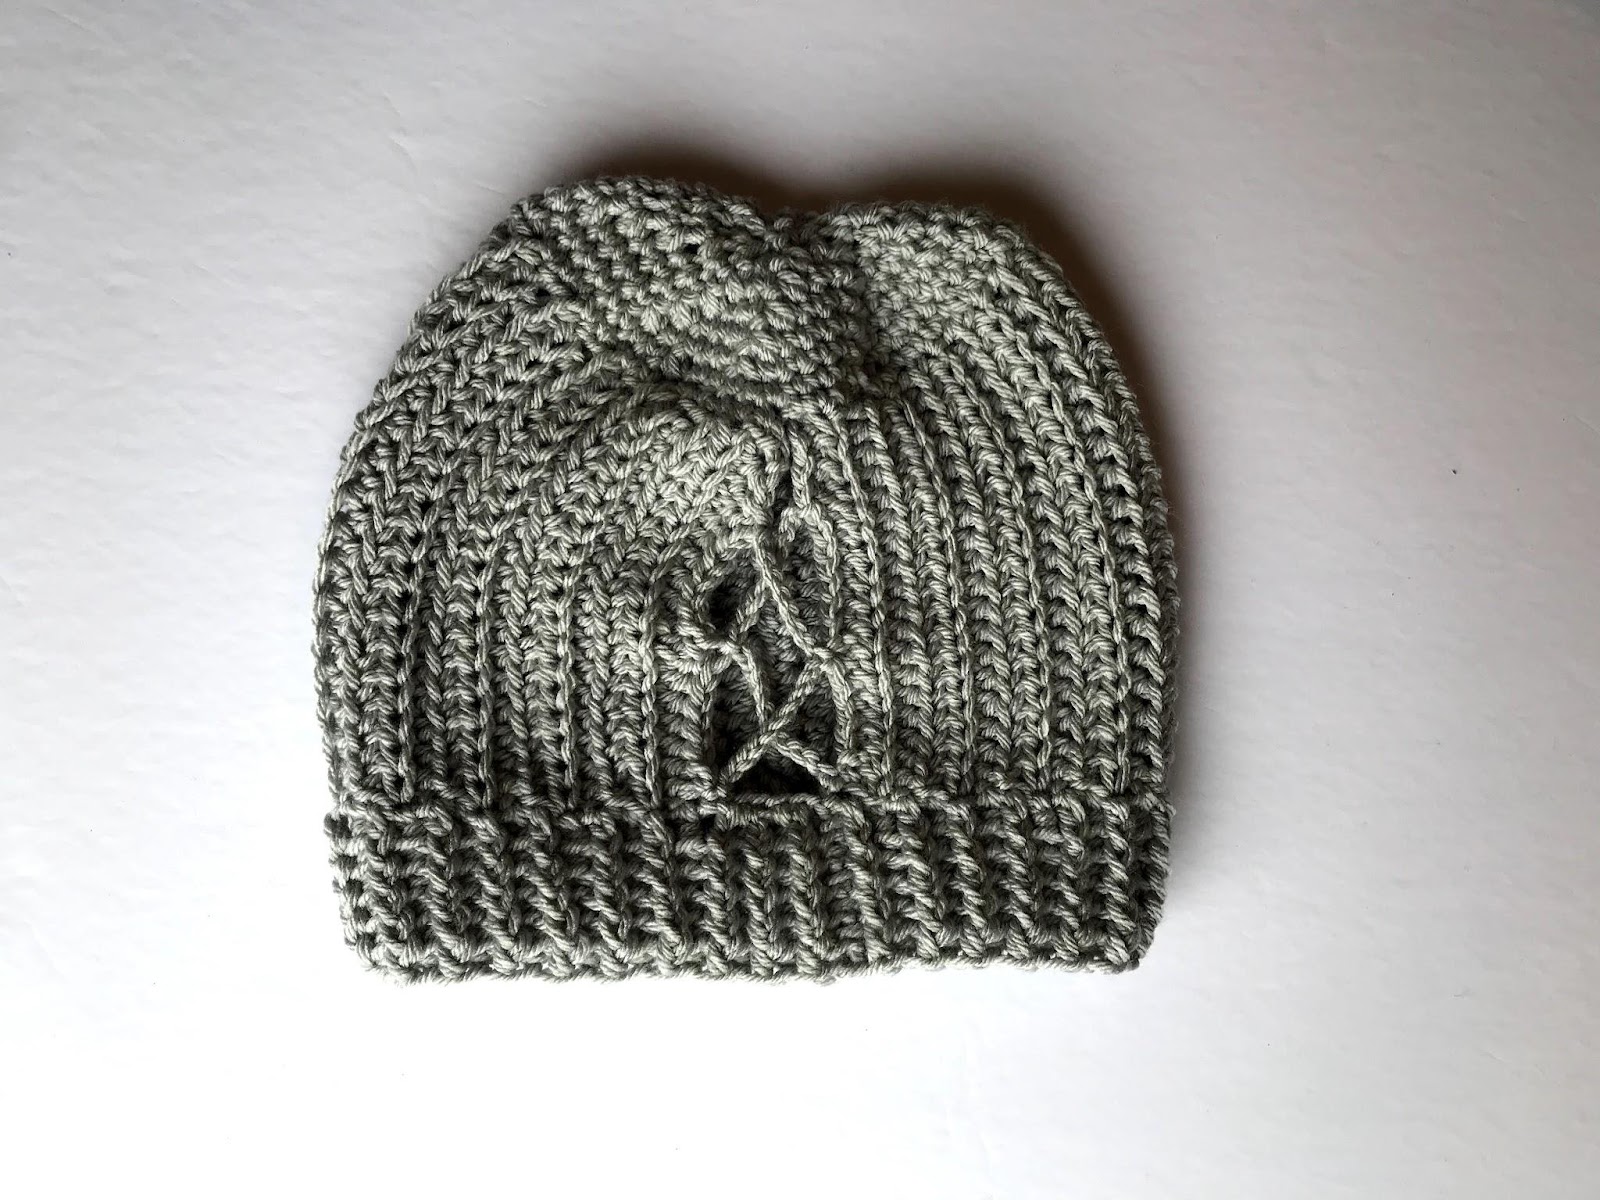
Photo 14: Front of Beanie

Style your ponytail hat with or without a Pom Pom. Place your ponytail in any of the openings in the back of the hat. It is perfect for low, medium, and high ponytails.

Save for later or share with others using the share buttons at the top and bottom of post. If you have any questions please comment below or you can email me at jessica@crochetitcreations.com.
I love to see photos of your work and read your comments. Follow Crochet It Creations on all of your favorite social media sites! Join my Crochet It Creations Crochet Friends Facebook group to further connect!
You may sell your items made from my patterns. Please do not use my photos as your own to sell your work. A link back to my site is much appreciated when selling your items from my patterns. I hope you enjoy!
This site is supported by advertisers and may contain affiliate links. See copyright & disclosure policy here for more information.

[…] original free pattern on crochetitcreations.com, or read more about […]
[…] Click For Free Pattern […]
[…] original free pattern on crochetitcreations.com, or read more about […]