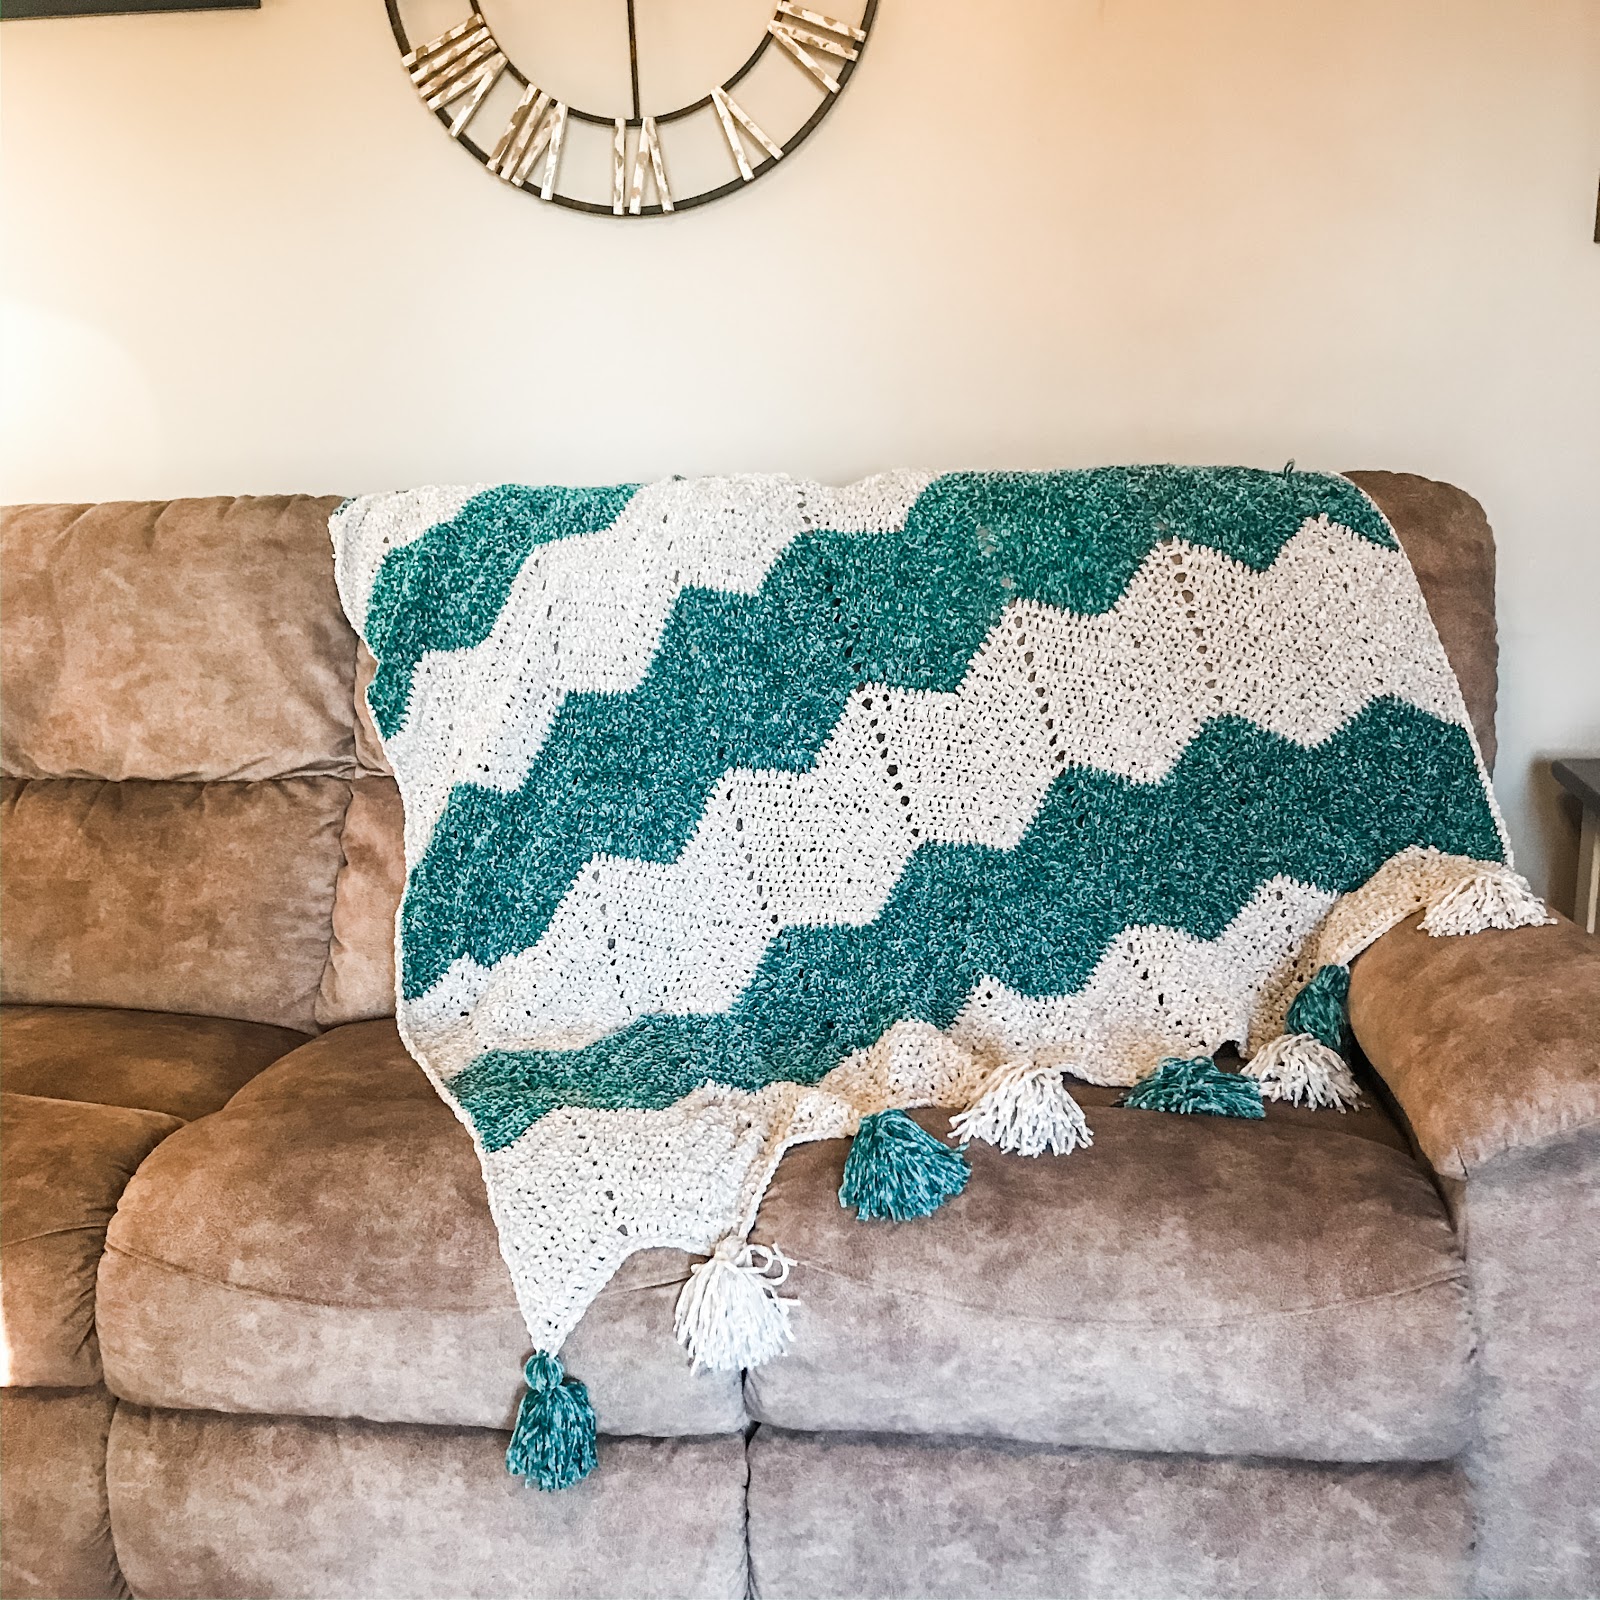
I love patterns that have a simple stitch repeat that you can work on mindlessly. The Ripple Throw Blanket is a perfect example of a simple crochet pattern with a beautiful outcome.
I used Bernat Baby Velvet yarn for this throw blanket. This yarn has an ultra plush feel without the bulkiness. It is a medium #4 weight yarn. I used 2 skeins of Emerald and 2 skeins of Misty Grey, alternating the two colors every 10 rows. Any yarn type will also do for this pattern.
I debated on leaving this blanket simple, but instead decided to add tassels. I love the look of the tassels on. I place one on each ripple alternating the colors. See end of the pattern to learn how to make and attach tassels.
The finished throw blanket measures about 50″ x 60″, which is a standard through blanket size. It works perfect for lounging around the living room. You can certainly make any size of your liking.

Materials Needed
- J 6mm Crochet Hook
- Bernat Baby Velvet Medium #4 Weight Yarn, 100% Polyester, 10.5oz/300g, 492yds/450m, 2 skeins each in colors Misty Grey and Emerald
- Scissors
- Tapestry Needle
Gauge
- 4” square = 6.5 rows x 12 DC
Stitches Used/Abbreviations (US Terms)
- SC – Single Crochet
- DC – Double Crochet
- Sl St – Slip Stitch
- SC2TOG – Single Crochet 2 Stitches Together
- Ch – Chain
- St(s) – Stitch(es)
- Sk – Skip
Pattern Notes
- Beginning chain 3 counts as a DC stitch
- Throw blanket measures approximately 50” x 60”
Ripple Throw Blanket Crochet Pattern
Chain 165, or multiples of 23 + 4
Row 1: DC in 4th ch from hook (counts as 2 DC), *DC in 10 ch, sk 2 ch, DC in 10 ch, 3DC in next ch* repeat from * to * across until the end of the ch, 2DC in last ch, turn. (162)
Row 2: Ch 3, DC in same st, *DC in 10 st, sk 2 st, DC in 10 st, 3DC in next st* repeat from * to * across, 2DC in last st, turn. (162)
Repeat row 2 changing colors every 10 rows for each color block, making 8 color blocks total.
Border – Ch 1, SC down the side of the blanket, place 3SC in corner, *SC in 10 ch, 3SC in next ch, SC in 10 sc, Sk 1 ch* repeat from * to * across, 3SC in corner, SC up the other side, 3SC in corner, * SC in 10 sts, SC2TOG, SC in 10 sts, 3SC* repeat from * to * across, join. Finish off, weave in ends.
Optional to add a tassel to each ripple. See photos for guidance. Please note that I have not washed this blanket yet to experiment with how the tassels hold up. I have been advised to make them removable since they can “ball up” in the washer. I am unsure what is the best way to make them removable. I did sew these on and they are permanent.
Tassels
Step 1: Wrap Yarn around a small object about 40-50 times. I do suggest to count the wraps on each tassel so they are all the same. This small notebook is about 4.5” long.
Step 2: Cut a strand about 20”, place around the strands and tie a tight knot. Make sure the knot is tight, you may need to remove the notebook before moving on to the next step to get it tight.
Step 3: Cut the strands across the end of the notebook so they are all even.
Step 4: Cut a strand of yarn about 12” and tie around the tassel. Tie several times and knot. Weave ends through the center and cut strands of the tassel even across.
Step 5: Attach tassel to the ripples of the blanket by sewing on and going through the center of the tassel several times to secure tightly.
Save for later or share with others using the share buttons at the top and bottom of post. If you have any questions please comment below or you can email me at jessica@crochetitcreations.com.
I love to see photos of your work and read your comments. Follow Crochet It Creations on all of your favorite social media sites! Join my Crochet It Creations Crochet Friends Facebook group to further connect!
You may sell your items made from my patterns. Please do not use my photos as your own to sell your work. A link back to my site is much appreciated when selling your items from my patterns. I hope you enjoy!
This site is supported by advertisers and may contain affiliate links. See copyright & disclosure policy here for more information.


