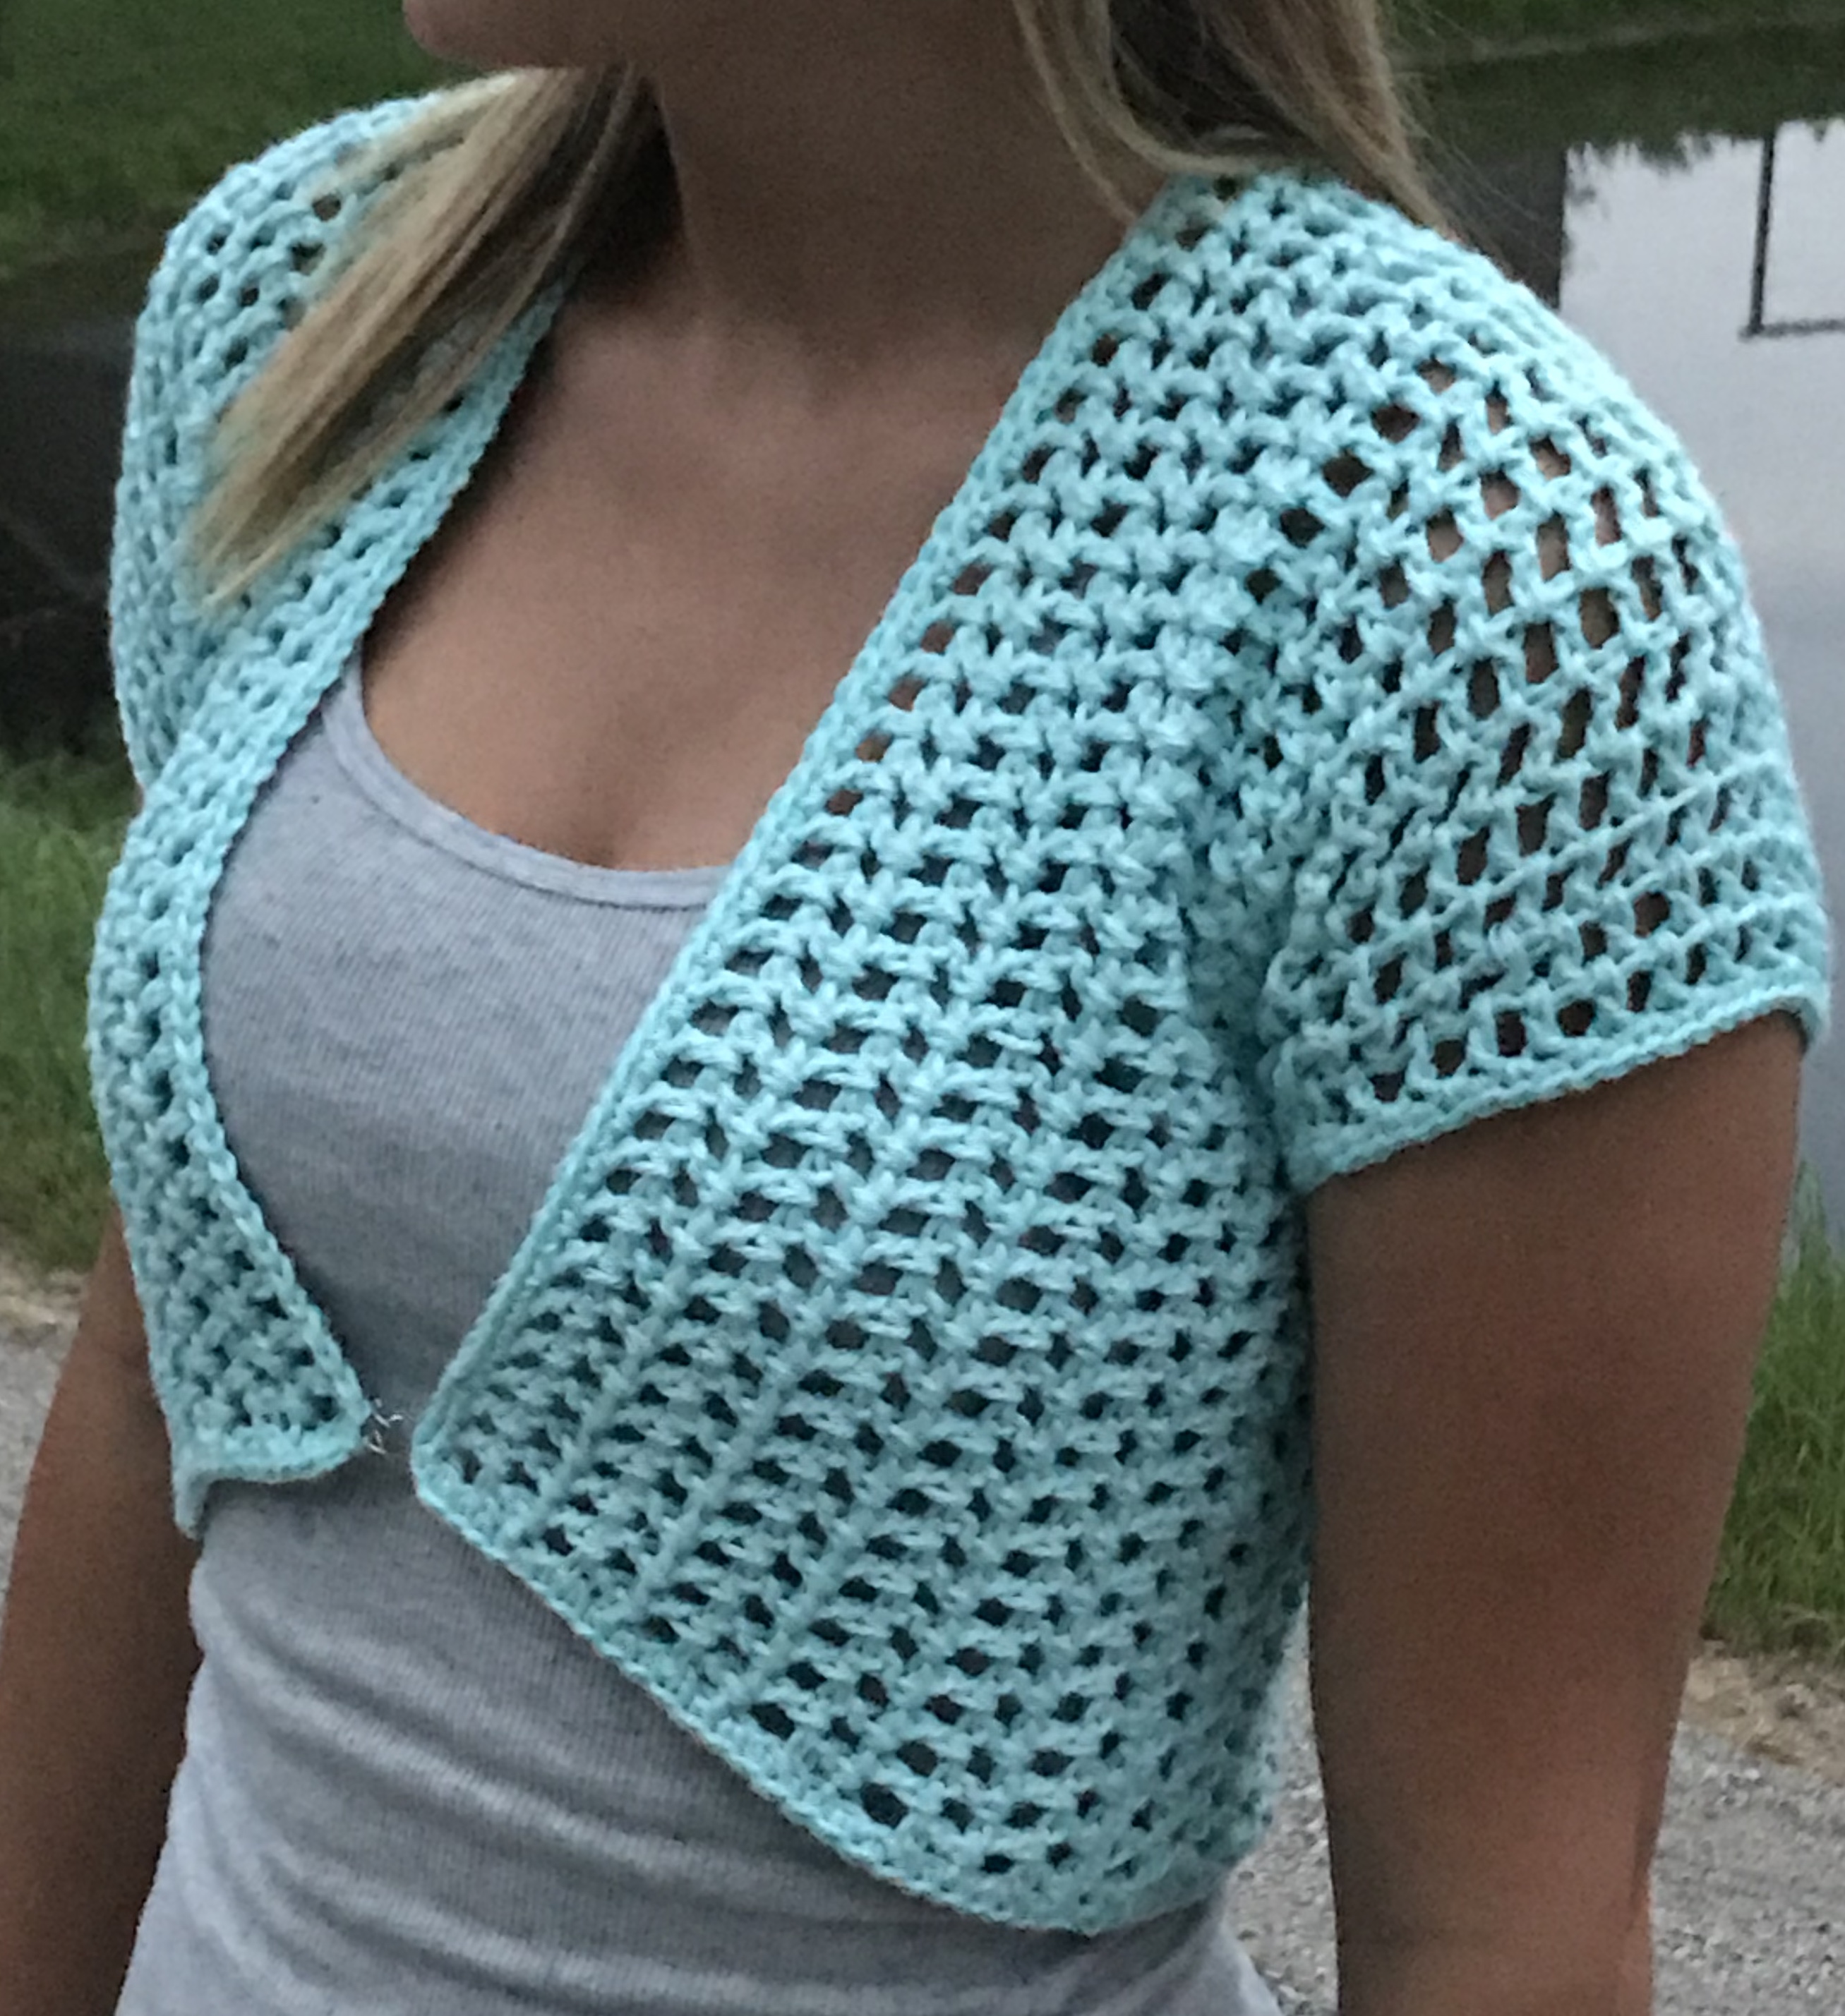
The Savy Crochet Shrug is a Free Pattern by Crochet It Creations. It comes in 9 adult sizes….yes 9! It’s a super cute and simple pattern. It will be your favorite go to pattern to spruce up a cute outfit.

The Savy Crochet Shrug idea came from the need to wear something light weight over a cute tank top or dress. I prefer to use I Love This Cotton! by Hobby Lobby for this pattern. It’s a soft high-end cotton with a lower-end price. It is my FAVORITE 100% cotton for clothing! It comes in many beautiful colors, like the one pictured below…AQUA. Also, if you are having trouble meeting gauge when using a different yard, try to find a comparable yarn on yarnsub.com
This crochet shrug pattern has simple construction with minimal sewing. You may notice that most of Crochet It Creations’ patterns require little or no sewing. I’m way more of a fan of crocheting than I am of sewing, so I try to eliminate it where I can. Just like my Cameo Cardigan series that comes in baby all the way up to adult 4XL! I also love making patterns that are applicable to EVERYONE! So, I hope you enjoy crocheting them as much as I enjoy designing them.
Prefer to have a PDF version of the crochet shrug that is printable and ad-free?…find it here in Crochet It Creation’s Ravelry Store.

Savy Crochet Shrug Pattern
Materials Needed
- I 5.5mm Crochet Hook, or hk needed to obtain gauge
- Medium Weight #4 yarn (I Love This Cotton by Hobby Lobby is recommended)
- Scissors
- Tapestry Needle
- Optional: Small button or clasp closure
Stitches Used/Abbreviations (U.S. Terms)
- DC – Double Crochet
- SC – Single Crochet
- DC2TOG – Double Crochet 2 Stitches Together
- Ch – Chain
- Sl St – Slip Stitch
- Join – Slip Stitch to first st
- Hk – Hook
- St – Stitch
- Sk – Skip
- Sp – Space
Gauge
- 4” square – 7 rows x 17 st (as the pattern)
Pattern Notes
- The shrug is made as vertical rows into a long rectangle with arm holes. After it is folded in and sewn at the shoulders using the whip stitch.
- If having trouble meeting gauge and using a yarn other than I Love This Cotton by Hobby Lobby, find a comparable yarn on yarnsub.com.
- Stitch count for each row is at the end in parentheses, which includes both stitches & chains for that row. Stitch count remains the same throughout the pattern.
- Beginning chain(s) does not count as a stitch, or count for end of row stitch count.
- Pattern is worked like the moss stitch, but in DC. Each DC will be placed in the ch-1 space from the previous row. Place last DC on each row in the top of the chain 2 from the previous row.
- Pattern is written as Sizes XS (S, M, L, XL, 2X, 3X, 4X, 5X) be sure to follow the correct stitch count. If no extra numbers are written, then count is the same for all sizes.
- See photos at end of pattern for guidance
| Size | Yardage Used | Bust | Length |
| Size Extra Small | 320 | 30” | 14” |
| Small | 380 | 34” | 14.5” |
| Medium | 420 | 38” | 15” |
| Large | 470 | 42” | 15.5” |
| Extra Large | 520 | 46” | 16” |
| 2XL | 575 | 50” | 16.5” |
| 3XL | 650 | 54” | 17” |
| 4XL | 700 | 58” | 17.5” |
| 5XL | 760 | 62” |
18” |

Chain & Double Crochet Stitches in Diagram
Sizes: XS (S, M, L, XL, 2X, 3X, 4X, 5X)
Begin Shrug Body in Vertical Rows
Chain 61 (63, 65, 67, 69, 71, 73, 75, 79)
Row 1: DC in 3rd ch from hk, *Ch 1, sk 1 ch, DC in next* repeat from * to * across. 59 (61, 63, 65, 67, 69, 71, 73, 77) ending stitch count remains the same for each size throughout the pattern and will not be written again.
Row 2 – 11 (12, 13, 14, 15, 16, 18, 19, 21): Ch 2, DC in Ch-1 sp, *Ch 1, DC in next Ch-1 sp* repeat from* to * across, DC in top of Ch 2 from previous row
Arm Hole Row
Row 12 (13, 14, 15, 16, 17, 19, 20, 22): Ch 26 (28, 30, 32, 34, 36, 38, 40, 42), sk 26 (28, 30, 32, 34, 36, 38, 40, 42) stitches counting both DC & Ch, SC in each st and Ch-1 sp to end
Row 13 (14, 15, 16, 17, 18, 20, 21, 23): Ch 2, DC in first st, *Ch 1, sk 1 st, DC in next* repeat from * to * across, DC in top of ch 2.
Row 14 (15, 16, 17, 18, 19, 21, 22, 24) – 39 (42, 47, 50, 55, 60, 66, 71, 77): Ch 2, Dc in Ch-1 sp, *Ch 1, DC in next Ch-1 sp* repeat from * to * across, DC in top of Ch 2
Arm Hole Row
Row 40 (43, 48, 51, 56, 61, 67, 72, 78): Ch 26 (28, 30, 32, 34, 36, 38, 40, 42), sk 26 (28, 30, 32, 34, 36, 38, 40, 42) stitches counting both DC & Ch, SC in each st and Ch-1 sp to end
Row 41 (44, 49, 52, 57, 62, 68, 73, 79): Ch 2, DC in first st, *Ch 1, sk 1 st, DC in next* repeat from * to * across, DC in top of Ch 2
Row 42 (45, 50, 53, 58, 63, 69, 74, 80) – 51 (55, 61, 65, 71, 77, 85, 91, 99): Ch 2, DC in Ch-1 sp, *Ch 1, DC in next Ch-1 sp* repeat from * to * across, DC in top of Ch 2. Finish off
Photo 1. Completed body before sewing the shoulder

Photo 2. Arm Hole

Sewing
Fold in the front panels at the arm holes. Line them up to the back rows. Whip Stitch together the front and back panels from the arm holes in at the shoulders.
Photo 3. Shoulder seam sewn with whip stitch

Sleeves
Join with Sl St to bottom of arm hole in Ch-1 sp
Rnd 1: Ch 2, DC in same space, *Ch 1, DC in Ch-1 sp* repeat from * to * around, join. 52 (56, 60, 64, 68, 72, 76, 80, 84)
Rnd 2: Sl St to Ch-1 sp, Ch 2, DC2TOG in same Ch-1 sp and next Ch-1 sp, *Ch 1, DC in next Ch-1 sp* repeat from * to * around, join
Rnd 3 – x(4, 4, 5, 5, 6, 7, 7, 8): Sl St to Ch-1 sp, Ch 2, DC2TOG in same Ch-1 sp and next Ch-1 sp, *Ch 1, DC in next Ch-1 sp* repeat from * to * around, join.
Rnd 4 (5, 5, 6, 6, 7, 8, 8, 9): Ch 1, SC in each st and Ch-1 sp around, join. Finish off & weave in ends
Photo 4. Join with slip stitch to the bottom of the arm hole

Photo 5. Sleeve – DC2TOG over 2 ch-1 spaces, eliminating a dc and ch 1 to equal 2 stitches.

Border
Join with Sl St to front corner.
Ch 1, SC evenly around the entire border; across the bottom, up the front panel, across the neck and back down the other border. Placing 3 SC in each corner, join. Finish off.
*Optional to make a button hole by chaining 3 at the end of the border before joining to first st.
Add chain tie, ribbon, button, or clasp for closure. Or leave open. Metal clasp closure was used in photos. These can be found at Walmart or any craft store.
Photo 6. Completed pattern ready for ends to be weaved in and closure added.


Prefer to have a PDF version of the crochet shrug that is printable and ad-free?…find it here in Crochet It Creation’s Ravelry Store.
Save for later or share with others using the share buttons at the top and bottom of post. If you have any questions please comment below or you can email me at jessica@crochetitcreations.com.
I love to see photos of your work and read your comments. Follow Crochet It Creations on all of your favorite social media sites! Join my Crochet It Creations Crochet Friends Facebook group to further connect!
You may sell your items made from my patterns. Please do not use my photos as your own to sell your work. A link back to my site is much appreciated when selling your items from my patterns. I hope you enjoy!
This site is supported by advertisers and may contain affiliate links. See copyright & disclosure policy here for more information.
Please make a video
I don’t understand how after you chain 65 and you follow what is written for row 1 you get 63. If you start out with 65 and you are skipping any chains you will never come out to 63 dcs. I only come out with 30 something. Because if you are skipping chains( I am assuming that is what the sk means) then you will have much less then you started out with. Am I reading it wrong?
Hi Arika! As it states in parentheses, it is 63 dc & chains. So both double Crochets and chains equal 63. The beginning chain 2 does not count as a stitch. I hope that helps!
Thank you! It has been a while since I was crocheting. I have another question, but I put it on the facebook page with a picture to my question.
I don’t know why I am having such trouble with this pattern, but I can’t get passed row 4 without having issues keeping the 63 stitches. I posted a question with a picture on the Facebook page.
Can this be made using #10 thread? What changes need to be made if using thread.
Thanks for your help
I wouldn’t suggest using single strand of thread. You may be able to double it and check gauge.
I would like to make this adorable shrug; however, after making the 13 rows of stitches – chaining 30 and skipping 30 I am now stumped. Do I attach next stitch along side (as you mentioned bottom of arm) then cross bottom of panel and around up the other length of side???? I could use more images pointing to direction this shrug takes. I appreciate your time in answering my questions. Ciao
Hi! Sorry for the delayed response. When you chain 30 you are making an arm hole. Skip 30 stitches (chains included) and continue down the row. There are some photos at the bottom of the post. Let me know if you need further guidance. -Jessica
Once I figured out I was working side to side, rather than top to bottom, this pattern was really easy!
I would like to make this shrug longer. Is there a way to adjust the pattern so that the arm holes still come out right?
Thank you.
You can definitely add more stitches to your starting chain. Just keep in mind how many stitches are needed for the arm hole. The pattern is made in vertical rows.
[…] Thirty ears ago, I was into crocheting, but I only ever made flat things – afghans and scarves. When I picked it up again this time, I started with a baby afghan. Flat, easy. (Except I had to completely rip it out and start over, but that’s another story). While working on the baby afghan, I found this pattern for a crocheted bolero: […]
just what i was looki g for
What is a HK hook?
hk = hook
Just finished my sweater and I LOVE it! Fits perfectly and looks much more complicated than the pattern actually is. Thank you so much!
Question on the sleeve area, when i do the 2dc together, then a ch1 and dc in next ch1 space. do I repete this around the sleeve on both rows 2 ? or is it just 1 2dctg in the beginning of each row?
It is just 1 dc2tog 😊
Es más fácil realizarlo en video .
[…] Click For Free Pattern […]
[…] Crocheted Shrug for Fashionistas […]
I want to make the sleeves longer, do I just keep going with the same rounds until desired length?
you can!
[…] Another one of my favorite shrug patterns is the Savy Shrug. This shrug is quite simple, yet can be used to spruce up just about any outfit! It can also be made into many different colors and sizes to suit your personal tastes. You can find the free pattern here. […]
[…] More at: Crochet It CreationsFREE […]
[…] Free Patterns Here […]