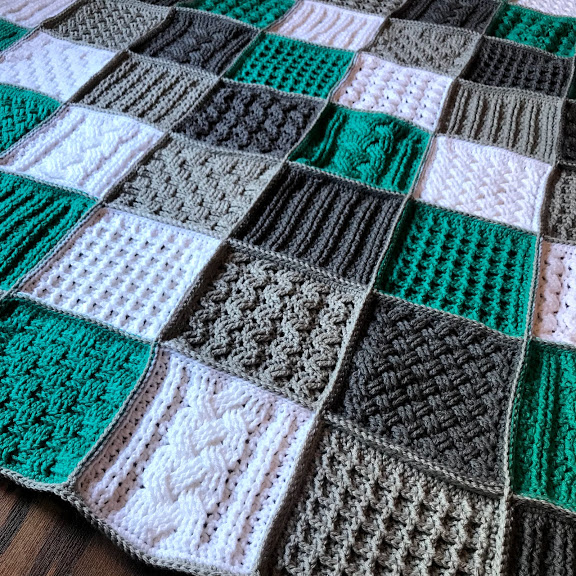
We have made it to week 7 of the Textured Fun Blanket Crochet Along! This week we will go over blanket construction with how to sew your blanket squares together.
Now that you have made all of your Fun, Textured squares, you are ready to put them together in to a blanket. If you’re just now catching this post, see the link to all of the square patterns below.
- Square 1 – Post Stitches
- Square 2 – Waffle Stitch
- Square 3 – Braided Cable Stitch
- Square 4 – Basket Weave Stitch
- Square 5 – Zig Zag Stitch
- Square 6 – Celtic Stitch

Materials Needed
- Yarn in similar color as squares
- Tapestry Needle (if sewing)
- Scissors
- J 6mm Crochet Hook if slip stitching together
- Spray Bottle to wet block
- Steamer to steam block
Construction: Join Squares
Lay squares out on a flat surface. Wet or steam block each square to get any imperfections out. You want each square to lay flat and be about the same size.
Lay squares out in order you wish. I used 4 colors in all the stitch variations for the throw blanket. See chart on the right for how I laid mine out.
Use the whip stitch or mattress stitch to sew the squares together. OR you can slip stitch them together like I did.
To slip stitch squares together. Place squares right side up. Slip stitch in BLO on one square and FLO of other square across entire row using J 5.5mm Crochet Hook. Repeat across each vertical row then across each horizontal row.
Throw Blanket Squares laid out for sewing
Sl St squares together using BLO and FLO
Slip Stitch or Sew across vertical rows first, then repeat across horizontal rows
- Square 1 – Post Stitches
- Square 2 – Waffle Stitch
- Square 3 – Braided Cable Stitch
- Square 4 – Basket Weave Stitch
- Square 5 – Zig Zag Stitch
- Square 6 – Celtic Stitch
Save for later or share with others using the share buttons at the top and bottom of post. If you have any questions please comment below or you can email me at jessica@crochetitcreations.com.
I love to see photos of your work and read your comments. Follow Crochet It Creations on all of your favorite social media sites! Join my Crochet It Creations Crochet Friends Facebook group to further connect!
You may sell your items made from my patterns. Please do not use my photos as your own to sell your work. A link back to my site is much appreciated when selling your items from my patterns. I hope you enjoy!
This site is supported by advertisers and may contain affiliate links. See copyright & disclosure policy here for more information.


I wasn’t able to do the follow along but thank you for making this avaliable still even though it’s 2020. I love this design and think it would make a great Xmas gift.
I would like to view new patterns.
How do you go about joining the squares that start with 26 stitches and the ones that start with 24? (I’m not going to block and wouldn’t understand how that would help anyways)
if you have 26 sts on one side and 24 on the other you will skip 2 sts of the 26 randomly. I swear you will not notice! And blocking does help get the squares all the same size but isn’t required.