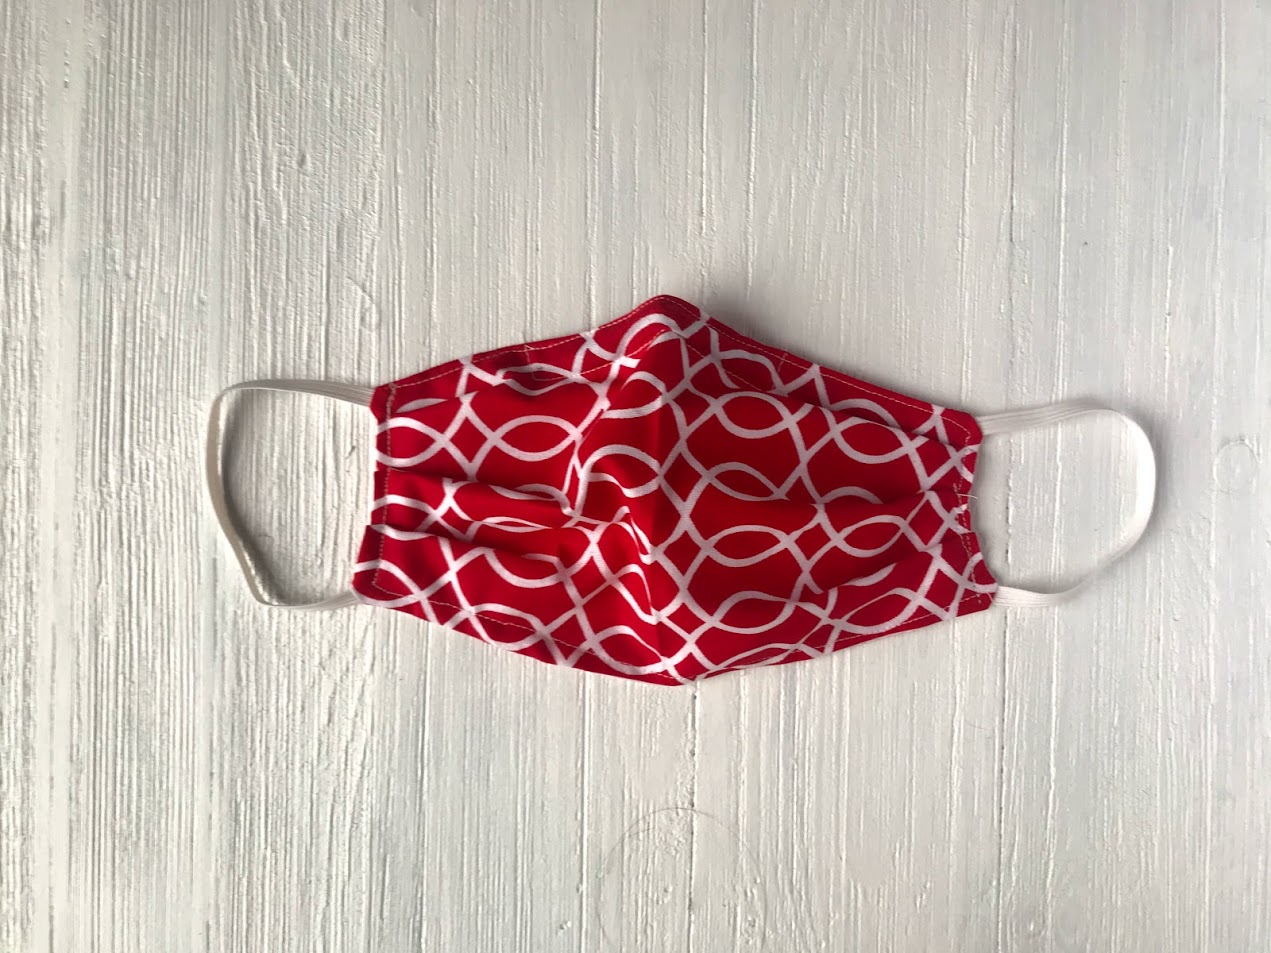
My local hospital sent out a call last week asking for help from the community to sew face masks. There is a shortage of masks across the country, probably even world. If you sew, then keep reading so you can help out!
Although these masks are not medical grade, they can be used as a basic protection from infection. The COVID-19 is an airborne virus and would require a N-95 respirator mask to prevent breathing in the droplets from an infected person when less than 6 feet from them. A N-95 should only be used for hospital staff since they are within lose proximity of the infected person.
Be sure to ear the CDC Guidelines and disclaimer at the bottom of this post.
The CDC is recommending social distancing of at least 6 feet from others during the pandemic. This mask will help protect you but cannot assure you will not get infected. Be sure to use proper hand hygiene and precautions. Learn more about the CDC’s recommendations regarding the Coronavirus HERE.

Keep scrolling for video
Starting early February my daughter began sewing lessons. I’ve had my Singer sewing machine for years but never took the time to learn to use it. So, during her lessons I learned some tips as well. Needless to say, I am a beginner sewer and I was able to follow the mask directions.
I am a nurse but have not done direct patient care in several years. I have many friends who work in health care and I’ve been making masks for them. Or those who are high risk for this virus, such as COPD or other lung issues could really benefit from one.
What Materials Are Needed
I bought my cotton fabric from Walmart. Fat Quarters are perfect for this project as they are 18″ x 21″. You can cut them straight down the middle since each mask needs 2 rectangles 9″ x 6″. So, you can get 6 rectangles from 1 Fat Quarter!!

There has been a shortage of elastic. My Walmart was out, but I got some from a small local craft store. I also saw Joann’s was out of elastic. You can use ribbon to tie, however I have heard that it needs to be cotton to be properly sterilized.
A Pipe Cleaner added can keep it secure around the nose and provide more protection
The first mask I made was exactly like the video, but I felt it wasn’t tight enough around my nose. Hospital masks have a metal piece that you bend over your nose. I decided to add 4″ pipe cleaner to the top center of the mask.

I add pipe cleaner by completing the steps in the video, after turning inside out slide the pipe cleaner in to the top. Use pins to keep the pipe cleaner in place. Sew around it, then complete the pleats and remaining steps.
Materials Needed:
- 9″ x 6″ rectangle pieces of cotton fabric. It is recommended to use 2 different colors of fabric so you know which side goes toward your face and which side is out to the public. This keeps you from contaminating yourself.
- 2 6-7″ strips of 1/2″, 1/4″, 3/8″, 1/8″ or rope elastic.
- Sewing pins
- Sewing machine
- Sewing thread
- Optional to use a 4″ piece of pipe cleaner for the nose bridge
Read more from the CDC about fabric masks for protection.
We started making our masks before we actually found elastic and used Headbands. Elastic headbands can be found at the Dollar Tree, Walmart, etc. These worked okay but the thicker ones didn’t stay on as well.

DISCLAIMER: FOLLOW THE CDC GUIDELINES FOR INFECTION CONTROL AND TO PROTECT YOURSELF. MAINTAIN 6 FT AWAY FROM OTHERS WHEN OUT IN PUBLIC, ONLY GO OUT FOR ESSENTIAL NEEDS, PRACTICE SOCIAL DISTANCING AND STAY HOME, WASH YOUR HANDS AFTER BEING IN PUBLIC, BEFORE EATING, AFTER USING THE BATHROOM, USE HAND SANITIZER WHEN UNABLE TO WASH HANDS. THIS MASK MAY STILL ALLOW DROPLETS TO ENTER, PLEASE PRACTICE THESE RECOMMENDATIONS AS WELL.


[…] Designer : Crochet It Creations Pattern Here: How to Make a Face Mask […]