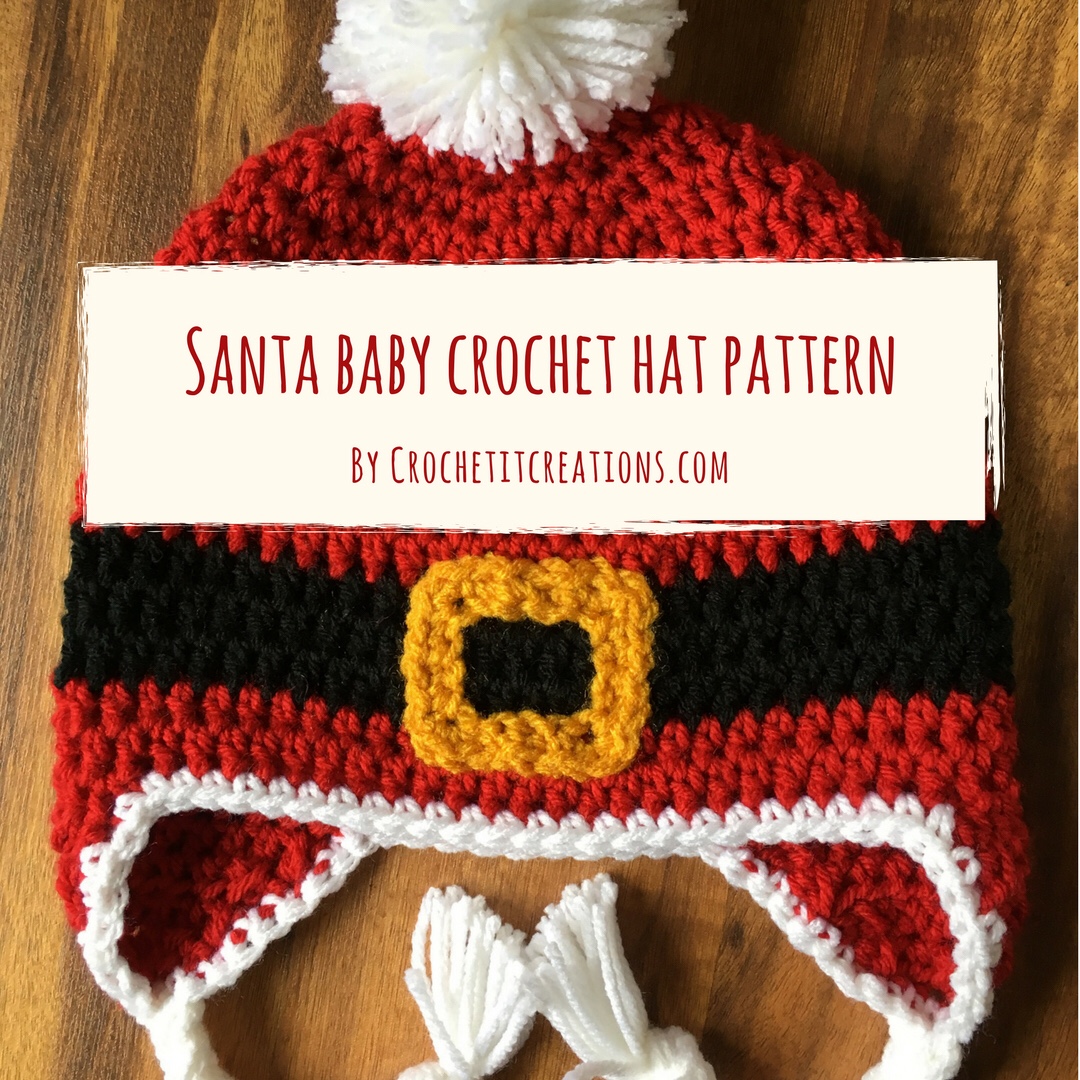
It’s that time of year, where Christmas is everywhere! All the little kiddos are out visiting Santa or doing other Christmas activities. These Santa Baby Hats are perfect to look cute and keep warm.
They use my basic hat crochet pattern with ear flaps. It can be made in any size from newborn to adult. You will need to add in 4 rows of black instead of 1 solid color. Then trim with white, add braids, a “belt buckle” and a pom pom on top. Click here for my post on how to make a pom pom with your hand. Then there you have it!

Materials Needed:
Worsted Weight yarn in red, white, gold, and black (less than 1 skein of each will do)
scissors
yarn needle for sewing ends
size H and G crochet hook
Santa Baby Hat
Child Size 3 – 5 years
18″W x 7.5″L
Rnd 1: ch 1, 8 hdc in magic ring (do not join continue working in a circle)
Rnd 2: 2hdc in each hdc (16)
Rnd 3: **hdc in first st, 2hdc in next** repeat around (24)
Rnd 4: **hdc in first 2 st, 2hdc in next** repeat around (32)
Rnd 5: **hdc in first 3 st, 2 hdc in next** repeat around (40)
Rnd 6: **hdc in first 4 st, 2hdc in next** repeat around (48)
Rnd 7: **hdc in first 5 st, 2hdc in next** repeat around (56)
Rnd 8 – 12 until reaches about 4.5″: hdc in each st around (56) sl st in first st on last hdc of rnd 12 switch to black
Rnd 13 – 16 in black: ch 1, hdc in each st around (56) sl st to 1st hdc Switch back to red
Rnd 17-19: ch 1, hdc in each st around (56) sl st to 1st hdc. Continue on to ear flaps.
Ear Flaps: (in red)
Row 1: ch 1 hdc in each 11 st. ch 1 and turn (11)
Row 2: decrease hdc, hdc 7 st, decrease hdc. Ch 1 and turn (9)
Row 3: decrease hdc, hdc in 5 st, decrease hdc. Ch1 and turn. (7)
Row 4: decrease hdc, hdc in 3 st, decrease hdc (5)
Row 5: decrease hdc, hdc in next st, decrease hdc. (3) fasten off
** skip 10 stitches and sl st in the 10th st. Repeat rows 1-5 for the second ear flap.
In white: Sc around the entire hat. Sl st to first sc. finish off
You can make this hat in any other size newborn to adult. You will need to follow the basic crochet hat from my patterns. But, you will need to change colors to the black 6-8 rows from the bottom. I would suggest switching to black 6 rows from the end on newborn then maybe 7-8 on the adult size. 7 rows is approximately 3″.
Belt Buckle (in gold)
Using G hook
Ch 20. sl st to 1st ch to make a closed circle
ch 1, sc in first 4 chains, 3 sc in next. Repeat this sequence around. sl st to 1st sc. finish off leaving a long tail for sewing on to hat.
Position the belt buckle in the center of the hat with the black in the center. You should not be able to see any red in the center. Sew it to the hat with a yarn needle.
Pom Pom (in white)
There are many ways you can make a pom pom. There are pom pom makers that you can purchase at craft stores. You can make your own pom pom maker out of card board. Or you can make them by hand, which is what I usually do. Here is step-by-step instructions on how to make a Pom Pom by hand if you do not have a pom pom maker.
Leave a long tail on the pom pom so you can sew it to the top of the hat. I attach it around the first row of the hat. I always make sure I go out a little further from the center when sewing for extra security.
Braids (in white)
cut 24 strips of white yarn 20″ long. Attach 4 strands together to each of the 3 sc from the bottom of the ear flaps. This will give you 12 strips of yarn on each ear flap. Braid them together somewhat tight. Tie a knot of all the strands together at the end. Cut the yarn so it is even across.
There you have it! A cute Santa Baby Crochet Hat. Save for later or share with others using the share buttons at the top and bottom of post. Most of my patterns are not tested. I simply write up how I make items. If you have any questions please comment below or you can email me. If you do not crochet but would like to order, I take custom orders off of my facebook page. Follow Crochet It Creations on all of your favorite social media sites.
You may sell your items made from my patterns. Please do not use my photos as your own to sell your work. A link back to my site is much appreciated when selling your items from my patterns. I hope you enjoy!


I may try to make one for my church bake and craft show next year. Very cute idea.
Great idea! I would love to see your finished product photo!