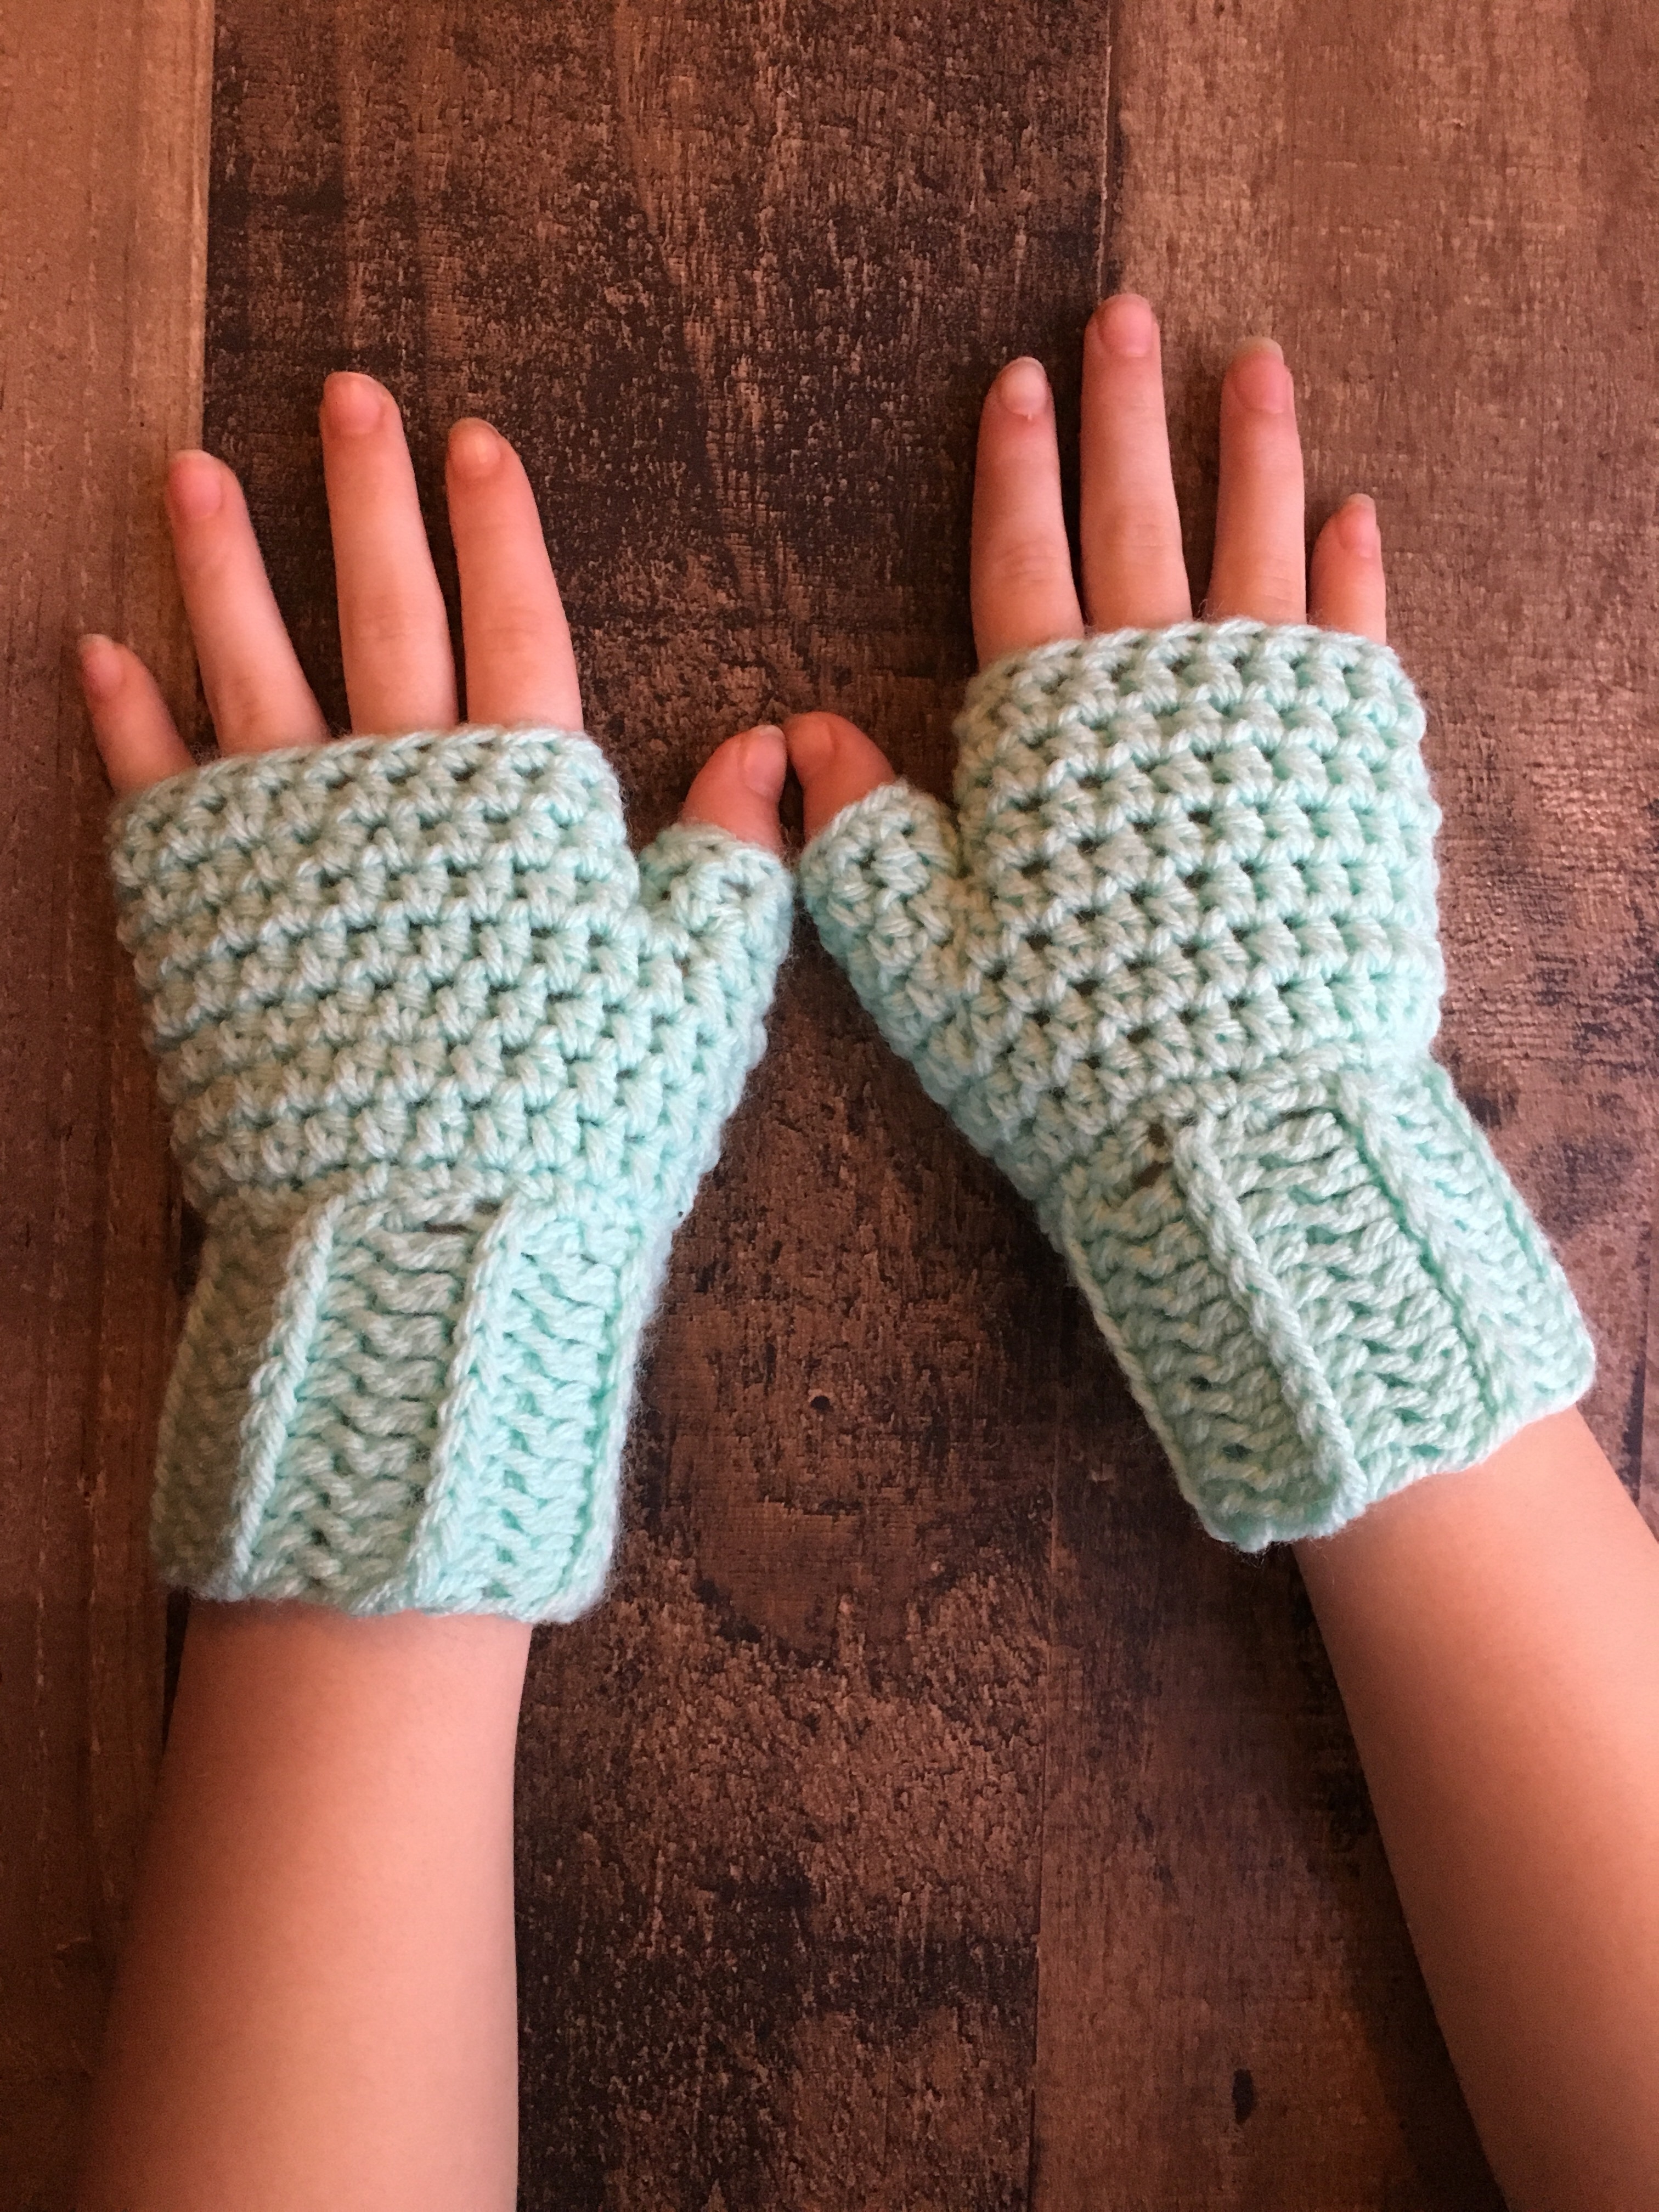
I really, really wanted to create a mittens pattern. I already have a fingerless gloves pattern….see the Camel Stitch Fringerless gloves here. I love fingerless gloves because there are times when you need to keep your hands warm, but still need your fingertips. I use them when driving and running errands. But my favorite time to use them is when I’m working because my office is freezing.
So, what lead me to writing another fingerless gloves pattern? Well, my 8 year daughter. She told me she wanted mittens, so I began working on them. The first try didn’t turn out quite right. Well, she goes on to say; no, I wanted mittens that show my fingers. So….here we are! Stay tuned for the full mitten version in all sizes!
The Woodland Fingerless Mittens are constructed from the wrist up. The camel stitch (hdc in third loop) is used for the band. Single crochet and half double crochet stitches are used for the top. This pattern is for the child size 6-10 years and small adult/teen size.
Looking for a full mittens pattern? I have 5 sizes available!
See the toddler size 1-2 years here
See the Child Small 3-5 years here
See the Child Large 6-10 years here
See the Teen/Adult Small size here
See the Large Adult size here
Purchase the ad-free PDF version here from Ravlery for a small fee. It includes all sizes and the fingerless options.

Materials Needed
- size H 5.0mm crochet hook
- Worsted weight #4 yarn – about 1 oz, less than 100 yards
- scissors
- tapestry needle
Stitches Used
- Camel hdc stitch – hdc in the front loop or third loop of the hdc stitch from previous row. This pushes the normal loops that you would crochet in to the back and looks like a chain. Also called Knit Stitch.
- Hdc – half double crochet
- Sc – single crochet
- sl st – slip stitch
- join – slip stitch to first st
Pattern Notes
- ch 1 does NOT count as a stitch
Woodland Fingerless Mittens Crochet Pattern
Child Size approximately 6-10 years old
Wrist Band
Row 1: Ch 11, hdc in second ch from Hook and each chain across in the back “bump” of the chain. (10) turn. See post here for how and why to crochet in the back bump of a chain.
Row 2-14: ch 1, hdc in 3rd loop (camel stitch) each st across (10)
Join first row to last row by slip stitching each st across. To keep the camel stitches look, sl st in third loop of hdc and in the whole chain across. Turn right side out.
Constructing the top
Row 1: ch 1, sc 25 times in the ends of the rows around. Join. (25)
*to evenly get 24 stitches. Use stitch makers for 1/2 or even 1/4 of the band. Evenly place the sc between stitch markers.
Row 2-5 ch 1, hdc in each st around. Join. (25)
On row 5 when joining to first st join through the first st and the 8th st (from the join) together. Pull your join tight to close up the gap. Those stitches on the left will be your thumb hole. We will get back to that at the end.
Row 6: ch 1, hdc in same st as join (8th st) and each st around til you meet the other side of the join. Join to first st. (18)
Row 7-8: ch 1, hdc in each st around. join (18)
Row 9: ch 1, sc in each st around. join (18) finish off.
Thumb
Row 1: join to corner of thumb hole. ch 1, place 8 hdc in thumb hole. join to first st. (8)
Row 2: ch 1, sc in each st around. join. (8) finish off.
Weave in the ends.
Teen/Adult Small Size
Wrist Band
Row 1: Ch 13, hdc in second ch from Hook and each chain across in the back “bump” of the chain. (12) turn. See post here for how and why to crochet in the back bump of a chain.
Row 2-16: ch 1, hdc in 3rd loop (camel stitch) each st across (12)
Join first row to last row by slip stitching each st across. To keep the camel stitches look, sl st in third loop of hdc and in the whole chain across. Turn right side out.
Constructing the top
Row 1: ch 1, sc 29 times in the ends of the rows around. Join. (29)
*to evenly get 29 stitches. Use stitch makers for 1/2 or even 1/4 of the band. Evenly place the sc between stitch markers.
Row 2-7: ch 1, hdc in each st around. Join. (29)
On row 7, when joining to first st join through the first st and the 10th st (from the join) together. Pull your join tight to close up the gap. Those stitches on the left will be your thumb hole. We will get back to that at the end.
Row 8: ch 1, hdc in same st as join (10th st) and each st around til you meet the other side of the join. Join to first st. (20)
Row 9 – 10: ch 1, hdc in each st around. join (20)
Row 11: ch 1, sc in each st around. Join. (20) Finish off.
Thumb
Row 1: join to corner of thumb hole. ch 1, place 10 hdc in thumb hole. join to first st. (10)
Row 2: ch 1, hdc in each st around. join. (10)
Row 3: ch 1, sc in each st around. join (10) finish off.
Weave in the ends.
There you have it! I hope you enjoy this pattern. I love seeing photos of your finished work from my patterns. Please tag me on any social media sites.
Save for later or share with others using the share buttons at the top and bottom of post. If you have any questions please comment below or you can email me. Follow Crochet It Creations on all of your favorite social media sites.
You may sell your items made from my patterns. Please do not use my photos as your own to sell your work. A link back to my site is much appreciated when selling your items from my patterns. I hope you enjoy!
This site is supported by advertisers and may contain affiliate links. See copyright & disclosure policy here for more information.


These are just what I have been looking for! No embellishments to catch on anything so I can wear them around the house as well as outside. Hope my can compare somewhat to yours. I love all of your work. Thanks a bunch!